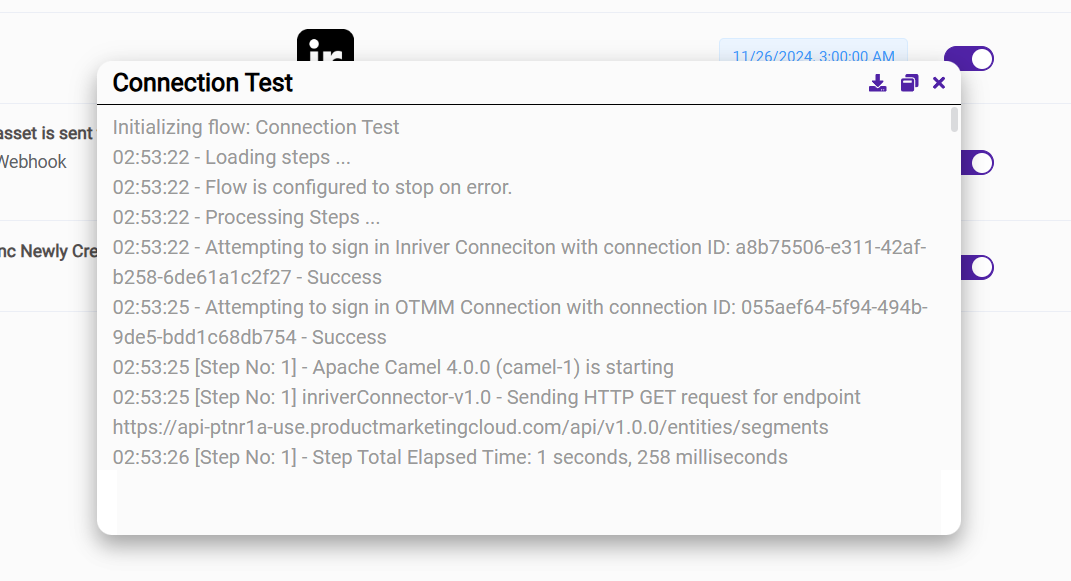
Before creating a Flow, determine how you want the Flow to be executed.
There are three ways to execute Flows:
-
Event-Driven (Triggered): Run via Webhooks/Event Calls, which enable the flow to execute when a trigger is sent to it. This must be started with a Webhook connection.
-
Scheduled: Run by setting up a start time and schedule period for the Flow to be executed.
-
Manually: Run by manually executing the Flow.
Event-Driven Flows (Webhook)
OneTeg offers the ability to trigger flows using webhooks, also known as event calls. If your flow needs to react to an external trigger, you must first create a Flow with a Webhook Connection (see and save it. The steps are as follows:
-
Step 1: On the Flow canvas, add the Webhook Connection as the first step of your flow.
-
If the Webhook Connection doesn’t already exist, you can create a new connection using the Webhook Connector.
-
-
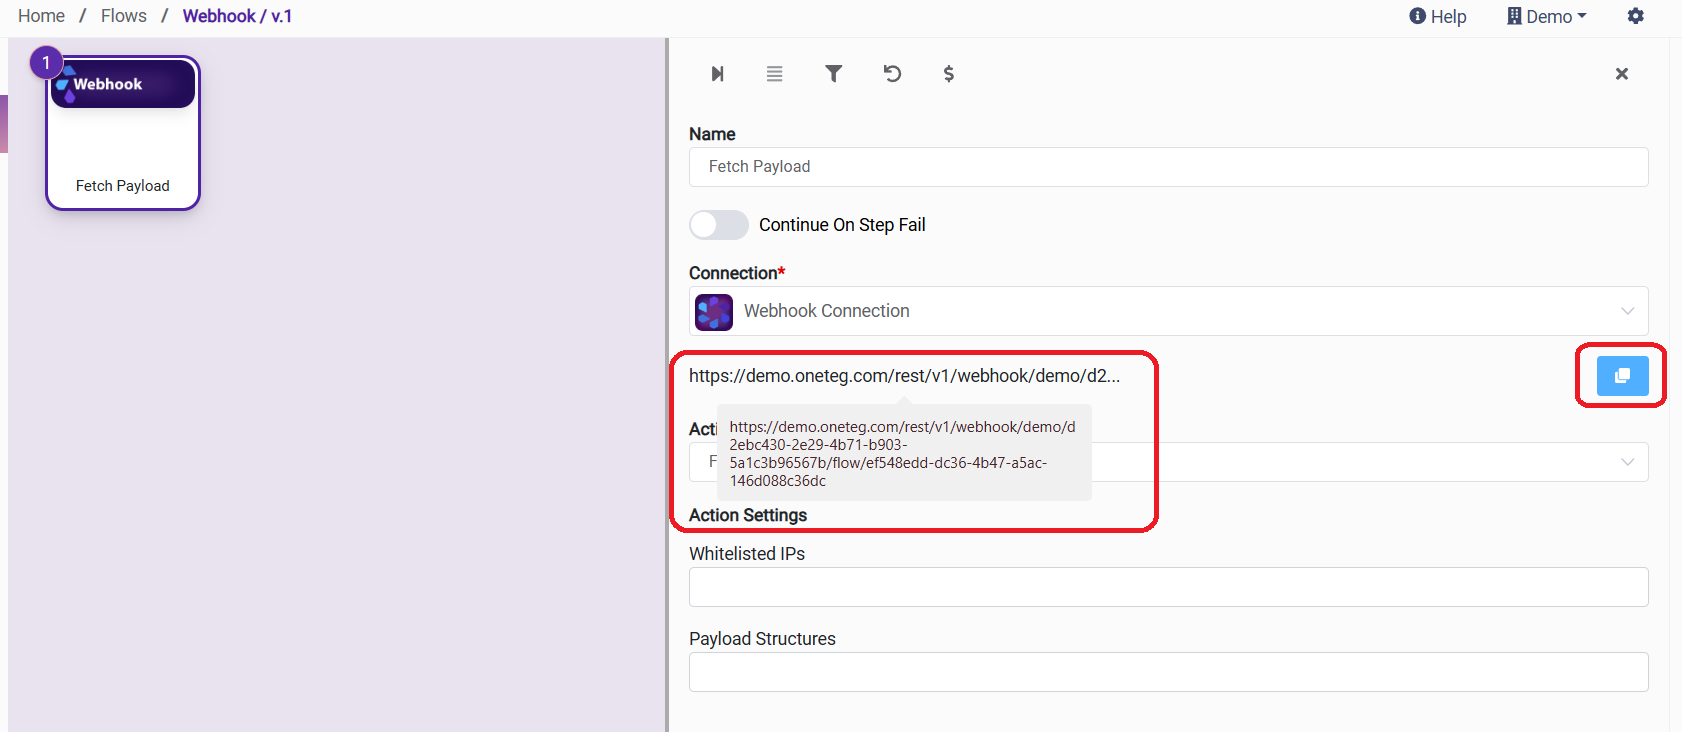
Step 2: Save the flow immediately.
Note: OneTeg will not generate a unique Webhook URL until the flow is saved for the first time.
-
Step 3: Copy the generated URL from the Webhook Connector and paste it into your originating system's event settings.
-
Step 4: Continue adding subsequent steps into your flow to carry out the desired action.
-
Step 5: Activate the Flow using the toggle on the Detail panel or Flow List. The Flow runs when triggered by the Event.
Scheduled Flows
-
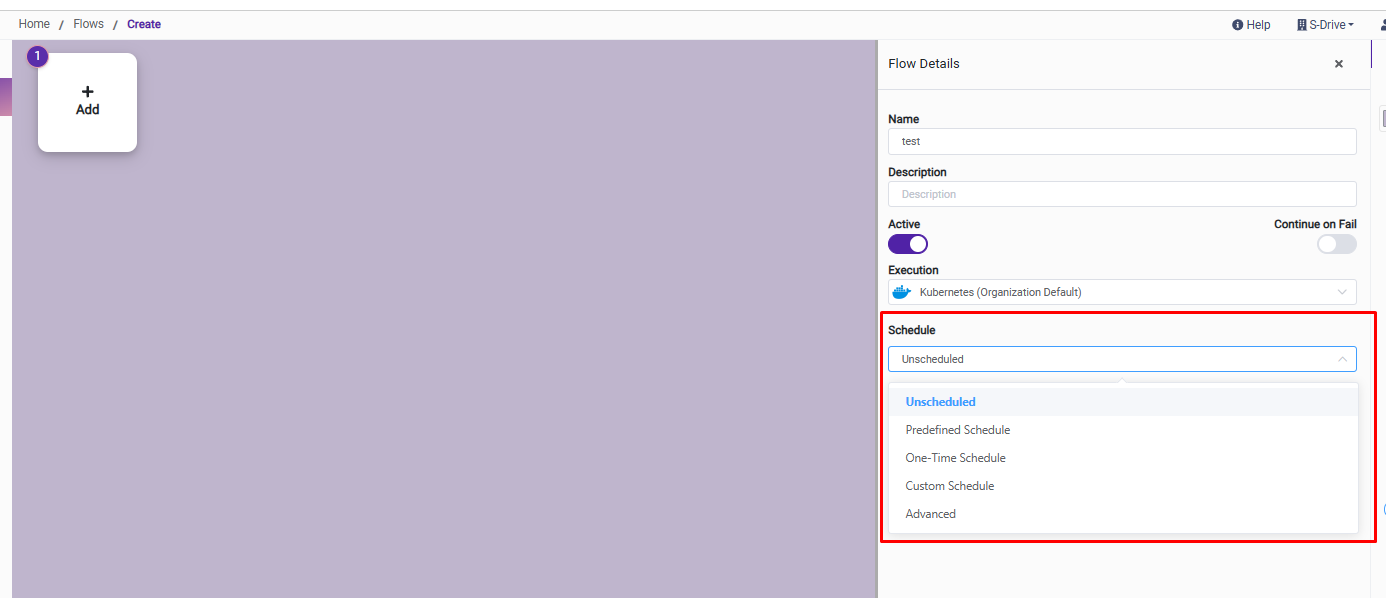
Step 1: On the Flow canvas, activate the Flow with the Toggle on the right-side panel. This will cause the Schedule section to appear.
-
Step 2: If you wish to schedule the Flow at this time, click on the schedule drop-down menu and choose an appropriate option. It can also be scheduled later.
-
If you have started to create your flow, you can get back to the Flow Details page to see the Schedule options by clicking the “i” icon on the right panel
-
Schedule the flow to run
Options to select for Scheduling OneTeg flows are:-
Predefined: Runs at one of the set interval options provided (e.g., every hour).
-
One-Time: A specific date and time for a single execution.
-
Custom: Detailed frequency settings (e.g., specific days of the week).
-
Advanced: Uses a Cron expression to determine the interval
-
-
For each option, you’ll select the start date and time zone. Depending on the option you choose, there will be other details to configure.
Manual Override: Even if scheduled, you can trigger these anytime using the Run button on the Flows page or within the Flow Editor.
Manual Flows
-
Step 1: Activate the Flow using the toggle either from the Flow Detail panel or from the Flow List.
-
Step 2: Run the flow by clicking the Run button on the bottom right of the Flow Detail panel or from the Flow List using the gear wheel.
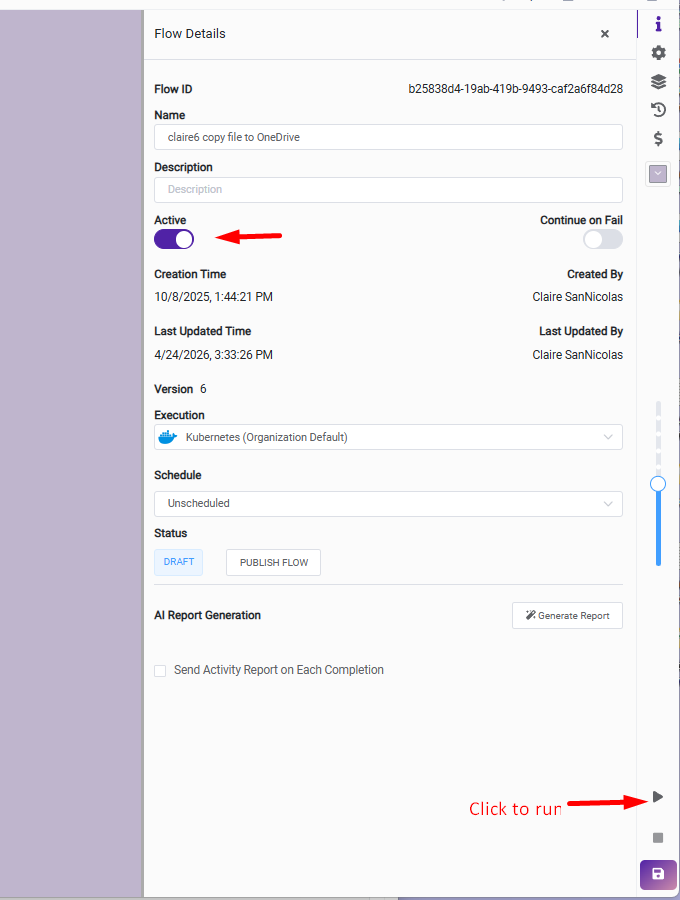
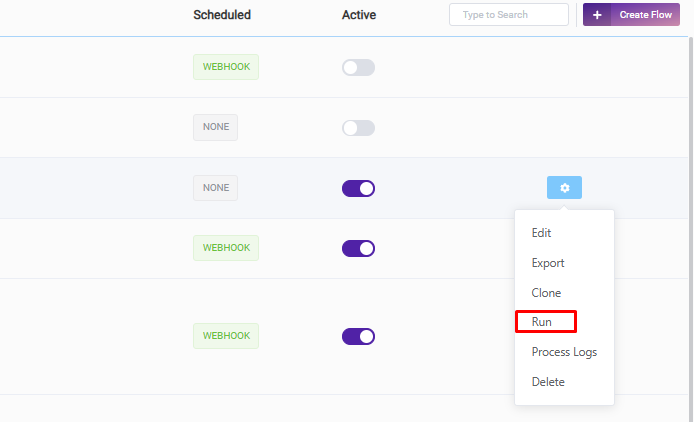
Once a flow has been executed manually, a new window will open and begin to provide information (flow logs) about the executed flow.