1. General Information
YouTube is Google's video sharing and streaming platform, used by creators, brands, and organizations to publish, manage, and analyze video content. The YouTube Data API v3 provides programmatic access to channels, videos, playlists, comments, and other YouTube resources, enabling automation of content management and reporting workflows.
The OneTeg YouTube Connector integrates with the YouTube Data API v3, enabling users to manage videos, playlists, and channel data directly from OneTeg automation workflows. This connector authenticates using OAuth Authorization Code.
This connector uses the same Google Cloud Console setup process as other Google connectors. The endpoint and scope below are specific to the YouTube Data API.
2. Connect YouTube to OneTeg
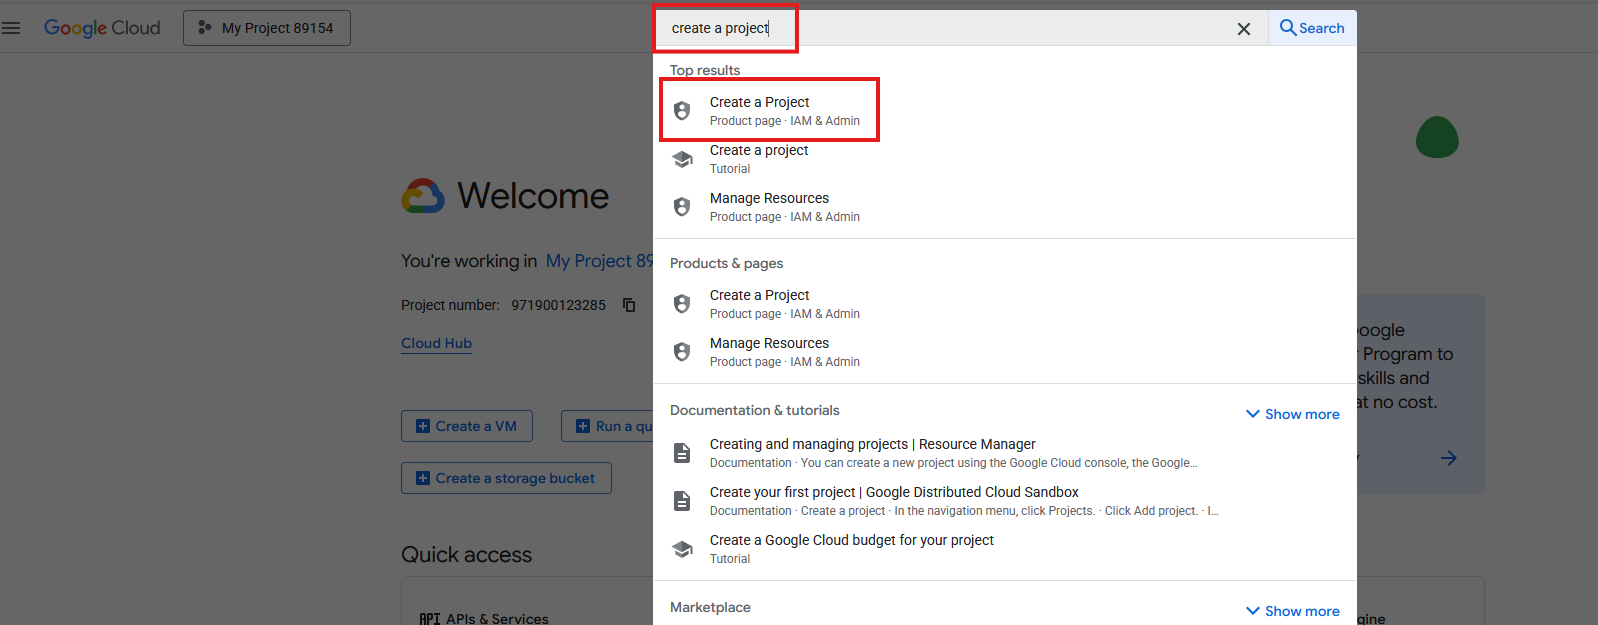
To integrate YouTube with OneTeg, it is necessary to initiate a new project within Google Cloud Services. Please navigate to the Google Cloud platform to create a new project.
Initiate the process by searching for "Create a Project" and selecting the "Product Page - IAM & Admin" option
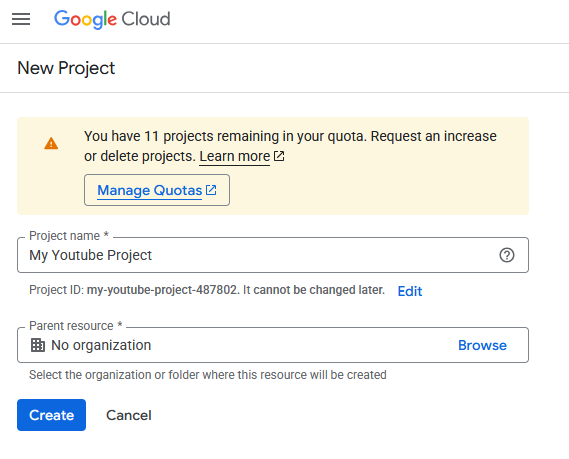
Assign a name to your project and retain the project ID for future reference.
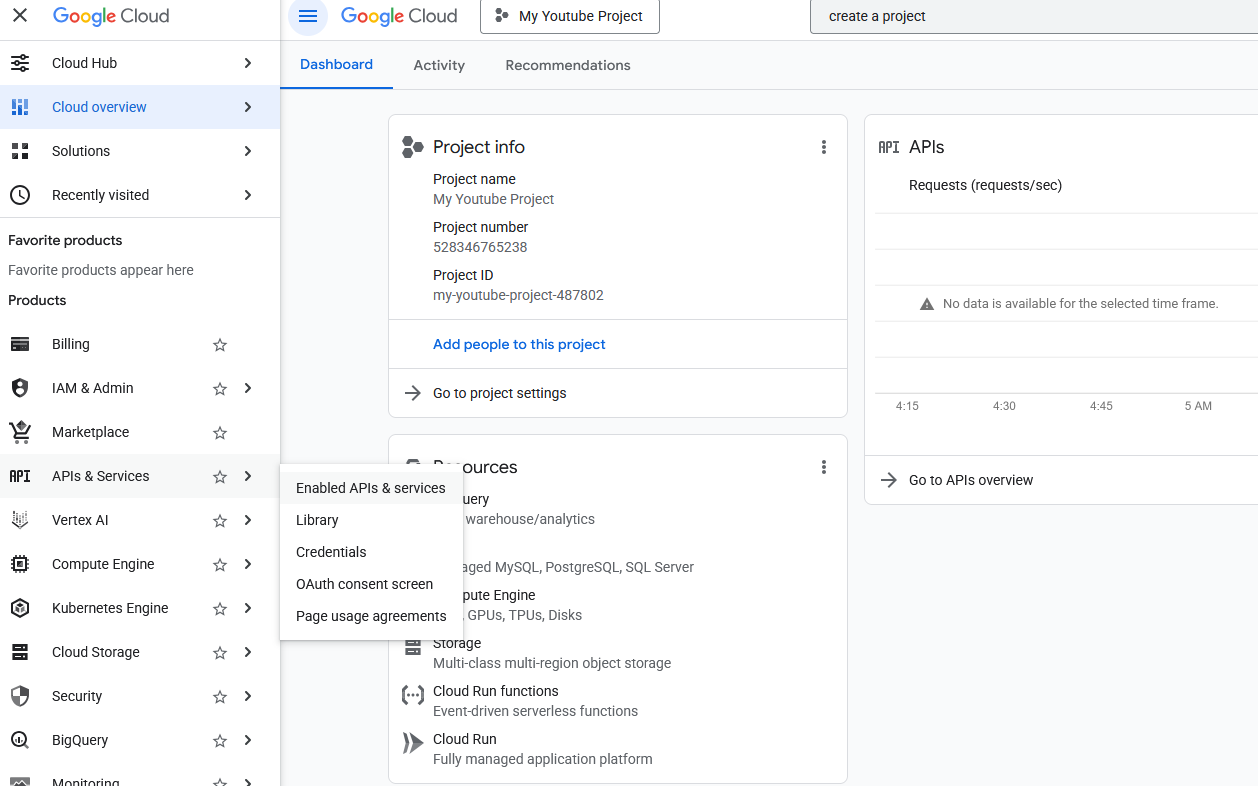
Please select your newly created project from the top menu bar, then navigate to the "API & Services" tab located in the left-hand menu. Select the "Enabled APIs & Services" menu option.
Select the "Enable API and Services" to configure the required API access permissions
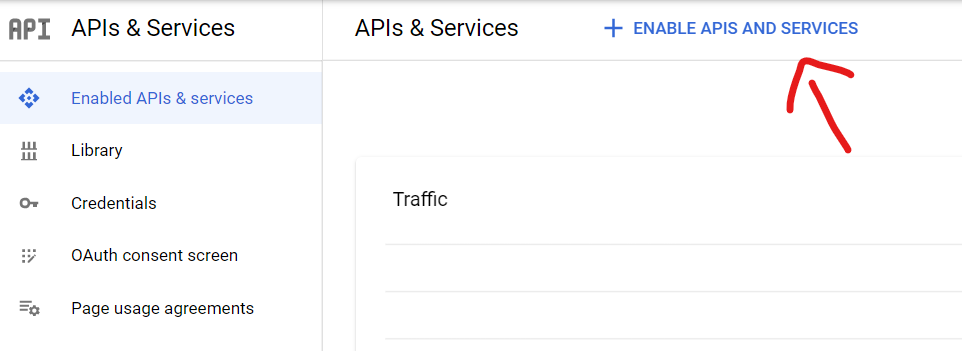
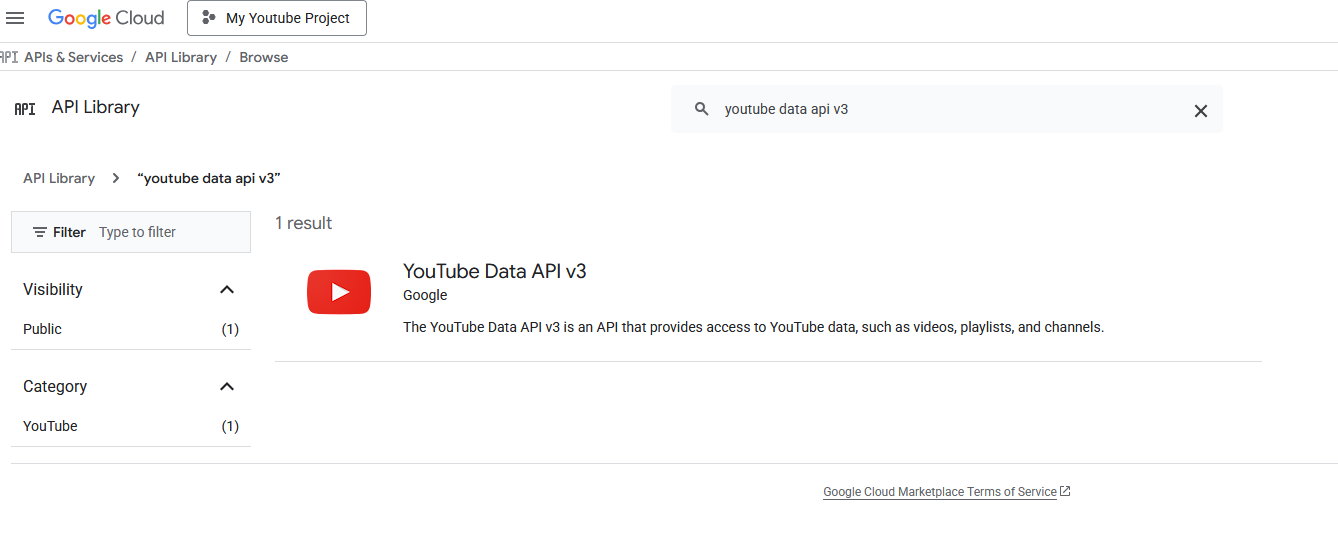
Find and select the YouTube API as shown:
Enable YouTube API:
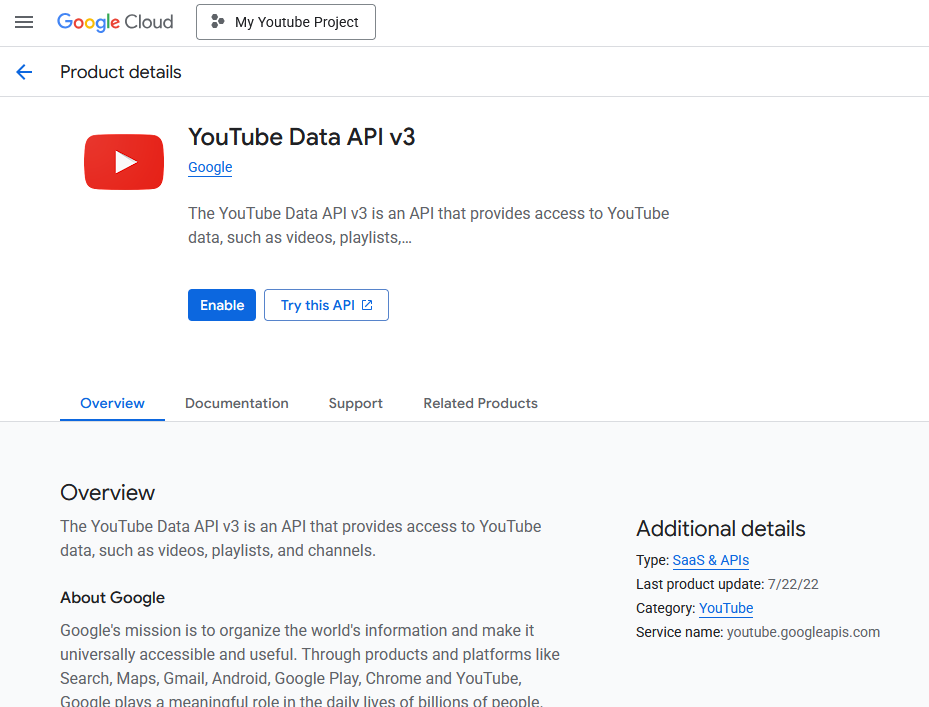
Click the “Enable” button.
Furthermore, it is necessary to generate new credentials to enable OneTeg to access YouTube. Navigate to the "APIs & Services" tab and select the "Credentials" menu item. From the top menu, choose "Create Credentials," followed by selecting the "OAuth Client ID" option.
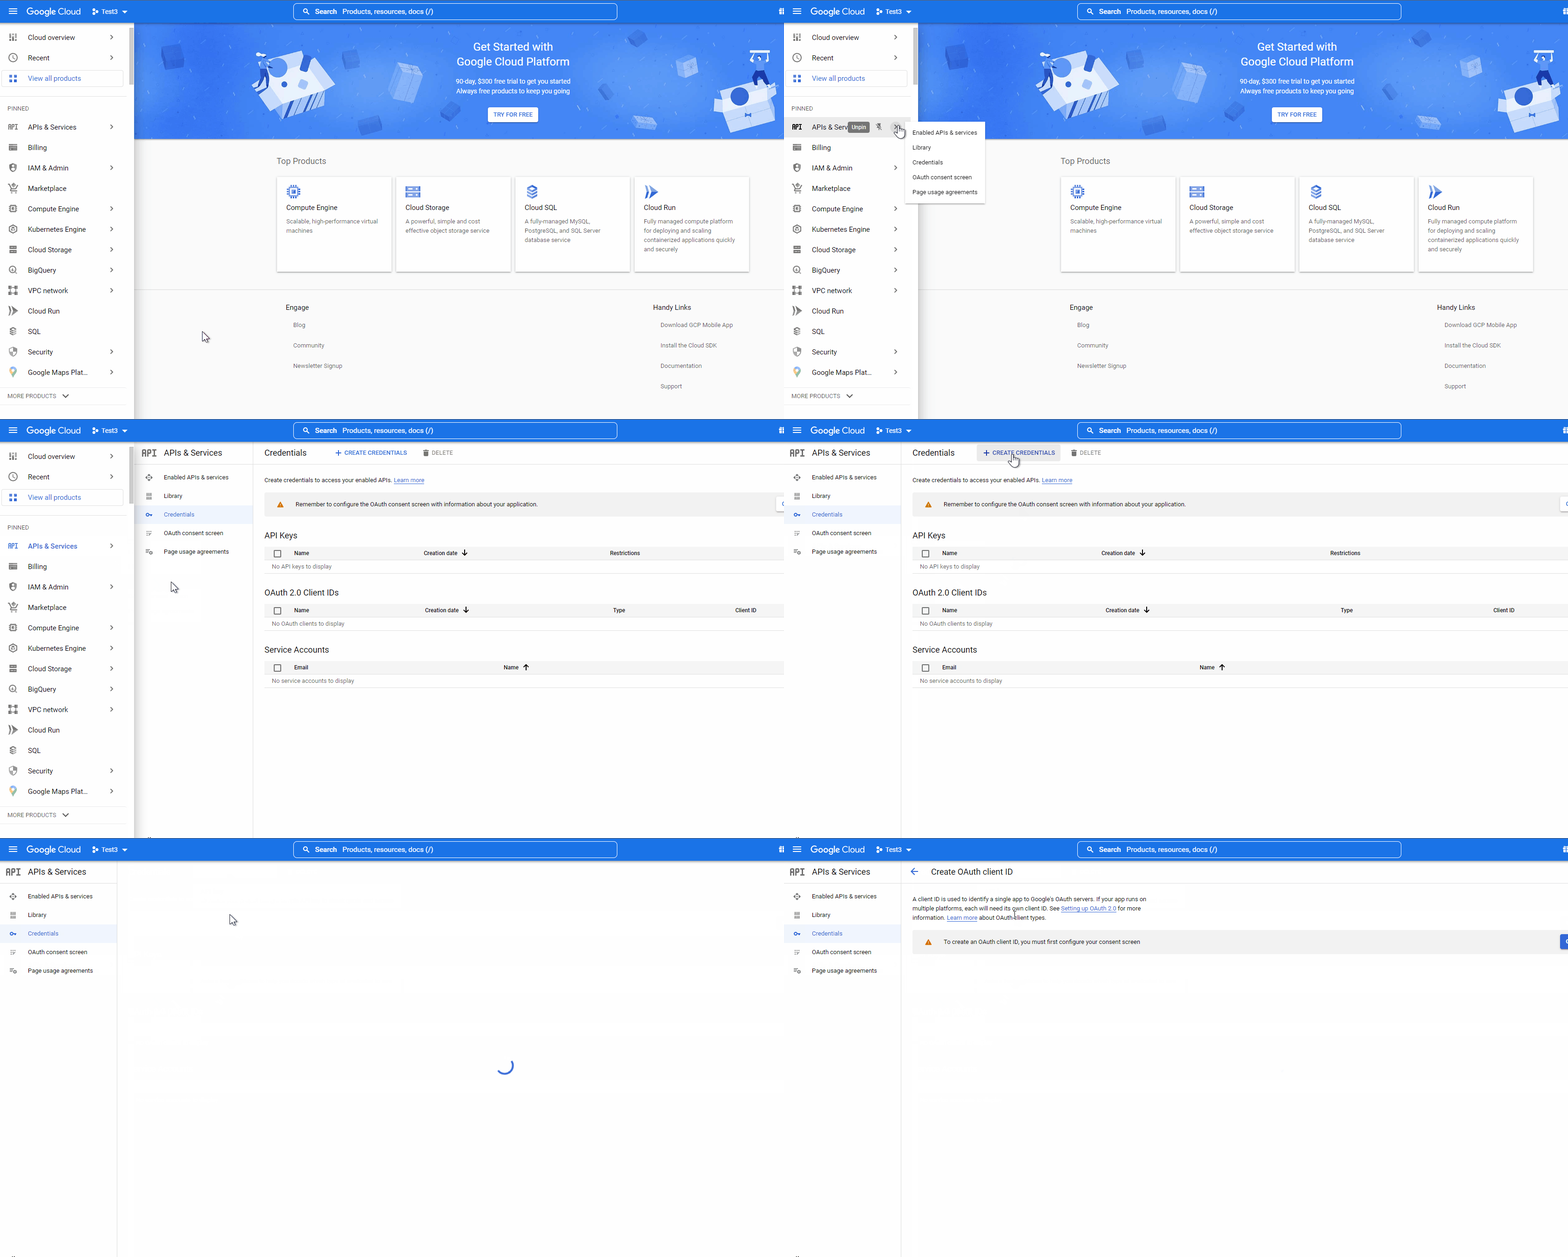
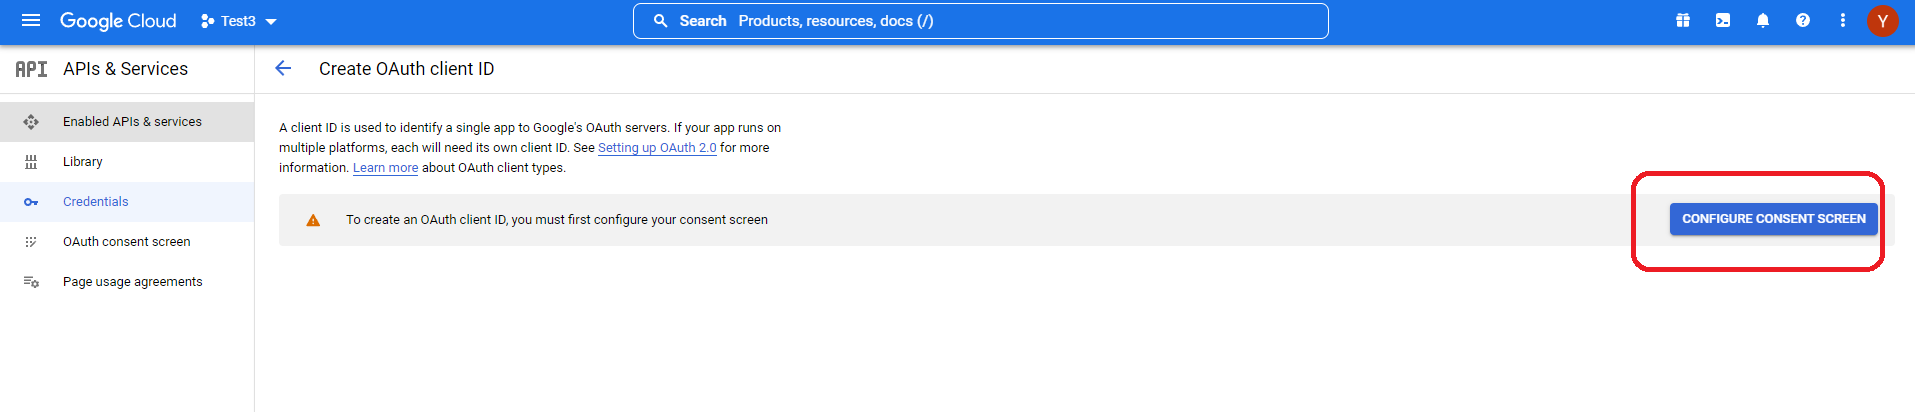
As indicated in the prompt, it is necessary to configure the "Consent Screen." Please select the "Consent Screen Options" located on the right side of the interface.
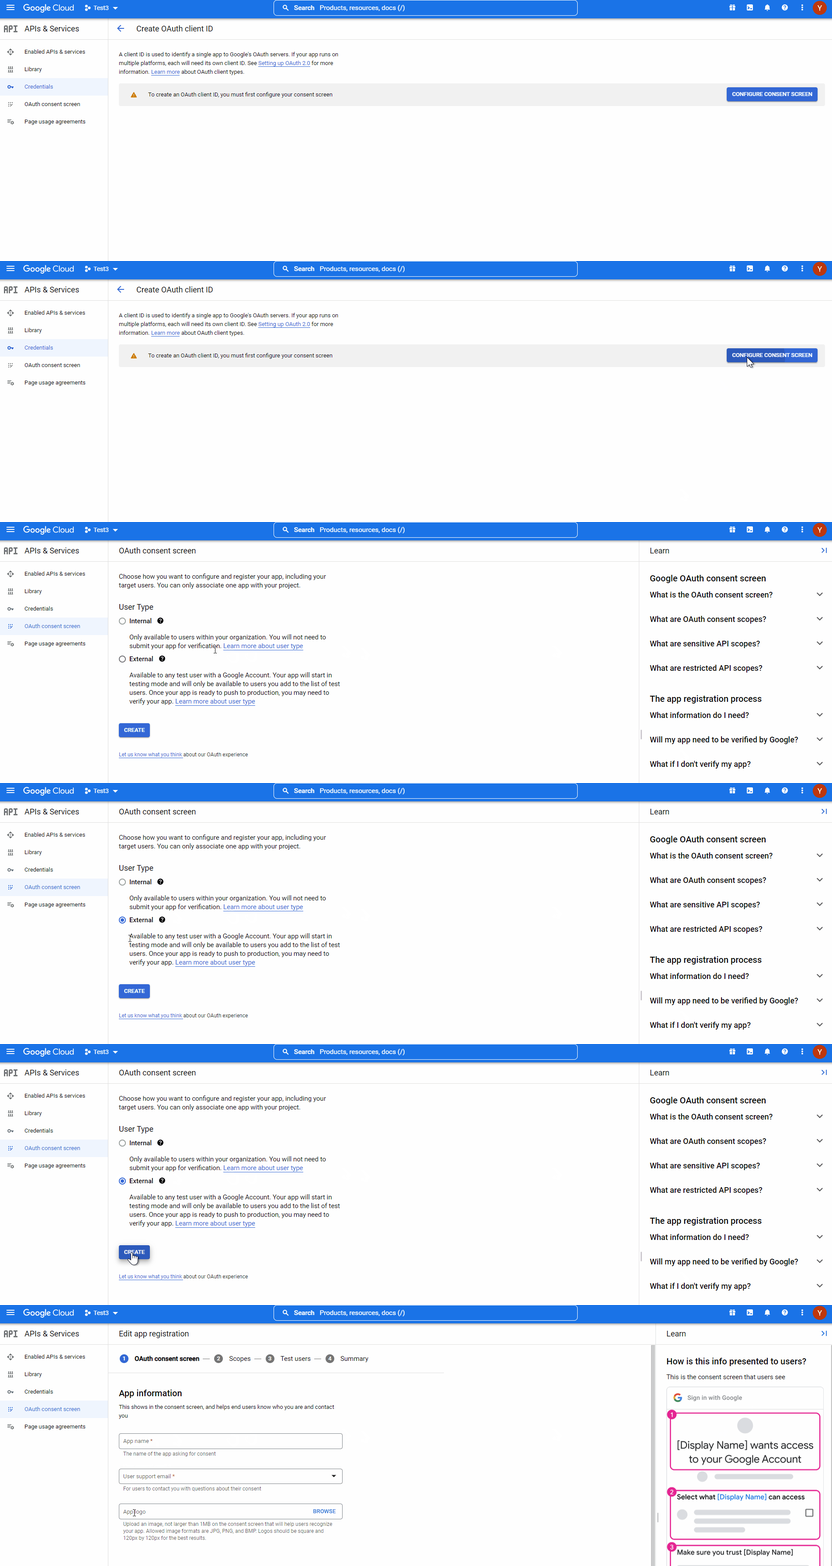
This new page enables configuration of the application registration and provides detailed information regarding the data presented to users.
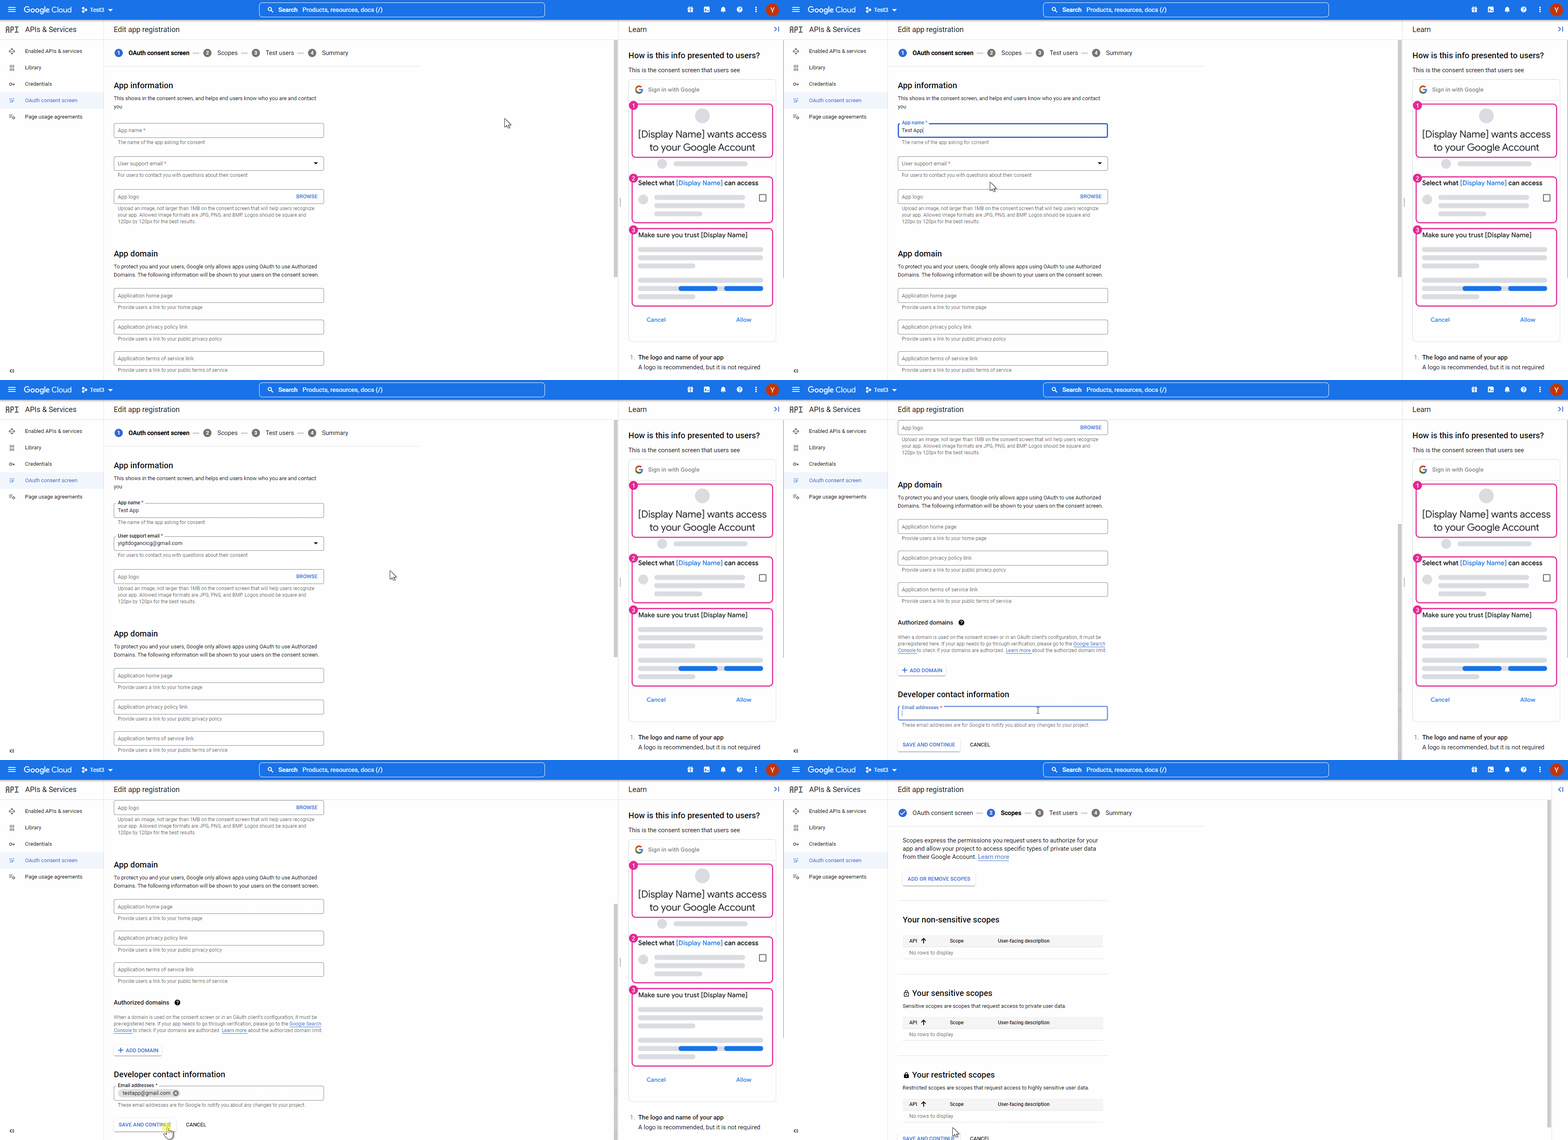
Initially, input your application details, user support email, application logo (if applicable), and any other requisite information. Ensure that the "Developer Contact Information" email address is included at the conclusion of the first page. The user support email address will be designated as the same address associated with the Google Account utilized to access this cloud environment.
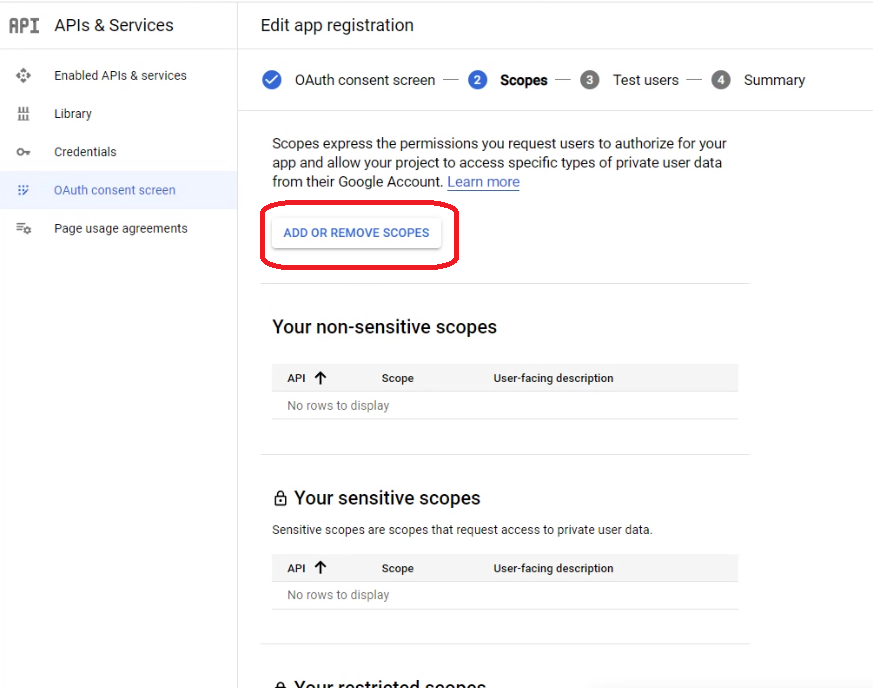
Click the "Add or Remove Scopes" button and select the necessary scopes as illustrated below
Within the filter section, enter "YouTube" and select all APIs whose names include the term "YouTube.".
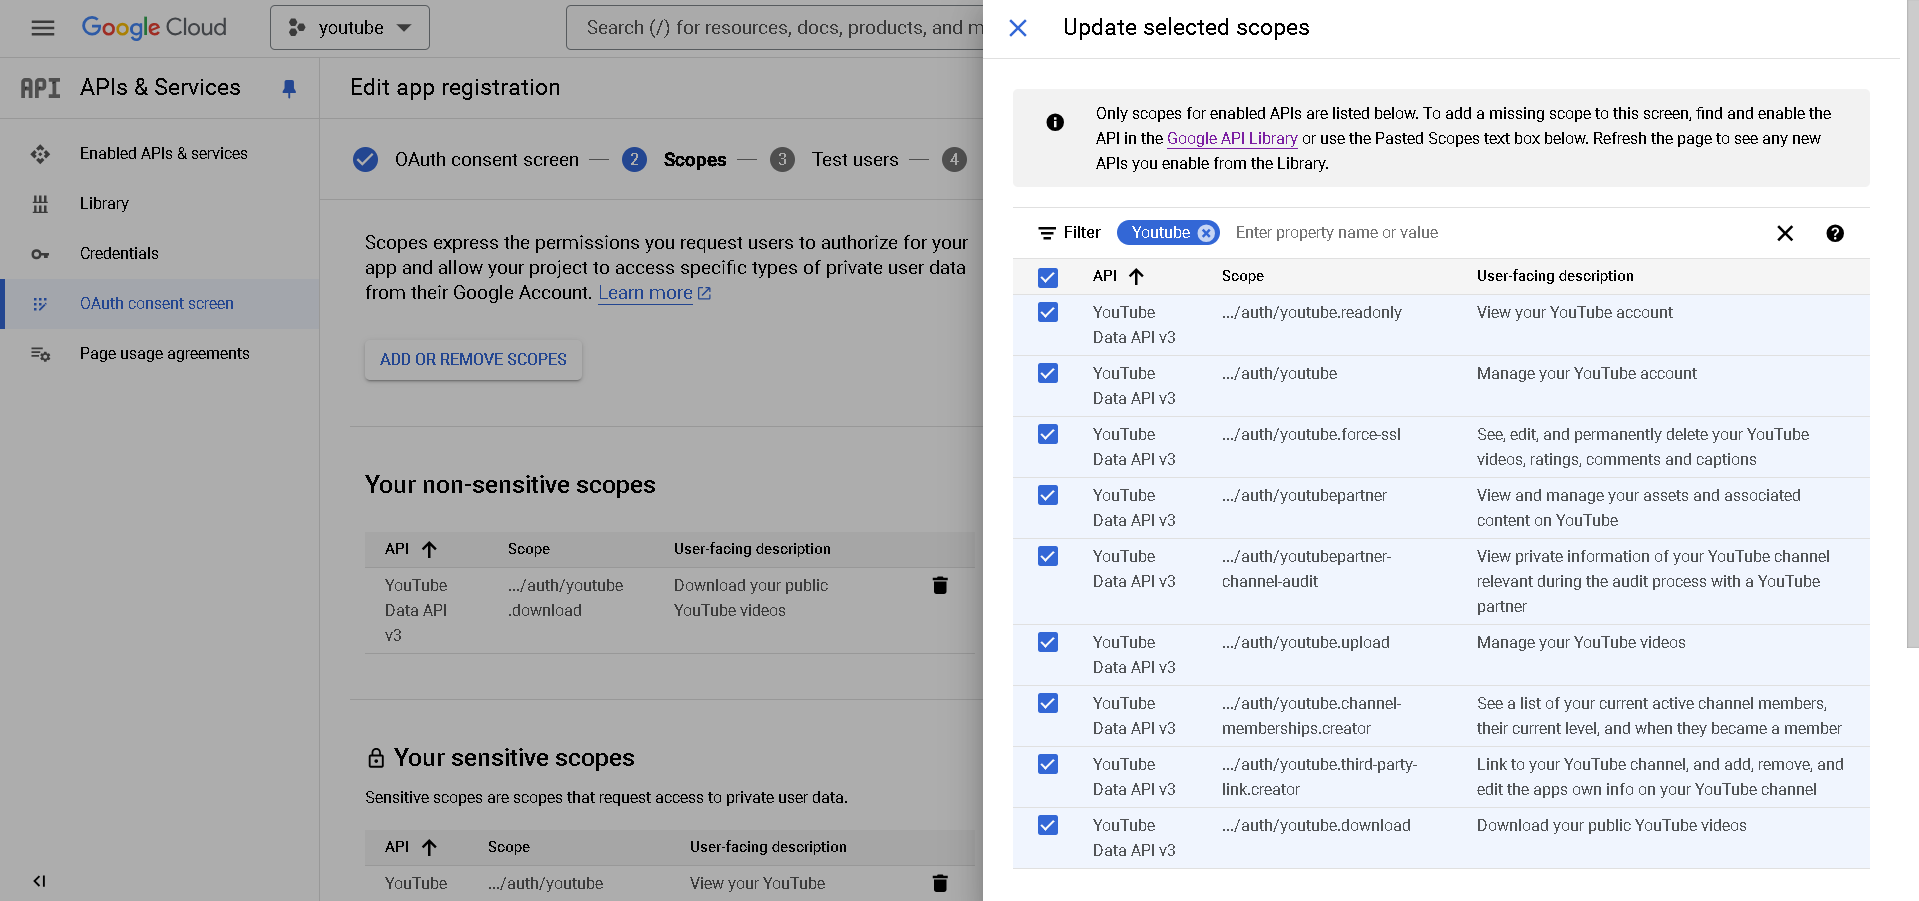
Upon adding the necessary scopes, please select the Save and Continue button to proceed.
Proceed by adding a user account to this application. Select the Add Users button and include the Google user account with which you are currently authenticated. Click “Save and Continue” button to proceed.
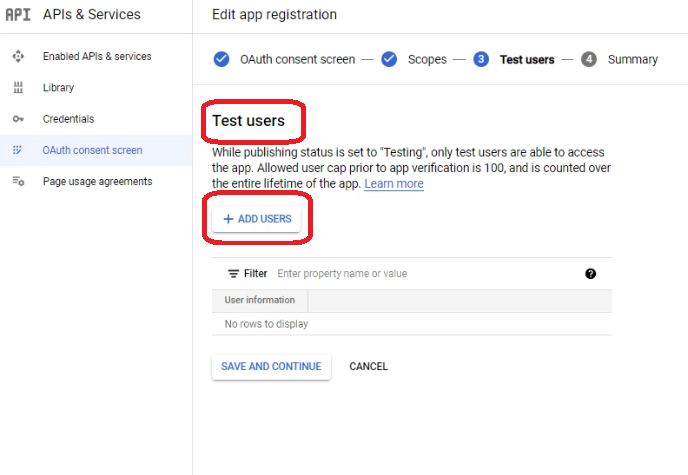
Select the "Back to Dashboard" button located at the bottom of the page to return to the Dashboard.
Navigate to the "Credentials" option in the left-side menu, then select the "Create Credentials" button positioned in the top menu.
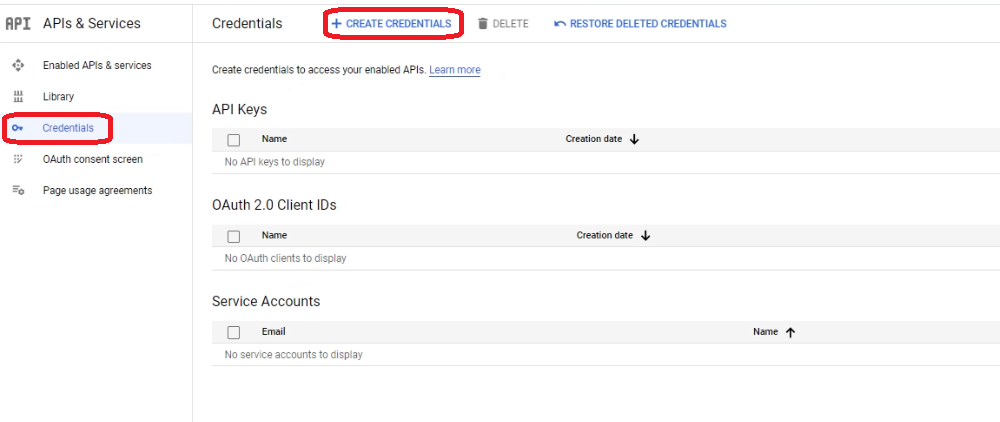
Select the appropriate application type for the OAuth client, which is Web App, and then press Create.
This interface will display the OAuth Client Creation Page, presenting the Client ID and Client Secret credentials. Please securely save these credentials, as they will be required within the OneTeg environment to generate the Callback URL.
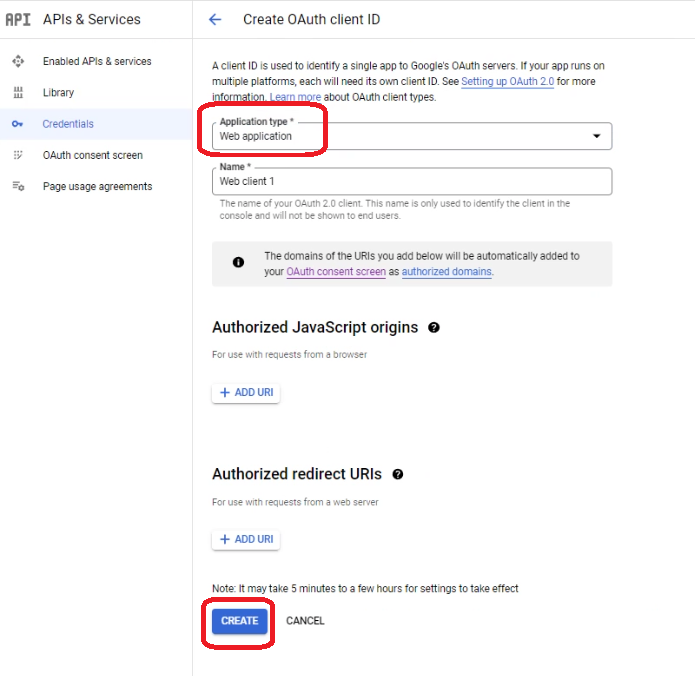
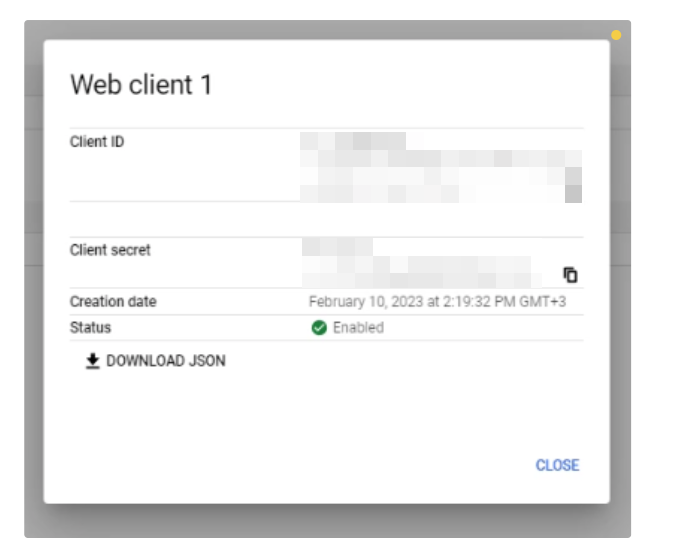
After entering the Client ID and Client Secret, please click the Save button to enable the system to generate a Callback URL.
Navigate to the Credentials main page, select the OAuth 2 credential, and enter the Callback URL accordingly.
After entering the URI, please press the save button to confirm and store the changes.
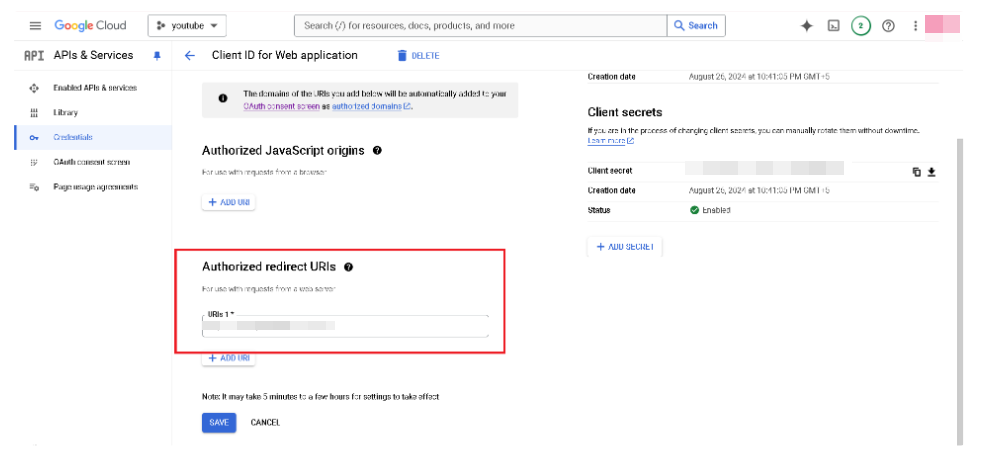
Please contact OneTeg support if you are not sure what the correct redirect URI should be.
3. Connection Settings and Configuration for OneTeg
In OneTeg, navigate to Connections and create a new connection using the YouTube Connector. Fill in the fields below using the credentials obtained in Section 2.
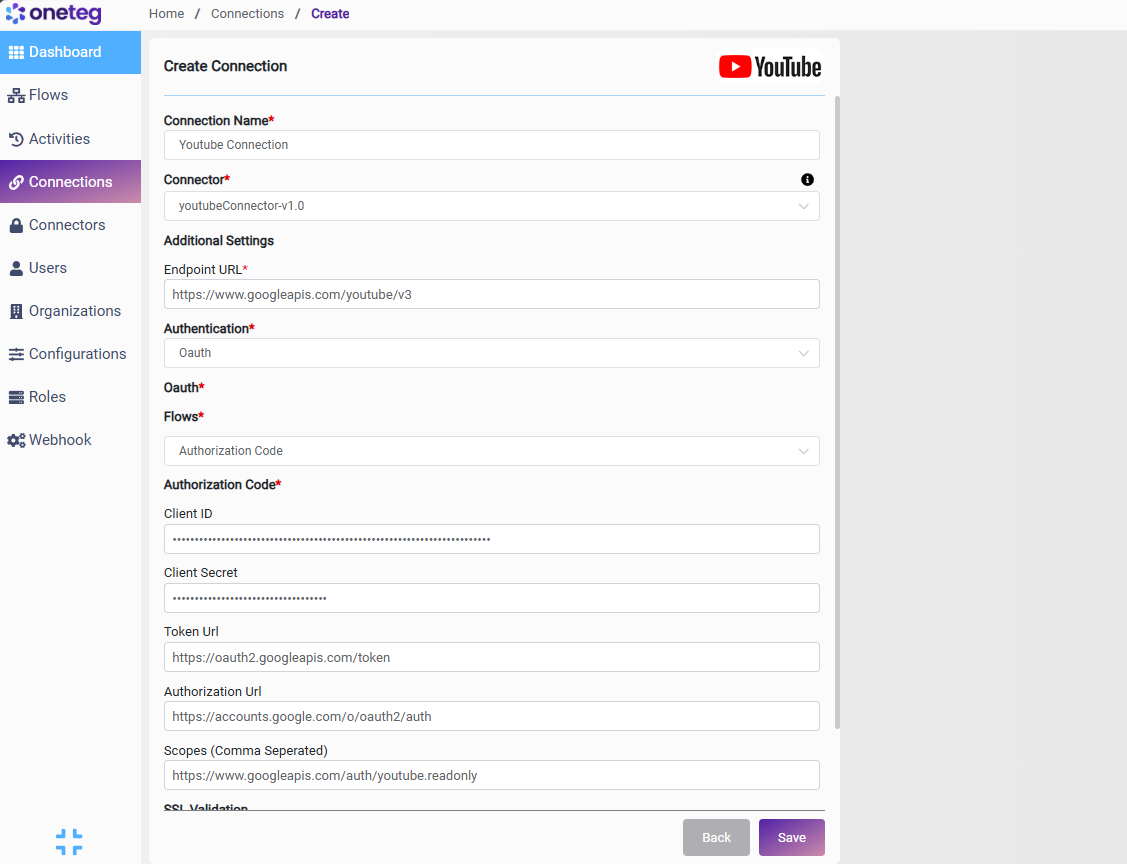
|
Settings Parameters |
Value / Sample Value |
Description |
Required (Y/N) |
|
Connection Name |
Youtube Connection |
Choose a name for your Connection |
Y |
|
Connector |
youtubeConnector-v1.0 |
Auto-populated once the YouTube Connector is selected |
Y |
|
Endpoint URL |
The base URL of the YouTube Data API v3 |
Y |
|
|
Authentication |
Oauth |
Select Oauth as the authentication method |
Y |
|
Flows |
Authorization Code |
Select Authorization Code as the OAuth flow |
Y |
|
Client ID |
Your Google OAuth Client ID |
The Client ID from your OAuth 2.0 credentials in the Google Cloud Console |
Y |
|
Client Secret |
Your Google OAuth Client Secret |
The Client Secret from your OAuth 2.0 credentials in the Google Cloud Console |
Y |
|
Token Url |
The Google OAuth 2.0 token endpoint used to exchange authorization codes for access tokens |
Y |
|
|
Authorization Url |
The Google OAuth 2.0 authorization endpoint where users grant access |
Y |
|
|
Scopes |
The YouTube Data API scope granting full access. Use https://www.googleapis.com/auth/youtube.readonly for read-only access |
Y |
4. Supported YouTube Actions and Options
For the full list of supported endpoints, parameters, and options, see the page below: