
1. General Information
Shopify is an e-commerce platform that offers an easy way to build an online store, sell and ship products, and accept payments online. Its Admin API provides programmatic access to store data such as products, orders, customers, and inventory.
The OneTeg Shopify Connector integrates with the Shopify Admin API, enabling users to manage store data directly from OneTeg automation workflows. This connector authenticates using an API Key — a Shopify Admin API access token.
Shopify authenticates with an Admin API access token generated by a custom app. The token is sent in the X-Shopify-Access-Token request header (this is what the Api Key field provides). The API base URL is store-specific and includes the API version.
2. Connect Shopify to OneTeg
The connector authenticates with a Shopify Admin API access token generated by a custom app in your store. Follow the steps below to create the app and obtain the token you will enter into OneTeg.
Step 1 - Create or Access Your Shopify Store
Create a Shopify store (Shopify offers a free trial for new stores) or use an existing one. Optionally set your myshopify.com store name, and add a product so you can test the connection later.
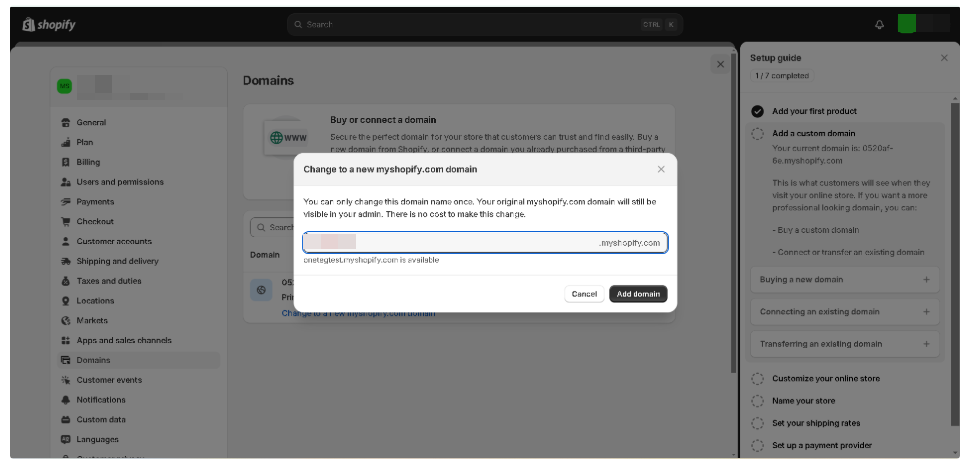
Step 2 - Create a Custom App
In your Shopify admin, go to Settings → Apps and sales channels → Develop apps. Allow custom app development if prompted, then click Create an app and give it a name.
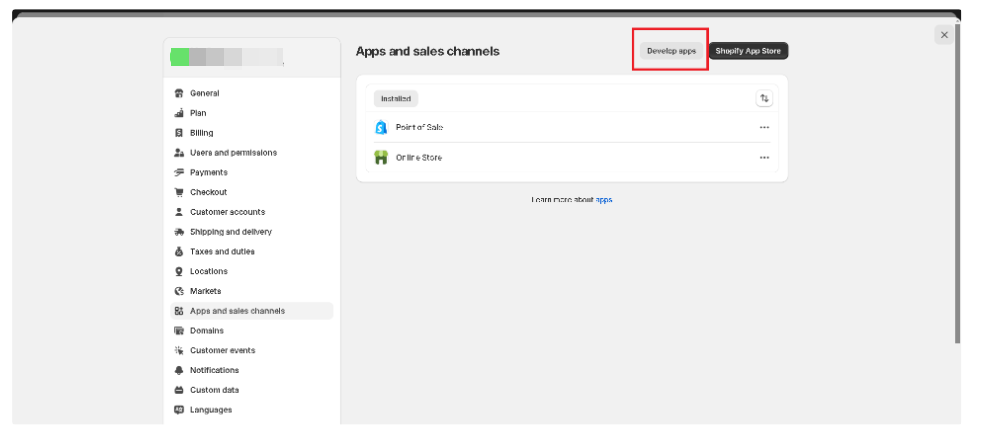
Step 3 - Configure API Scopes
In the app’s Overview, click Configure Admin API scopes (and, if needed, Configure Storefront API scopes), select all the scopes your integration requires, and save.
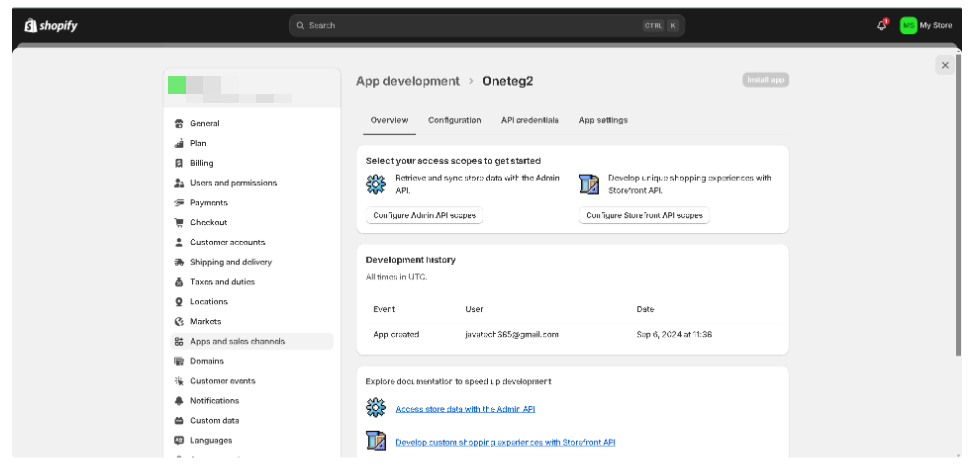
Step 4 - Install the App and Reveal the Token
Go to API credentials and click Install app. After installation, click Reveal token once to view the Admin API access token. Copy it — you will paste it into OneTeg in the next step.
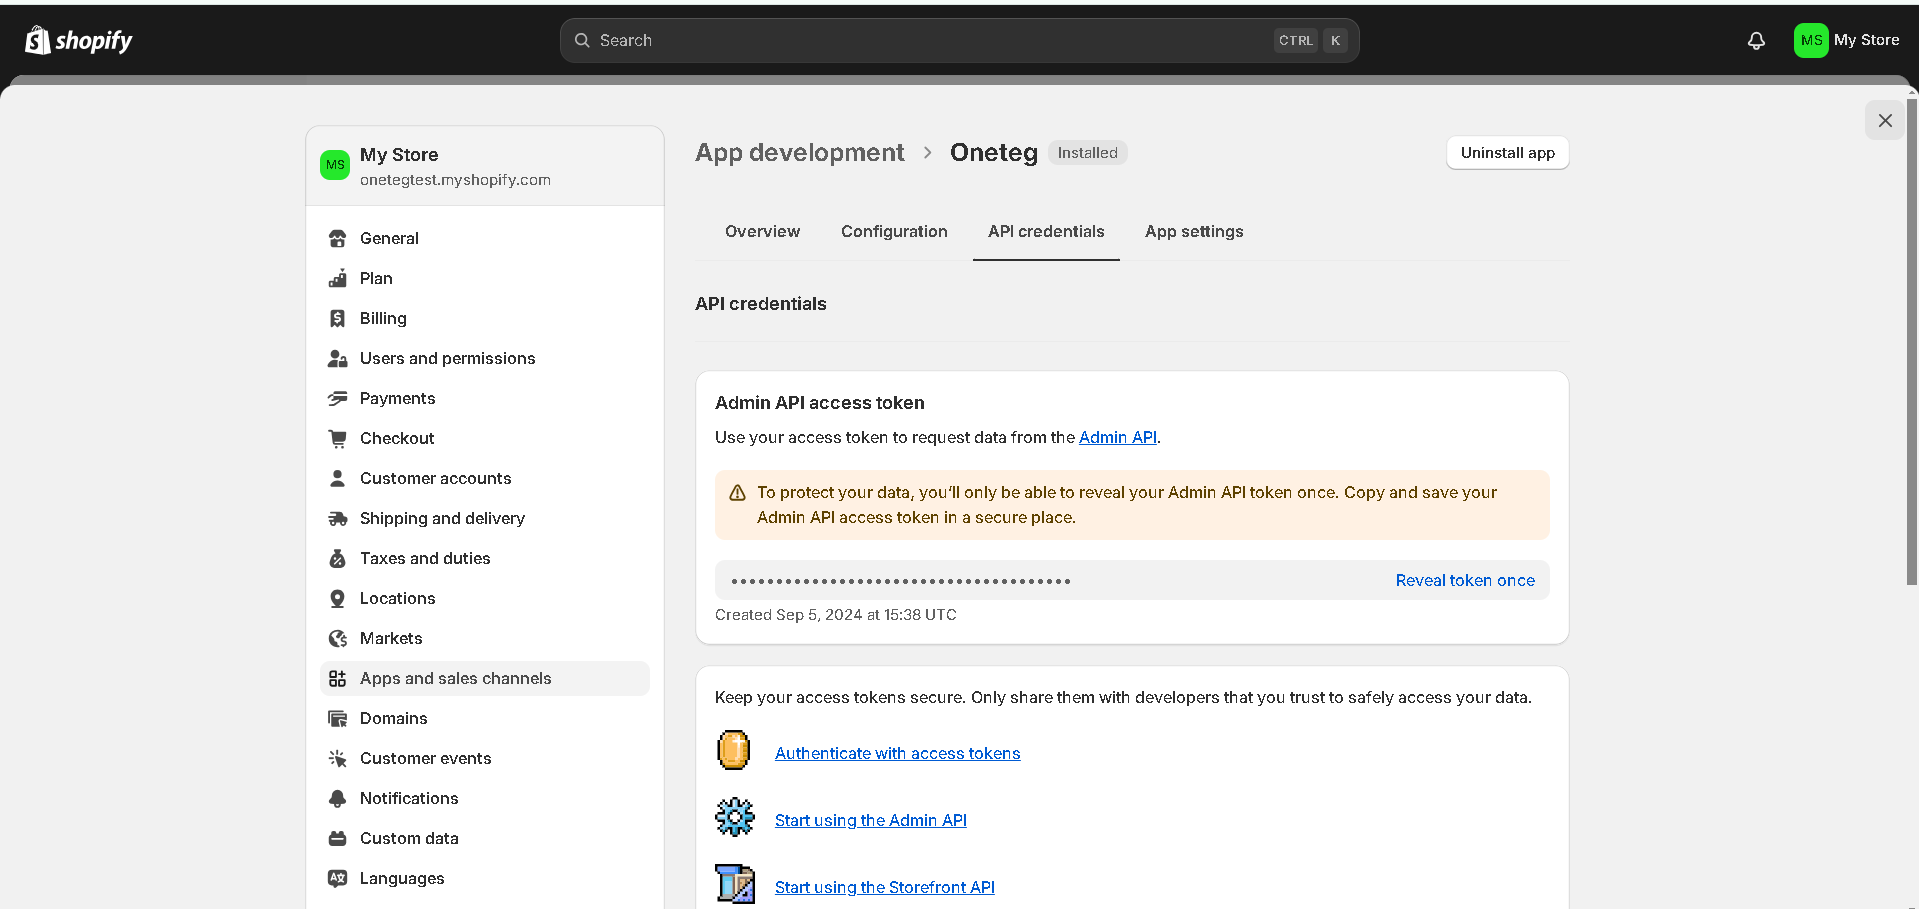
The Admin API access token is shown only once (“Reveal token once”). Copy it immediately and store it securely; if it is lost, you will need to rotate it or reinstall the app.
3. Connection Settings and Configuration for OneTeg
In OneTeg, navigate to Connections and create a new connection using the Shopify Connector. Enter the settings below.
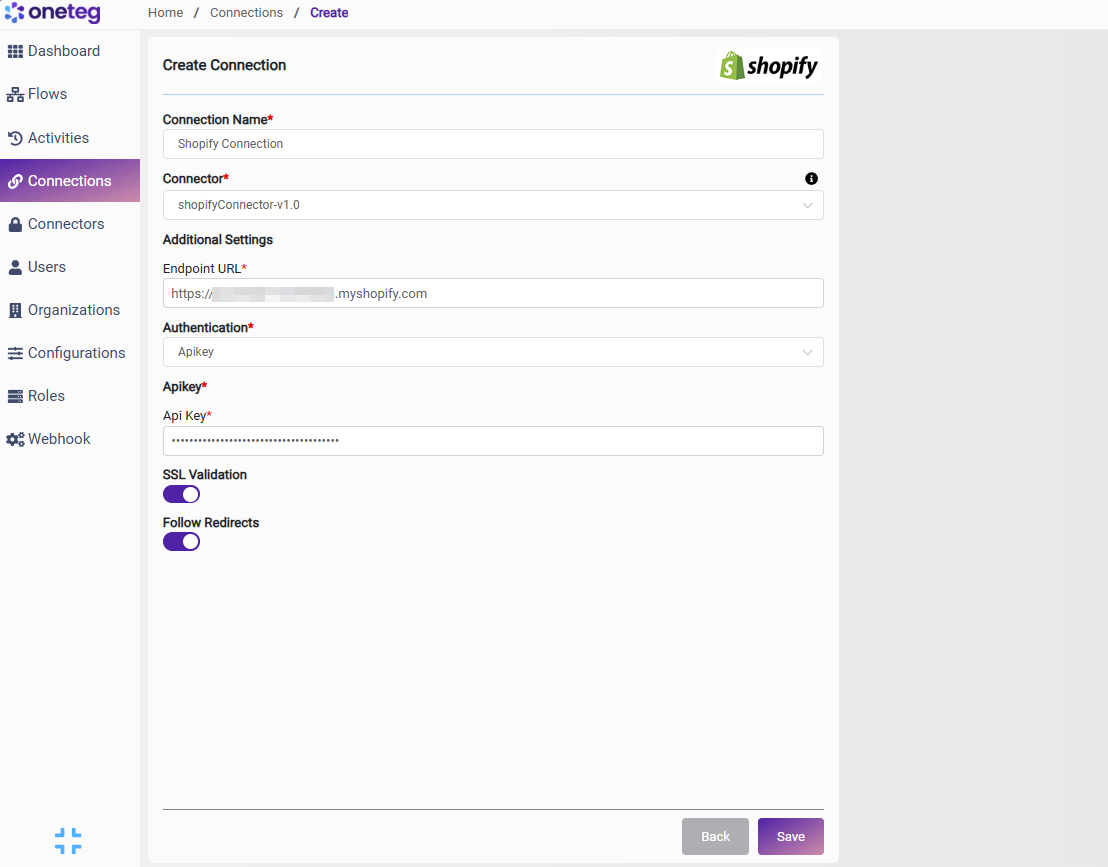
|
Settings Parameters |
Value / Sample Value |
Description |
Required (Y/N) |
|
Connection Name |
Shopify Connection |
Choose a name for your Connection |
Y |
|
Connector |
shopifyConnector-v1.0 |
Auto-populated once the Shopify Connector is selected |
Y |
|
Endpoint URL |
https://{your-store}.myshopify.com/admin/api/2026-07 |
The base URL of the Shopify Admin API, where {your-store} is your myshopify.com store name and 2026-07 is the API version |
Y |
|
Authentication |
Apikey |
Select Apikey as the authentication method |
Y |
|
Api Key |
Your Shopify Admin API access token |
The Admin API access token from your custom app, sent in the X-Shopify-Access-Token header to authenticate requests |
Y |
Shopify releases a new date-based API version each quarter and supports each for about 12 months. 2026-07 is the current stable version; update the version segment of the Endpoint URL periodically to stay on a supported version.
4. Supported Shopify Actions and Options
For the full list of supported endpoints, parameters, and options, see the page below: