
1. General Information
WordPress is the world's most widely used content management system (CMS), powering websites ranging from personal blogs to large enterprise sites. It provides a flexible publishing platform with support for posts, pages, media, custom post types, and a vast plugin and theme ecosystem. WordPress includes a built-in REST API, exposed under the /wp-json path, that provides programmatic access to site content.
The OneTeg WordPress Connector integrates with the WordPress REST API, enabling users to create, read, update, and manage posts, pages, and media directly from OneTeg automation workflows. This connector authenticates using Basic authentication with a WordPress username and an Application Password.
Because WordPress is self-hosted, the endpoint URL is specific to your WordPress site. Application Passwords require the site to be served over HTTPS and are available by default in WordPress 5.6 and later.
2. Connect WordPress to OneTeg
Begin by logging into the WordPress administration page at:
https://your-wordpress-site.com/wp-admin/index.php
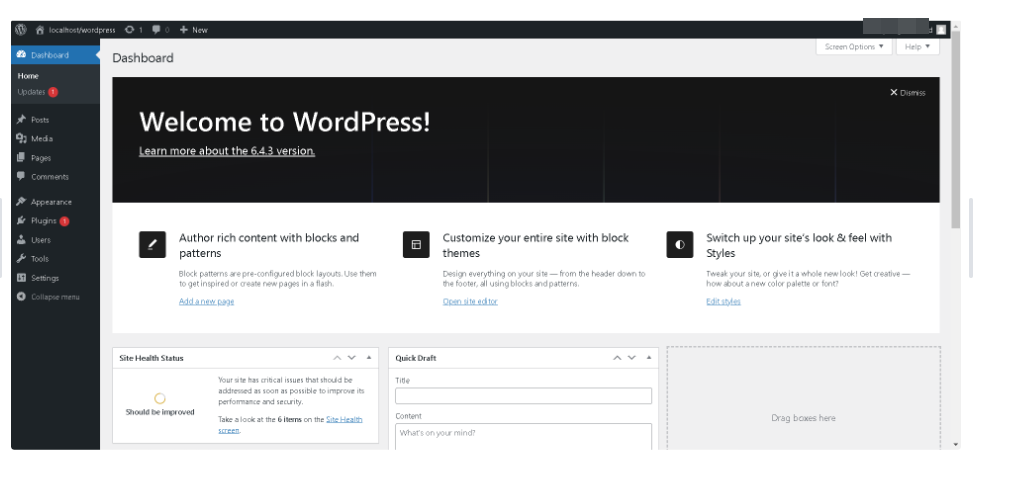
WordPress offers a comprehensive set of APIs to facilitate interaction with its content management system. It employs HTTP Basic authentication to validate incoming requests. To utilize WordPress APIs for content management using OneTeg, it is necessary to generate a dedicated password for the user via the administrative portal. This password is exclusively designated for managing content through the APIs.
Password Creation
To establish a password for the user, navigate to the Profile section within the Users tab located in the primary navigation menu of the administrative portal. Scroll down to locate the "Application Password" option.
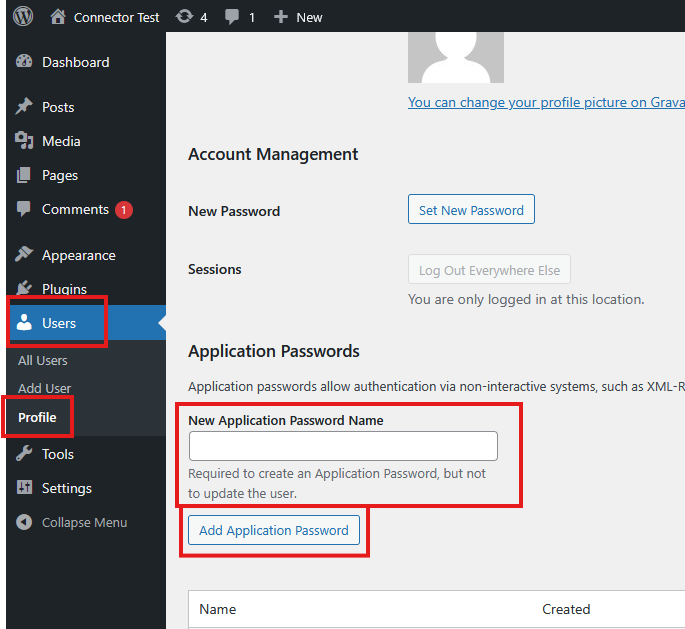
Assign a name to the password and select the Add New Application Password button to generate a new password for request authentication. This password facilitates basic authentication when transmitting requests to WordPress via OneTeg.
3. Connection Settings and Configuration for OneTeg
In OneTeg, navigate to Connections and create a new connection using the WordPress Connector. Fill in the fields below using the username and Application Password obtained in Section 2.
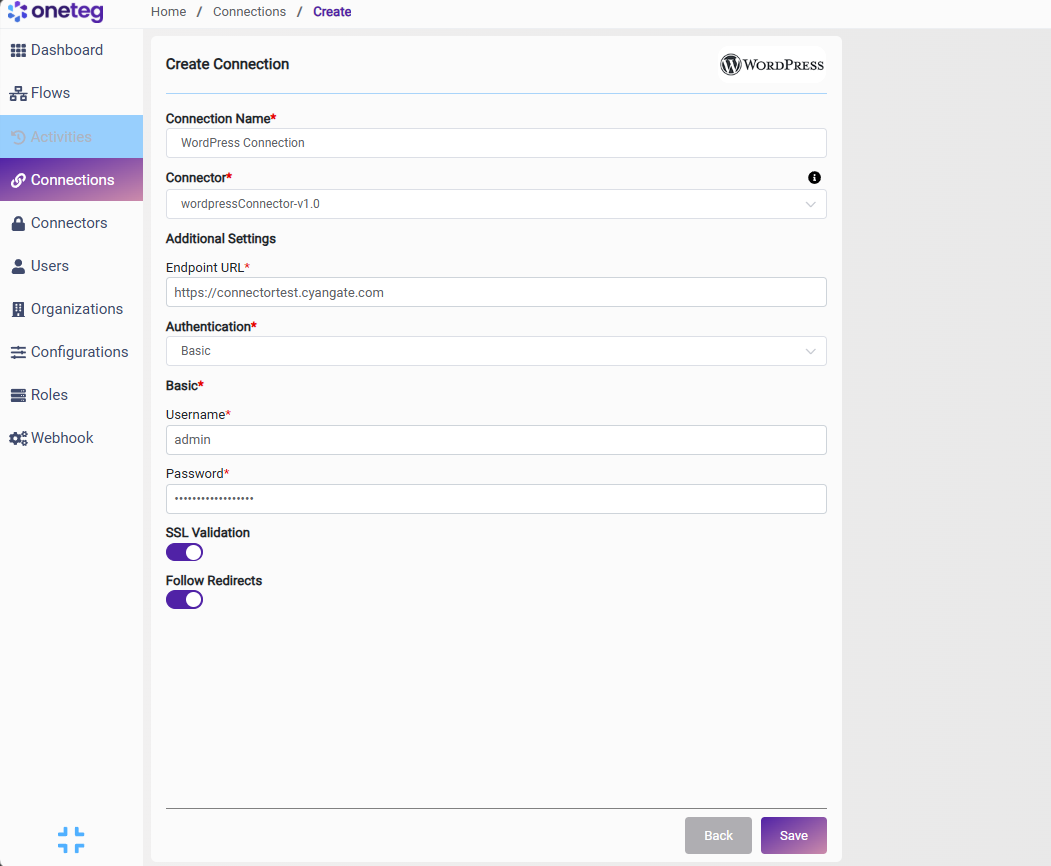
|
Settings Parameters |
Value / Sample Value |
Description |
Required (Y/N) |
|
Connection Name |
WordPress Connection |
Choose a name for your Connection |
Y |
|
Connector |
wordpressConnector-v1.0 |
Auto-populated once the WordPress Connector is selected |
Y |
|
Endpoint URL |
https://{your-wordpress-site} |
The base URL of your WordPress site. Replace with your own domain (e.g. https://yoursite.com ) |
Y |
|
Authentication |
Basic |
Select Basic as the authentication method |
Y |
|
Username |
Your WordPress username |
The username of the WordPress account the Application Password was created for |
Y |
|
Password |
Your WordPress Application Password |
The Application Password generated from Users → Profile (see Section 2) |
Y |
4. Supported WordPress Actions and Options
For the full list of supported endpoints, parameters, and options, see the page below: