1. General Information
Jira Software is Atlassian's project and issue tracking tool, widely used by software and cross-functional teams to plan, track, and manage work using agile methodologies such as Scrum and Kanban. It provides issue tracking, boards, backlogs, sprints, and extensive reporting. Jira Cloud exposes a REST API (v3) that provides programmatic access to issues, projects, workflows, and other Jira data.
The OneTeg Jira Connector integrates with the Jira Cloud REST API, enabling users to create, read, update, and manage issues and projects directly from OneTeg automation workflows. This connector supports two authentication methods: OAuth Authorization Code (OAuth 2.0 3LO) and Basic authentication using an API token.
The Endpoint URL differs between authentication methods. Basic authentication connects directly to your Jira site (https://your-domain.atlassian.net), while OAuth connects through the Atlassian API gateway using a cloud ID obtained after authorization.
2. Connect Jira to OneTeg
Basic authentication (Steps 1–2) is the simplest method and only requires an API token. OAuth Authorization Code (Steps 3–6) requires registering an app in the Atlassian Developer Console and is recommended for production integrations requiring user-delegated, scoped access.
Step 1 - Generate an API Token (for Basic Authentication)
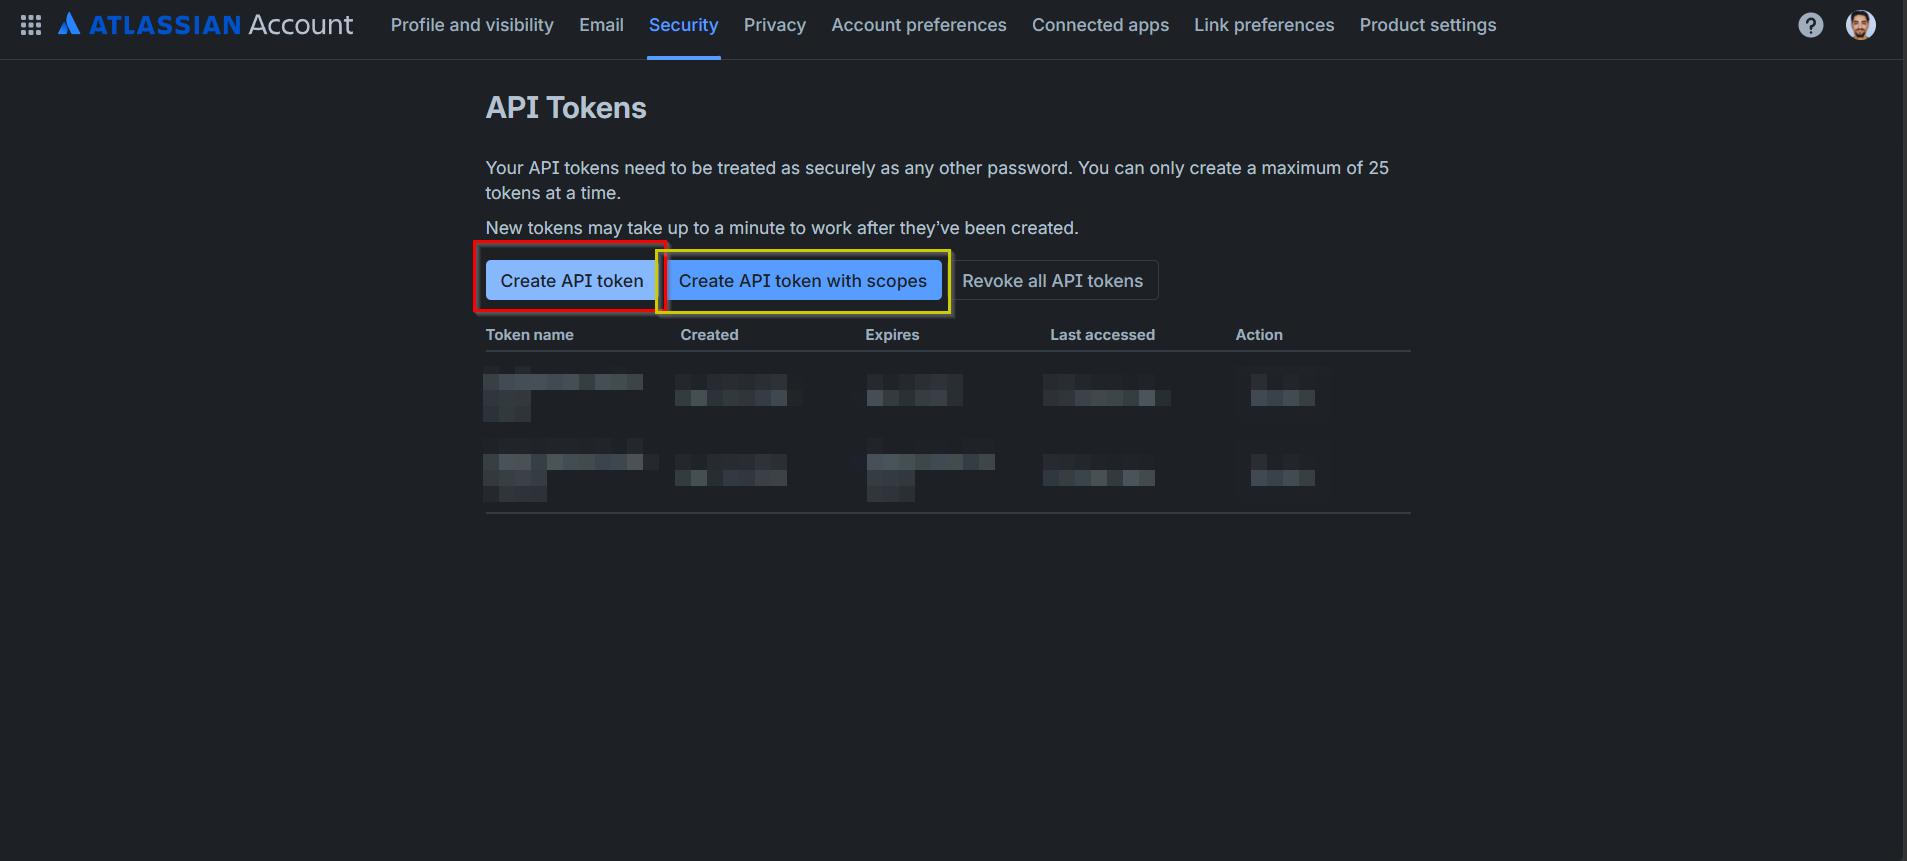
Log in to https://id.atlassian.com/manage-profile/security/api-tokens with your Atlassian account. Click Create API token (or Create API token with scopes for a scoped token), give it a descriptive name, and set an expiration date between 1 and 365 days.
Step 2 - Copy the API Token
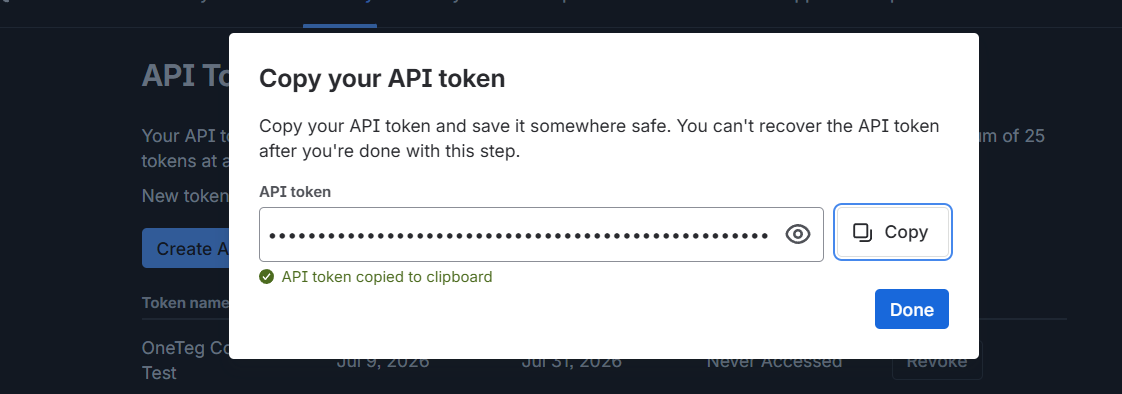
Copy the token immediately after creation — it is shown only once and cannot be retrieved again. This token is used together with your Atlassian account email as the password in Basic authentication.
API tokens default to a 1-year expiration and inherit all permissions of the account that created them. If you only need Basic authentication, you can stop here and proceed to Section 3, Option 2. Continue with Steps 3–6 only if you want to use OAuth authentication.
Step 3 - Register an App in the Atlassian Developer Console
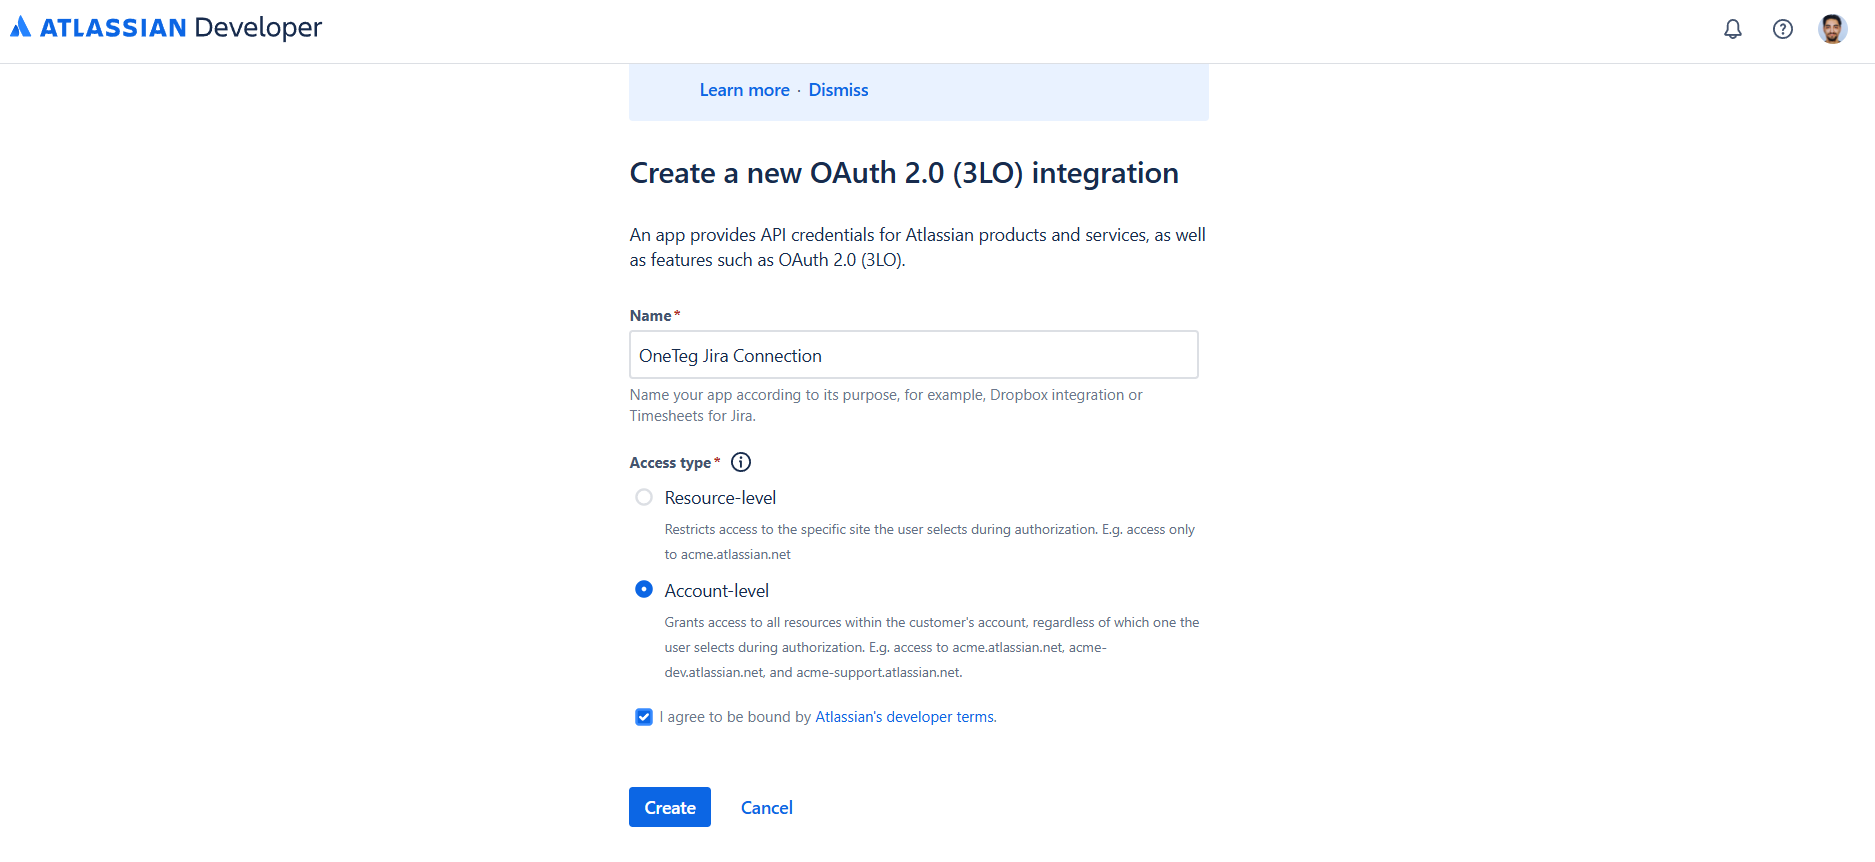
Navigate to https://developer.atlassian.com/console/myapps and sign in with your Atlassian account. Click Create and select OAuth 2.0 integration. Give your app a name — for example, "OneTeg Integration" — and choose an Access type:
Resource-level — restricts access to the specific site the user selects during authorization. This is the typical choice for most integrations.
Account-level — grants access to all sites within the customer's account, regardless of which one the user selects during authorization.
Agree to Atlassian's developer terms, then click Create.
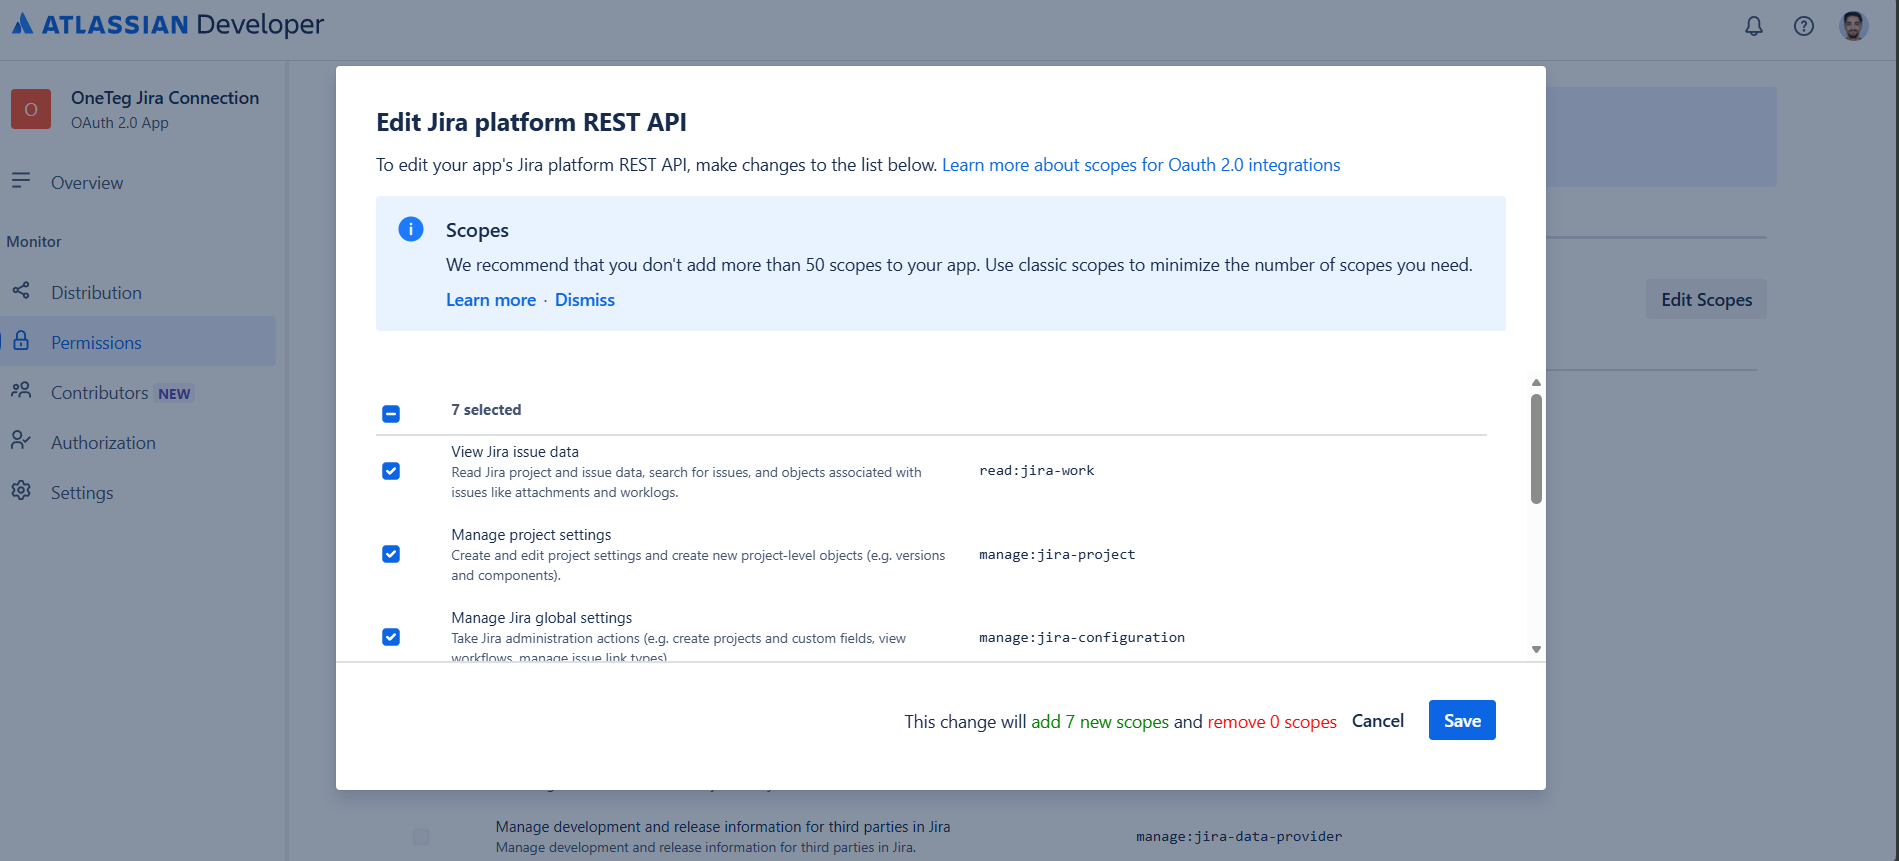
Step 4 - Add Jira API Permissions and Configure Authorization
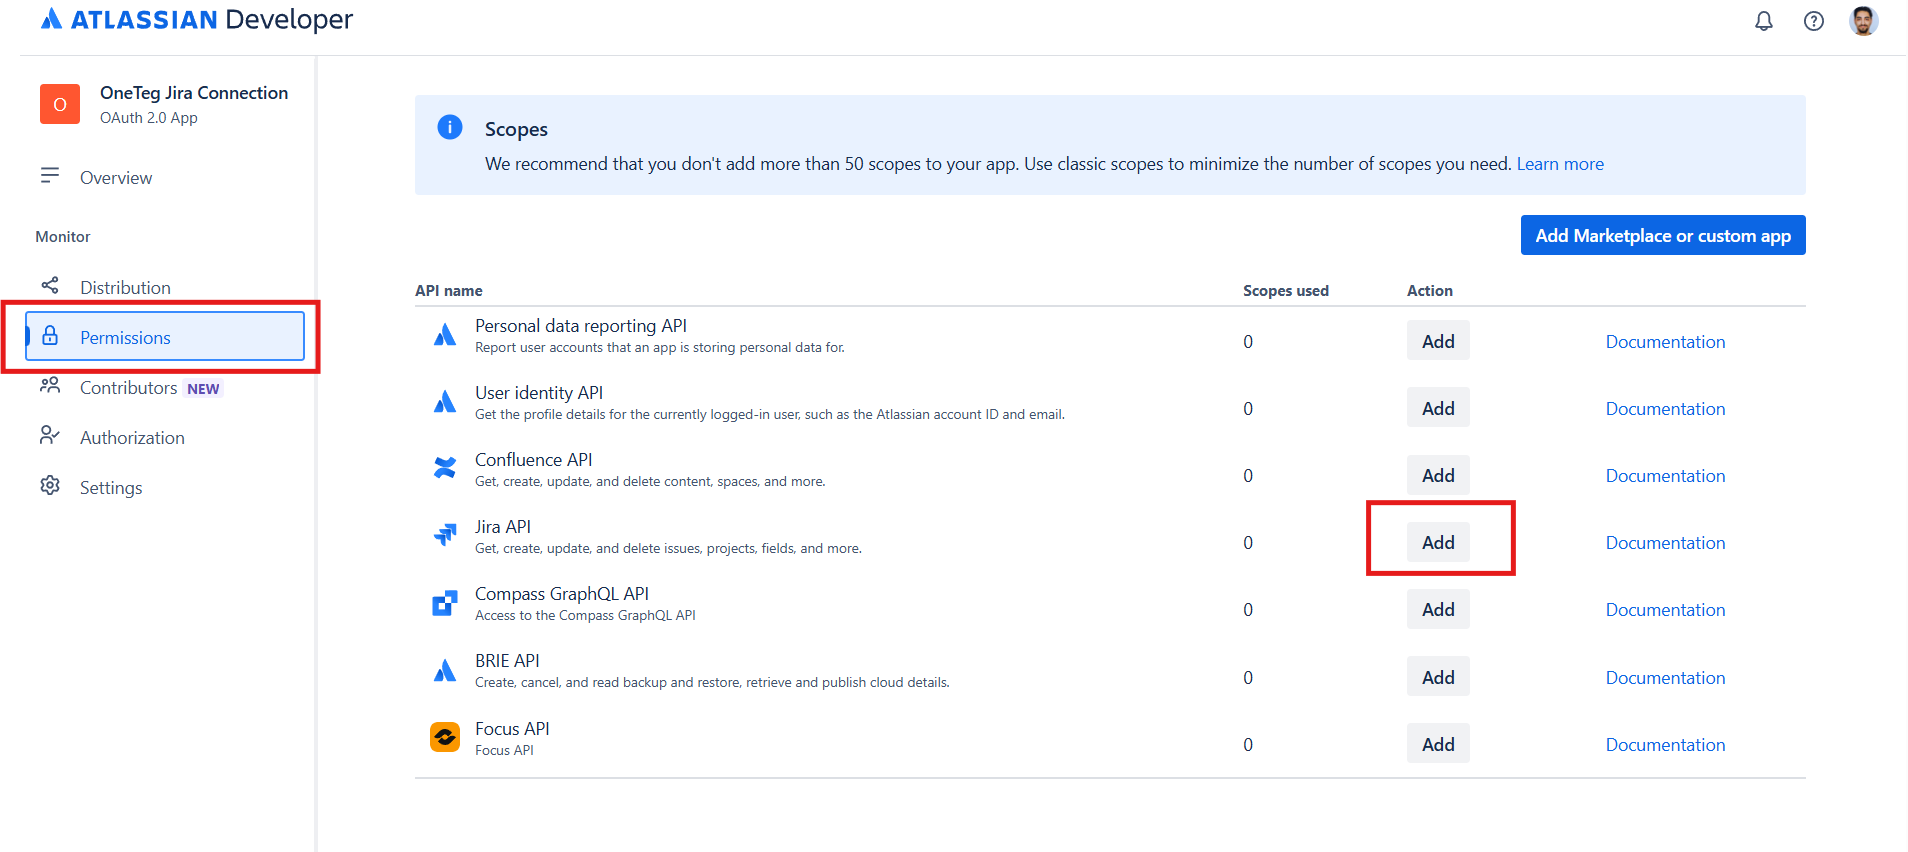
In your app, go to Permissions and add the Jira API. Then go to Authorization, select OAuth 2.0 (3LO), and click Configure. Add the OneTeg OAuth callback URL as the callback URL:
https://app.oneteg.com/rest/v1/oauth2/callback
Then go to Permissions → Jira API → Configure → Edit Scopes and select the scopes your workflow requires — for example, read:jira-work for read access or write:jira-work to also create and update issues.
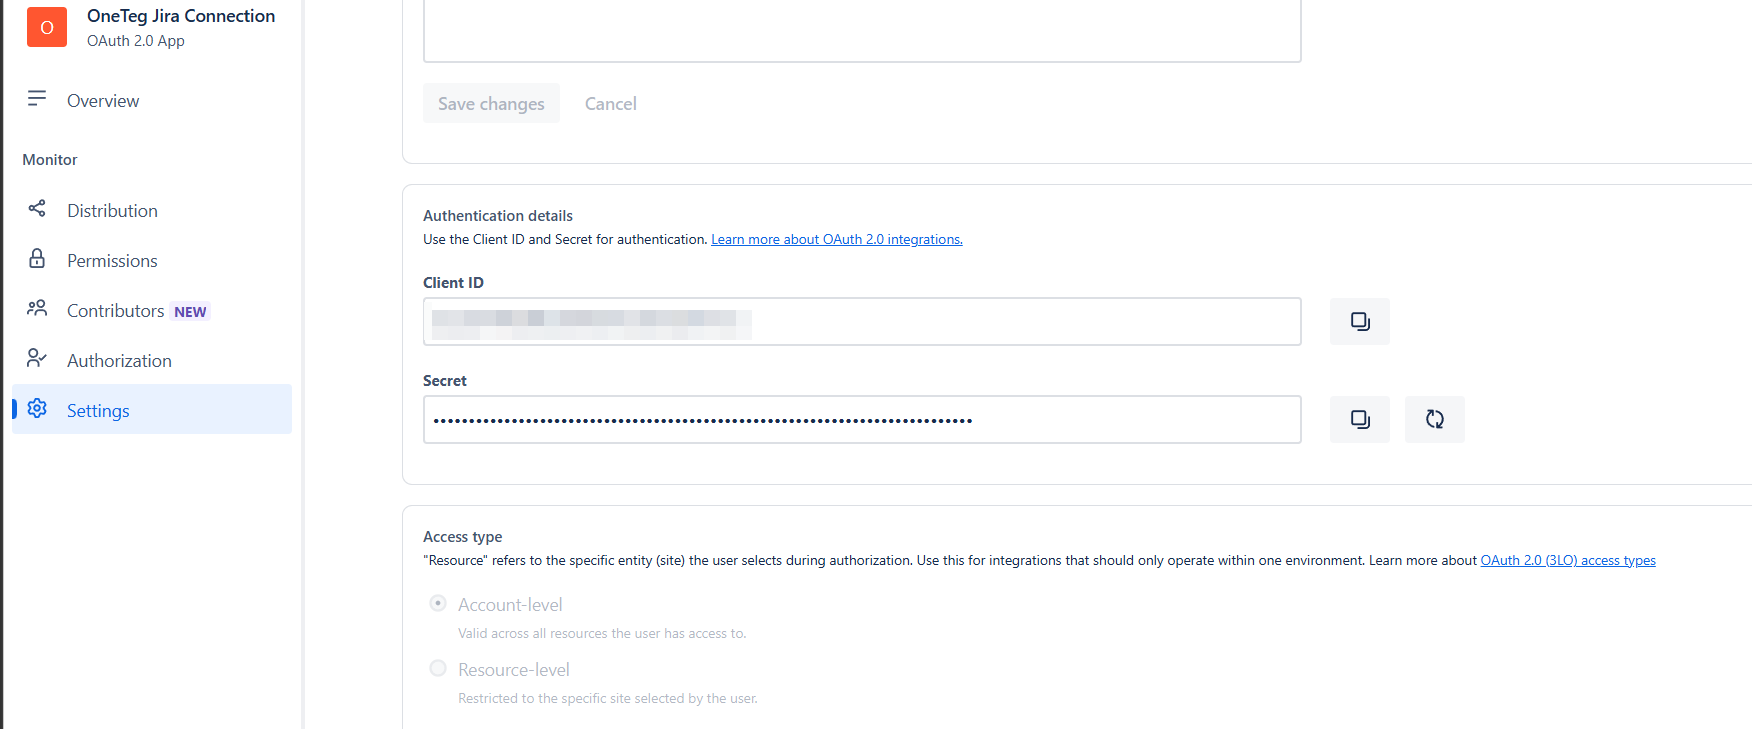
Step 5 - Copy the Client ID and Client Secret
From the app's Settings page, copy the Client ID and Client Secret. You will enter these into OneTeg as the Client ID and Client Secret.
Step 6 - Determine Your Cloud ID
OAuth requests are made against https://api.atlassian.com/ex/jira/{cloudId}/rest/api/3, where {cloudId} identifies your specific Jira site. To find your cloud ID, simply open the following URL in your browser while logged in to your Jira site:
https://{your-domain}.atlassian.net/_edge/tenant_info
The response displays your site's cloudId directly. Use this value as the cloud ID in your Endpoint URL.
Keep your Client Secret confidential. If it is ever exposed, regenerate it from the app's Settings page in the Developer Console and update the value in your OneTeg connection.
3. Connection Settings and Configuration for OneTeg
In OneTeg, navigate to Connections and create a new connection using the Jira Connector. Choose your preferred authentication method below. Note that the Endpoint URL is structured differently for each method.
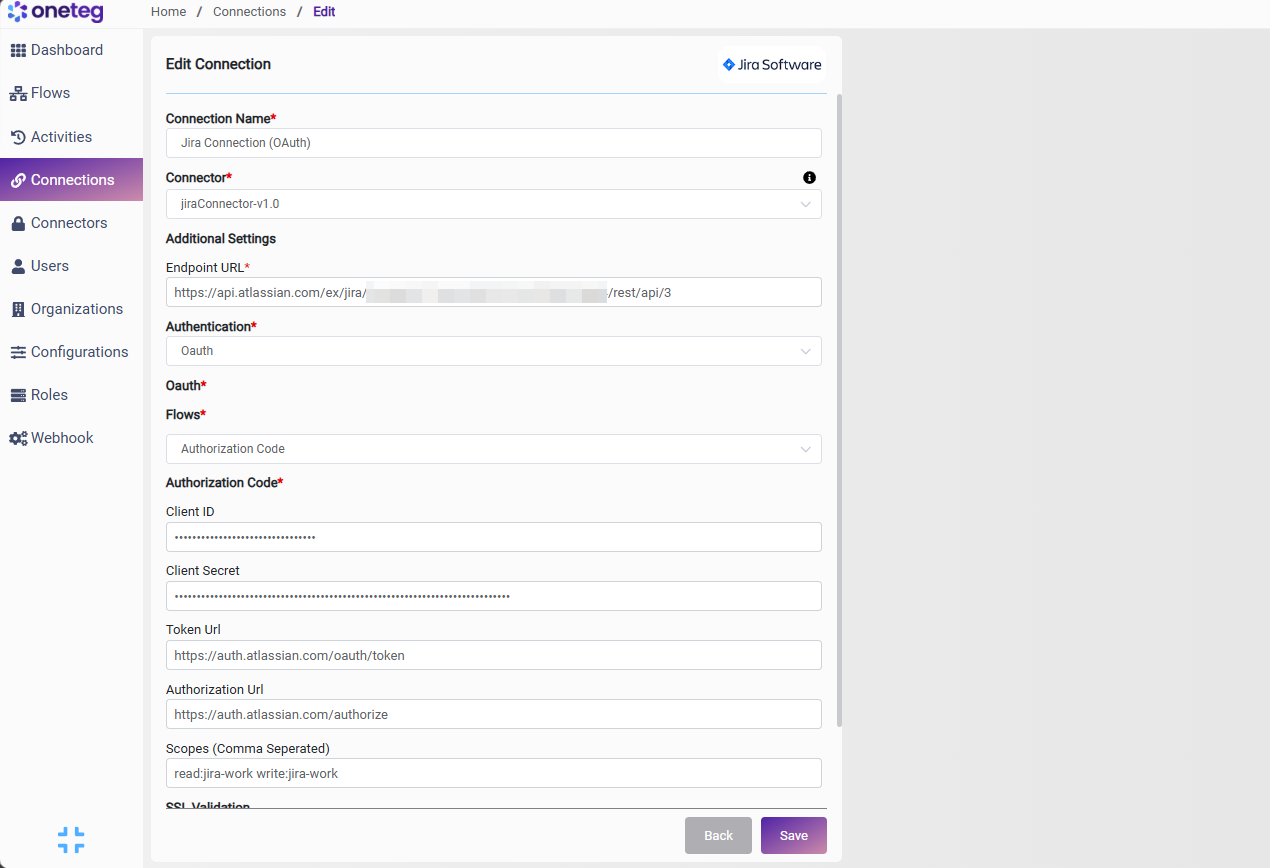
Option 1 — OAuth Authorization Code
Use this option for production integrations requiring scoped, user-delegated access. Requires an Atlassian Developer Console app (Steps 3–6).
|
Settings Parameters |
Value / Sample Value |
Description |
Required (Y/N) |
|
Connection Name |
Jira Connection |
Choose a name for your Connection |
Y |
|
Connector |
jiraConnector-v1.0 |
Auto-populated once the Jira Connector is selected |
Y |
|
Endpoint URL |
https://api.atlassian.com/ex/jira/{your-cloud-id}/rest/api/3 |
The Atlassian API gateway URL for OAuth. Replace {your-cloud-id} with the cloud ID for your site (see Step 6) |
Y |
|
Authentication |
Oauth |
Select Oauth as the authentication method |
Y |
|
Flows |
Authorization Code |
Select Authorization Code as the OAuth flow |
Y |
|
Client ID |
Your Atlassian app Client ID |
The Client ID from your app's Settings page in the Atlassian Developer Console |
Y |
|
Client Secret |
Your Atlassian app Client Secret |
The Client Secret from your app's Settings page in the Atlassian Developer Console |
Y |
|
Token Url |
The Atlassian OAuth token endpoint used to exchange authorization codes for access tokens |
Y |
|
|
Authorization Url |
The Atlassian OAuth authorization endpoint where users grant access |
Y |
|
|
Scopes |
read:jira-work write:jira-work |
Space-delimited list of Jira scopes. Must match the scopes configured on your app in the Developer Console |
Y |
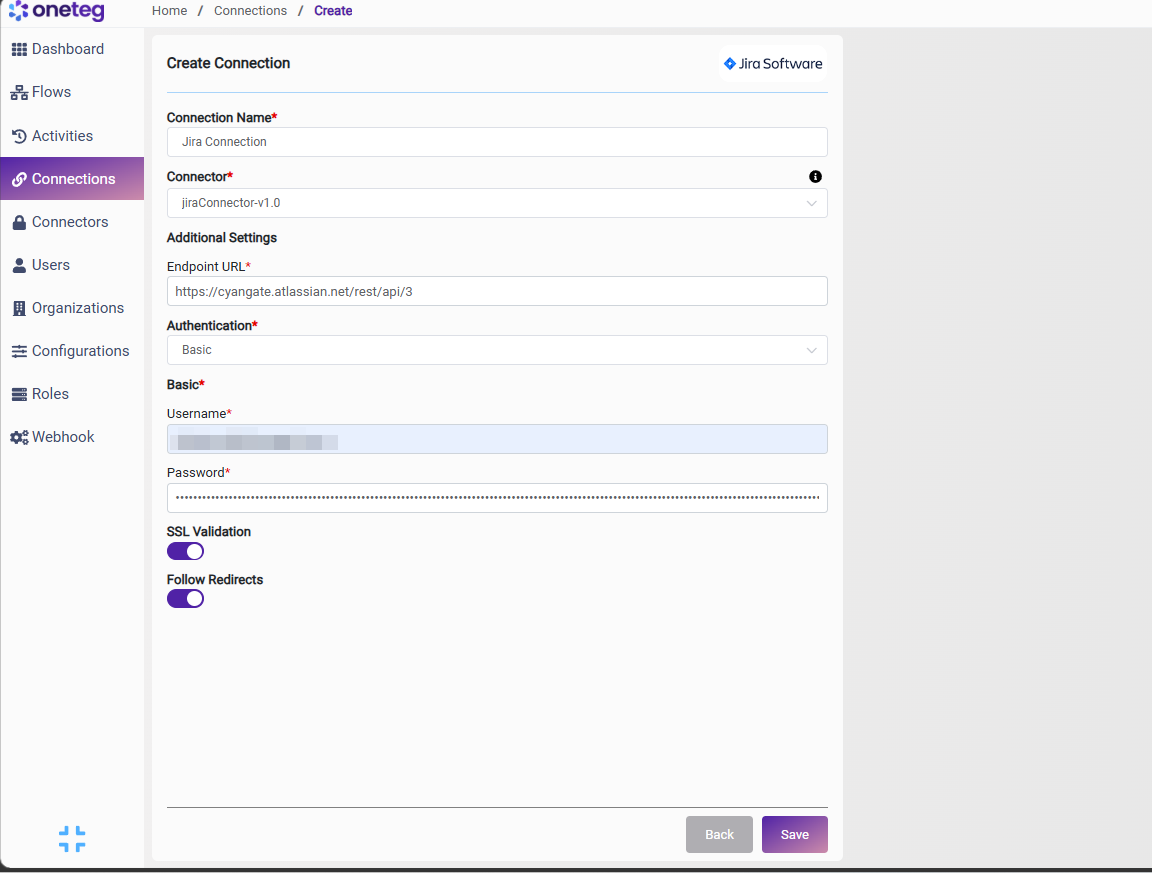
Option 2 — Basic
Use this option for a quick, straightforward connection using an API token (Steps 1–2).
|
Settings Parameters |
Value / Sample Value |
Description |
Required (Y/N) |
|
Connection Name |
Jira Connection |
Choose a name for your Connection |
Y |
|
Connector |
jiraConnector-v1.0 |
Auto-populated once the Jira Connector is selected |
Y |
|
Endpoint URL |
https://{your-domain}.atlassian.net/rest/api/3 |
The base URL of your Jira Cloud site. Replace {your-domain} with your own Jira site domain |
Y |
|
Authentication |
Basic |
Select Basic as the authentication method |
Y |
|
Username |
The email address of your Atlassian account |
Y |
|
|
Password |
Your Atlassian API token |
The API token generated in Section 2 (used in place of your account password) |
Y |
4. Supported Jira Actions and Options
For the full list of supported endpoints, parameters, and options, see the page below: