1. General Information
Google Sheets is a cloud-based spreadsheet application that is part of Google Workspace. It allows individuals and teams to create, edit, and collaborate on spreadsheets in real time from any device. With support for formulas, charts, pivot tables, and a comprehensive REST API, Google Sheets is widely used for data collection, reporting, and lightweight data management across organizations of all sizes.
The OneTeg Google Sheets Connector integrates with the Google Sheets API v4, enabling users to read from and write to spreadsheets directly from OneTeg automation workflows. This connector supports two authentication methods: OAuth Authorization Code for user-delegated access, and Bearer token for direct API access.
OAuth Authorization Code is the recommended authentication method for production integrations. The Bearer token method uses a short-lived Google OAuth 2.0 access token that expires after approximately 1 hour and must be refreshed manually, making it less suitable for long-running automations.
2. Connect Google Sheets to OneTeg
Both authentication methods require a Google Cloud project with the Google Sheets API enabled. Steps 1–3 cover the shared setup. Step 4 onwards covers obtaining OAuth credentials (Client ID and Client Secret) for the recommended OAuth method. Step 7 is optional and covers obtaining a Bearer access token for the alternative method.
Step 1 - Log in to the Google Cloud Console
Navigate to https://console.cloud.google.com and log in with the Google account you use to manage your Google Workspace or Google Sheets.
Step 2 - Create or Select a Project
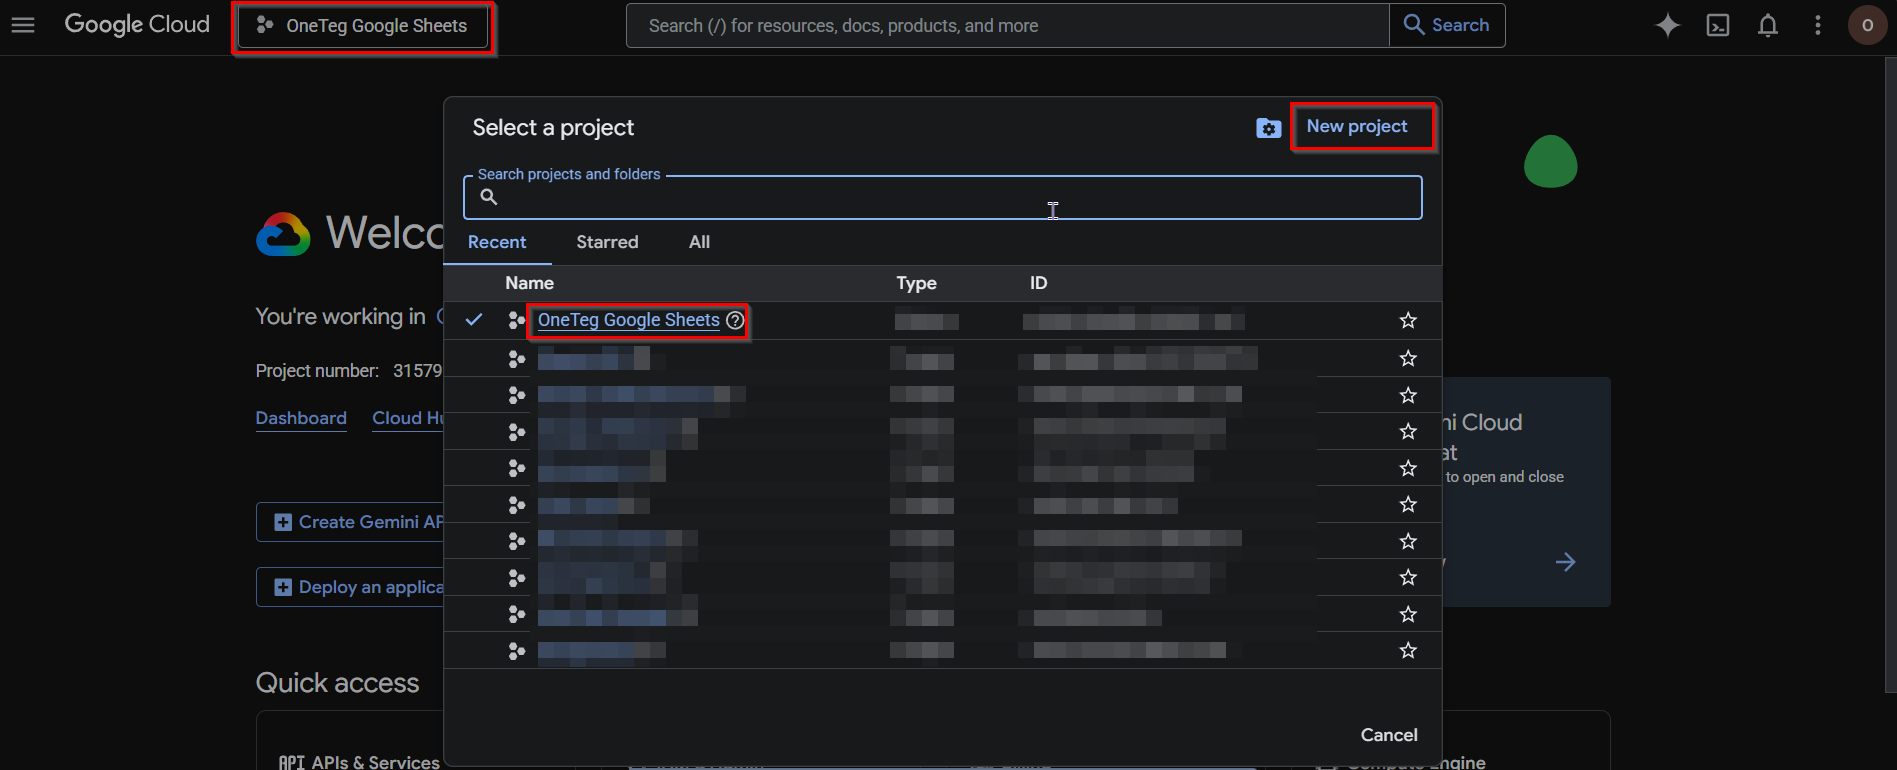
At the top of the Google Cloud Console, you can see the currently active project next to the Google Cloud logo. Click on the project name to open the project selector. Choose an existing project or click New Project, give it a name such as "OneTeg Integration", and click Create.
Step 3 - Enable the Google Sheets API
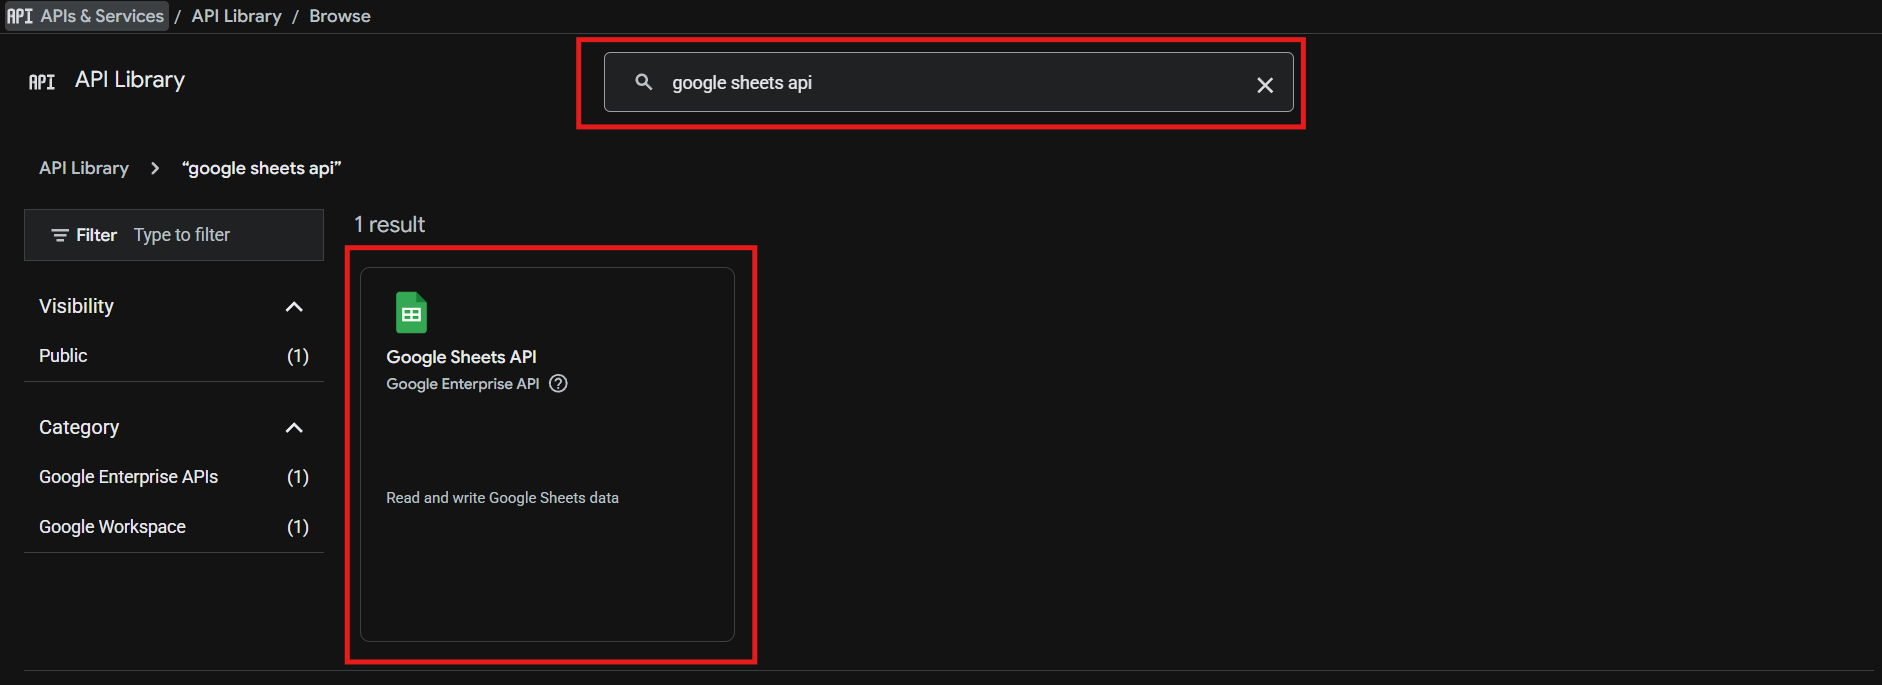
From the left navigation menu, click APIs & Services, then select Library from the submenu. In the search bar, type "Google Sheets API", click on the result, and click Enable.
Step 4 - Configure the OAuth Consent Screen
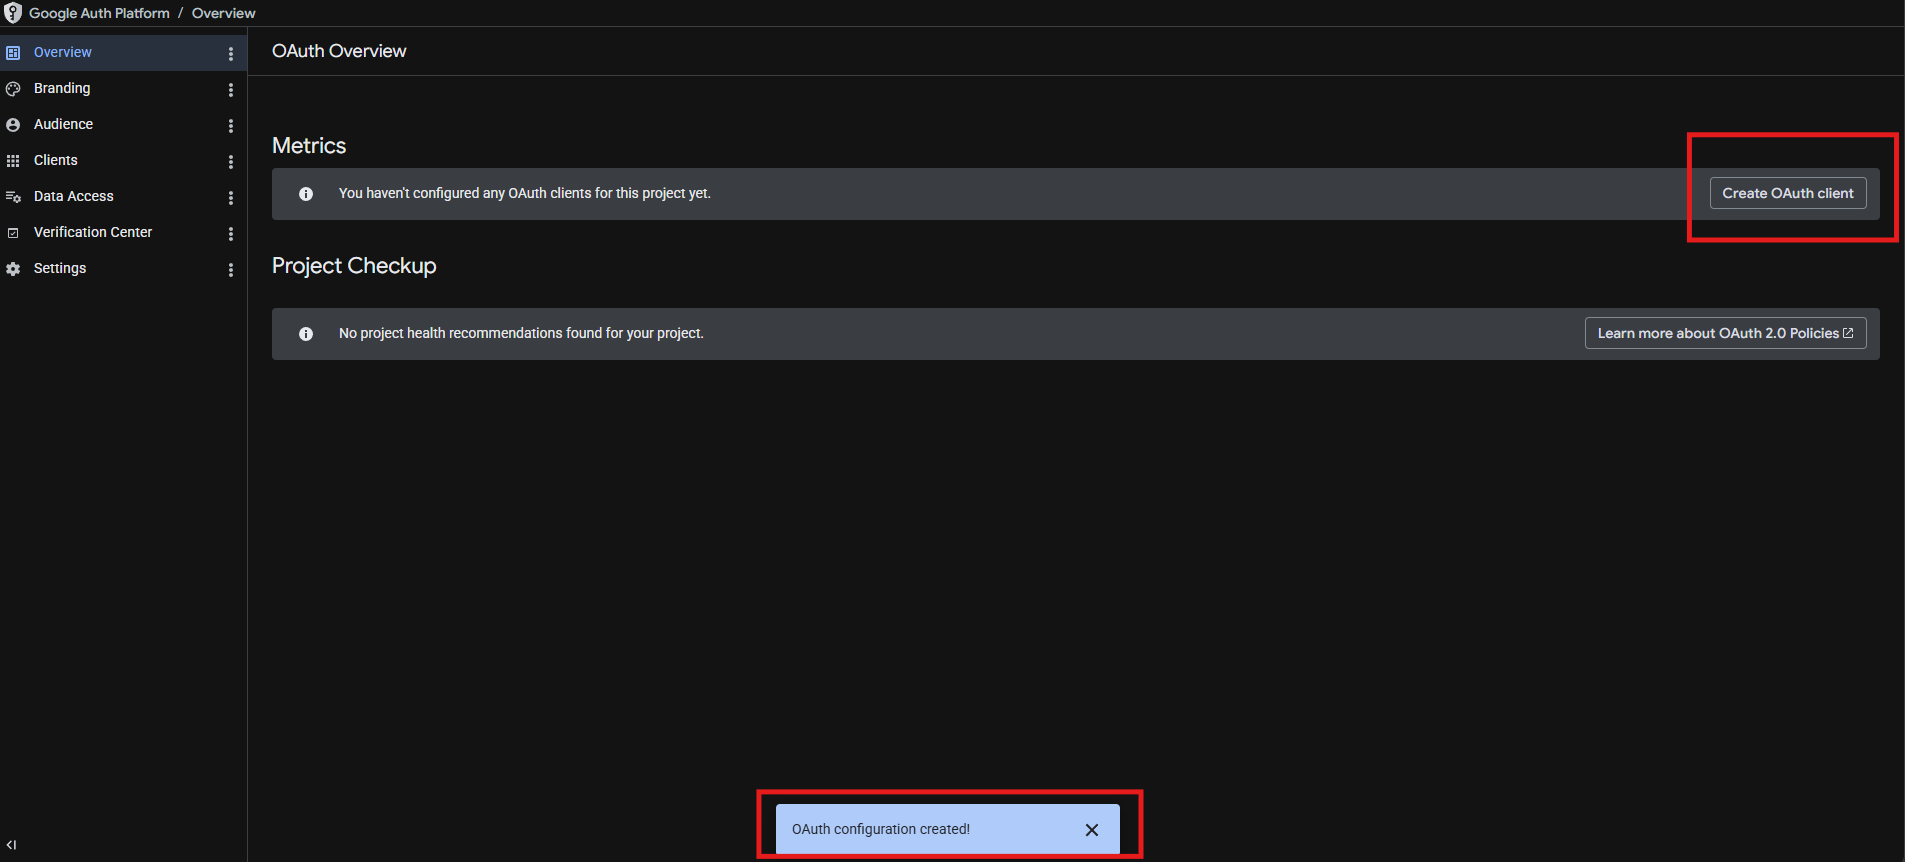
In the left navigation menu, go to Google Auth Platform → Branding. Click Create branding. Fill in the required App name and User support email under App Information, then click Next. Complete the Audience and Contact Information steps, then click Create on the Finish screen.
Step 5 - Create OAuth 2.0 Credentials
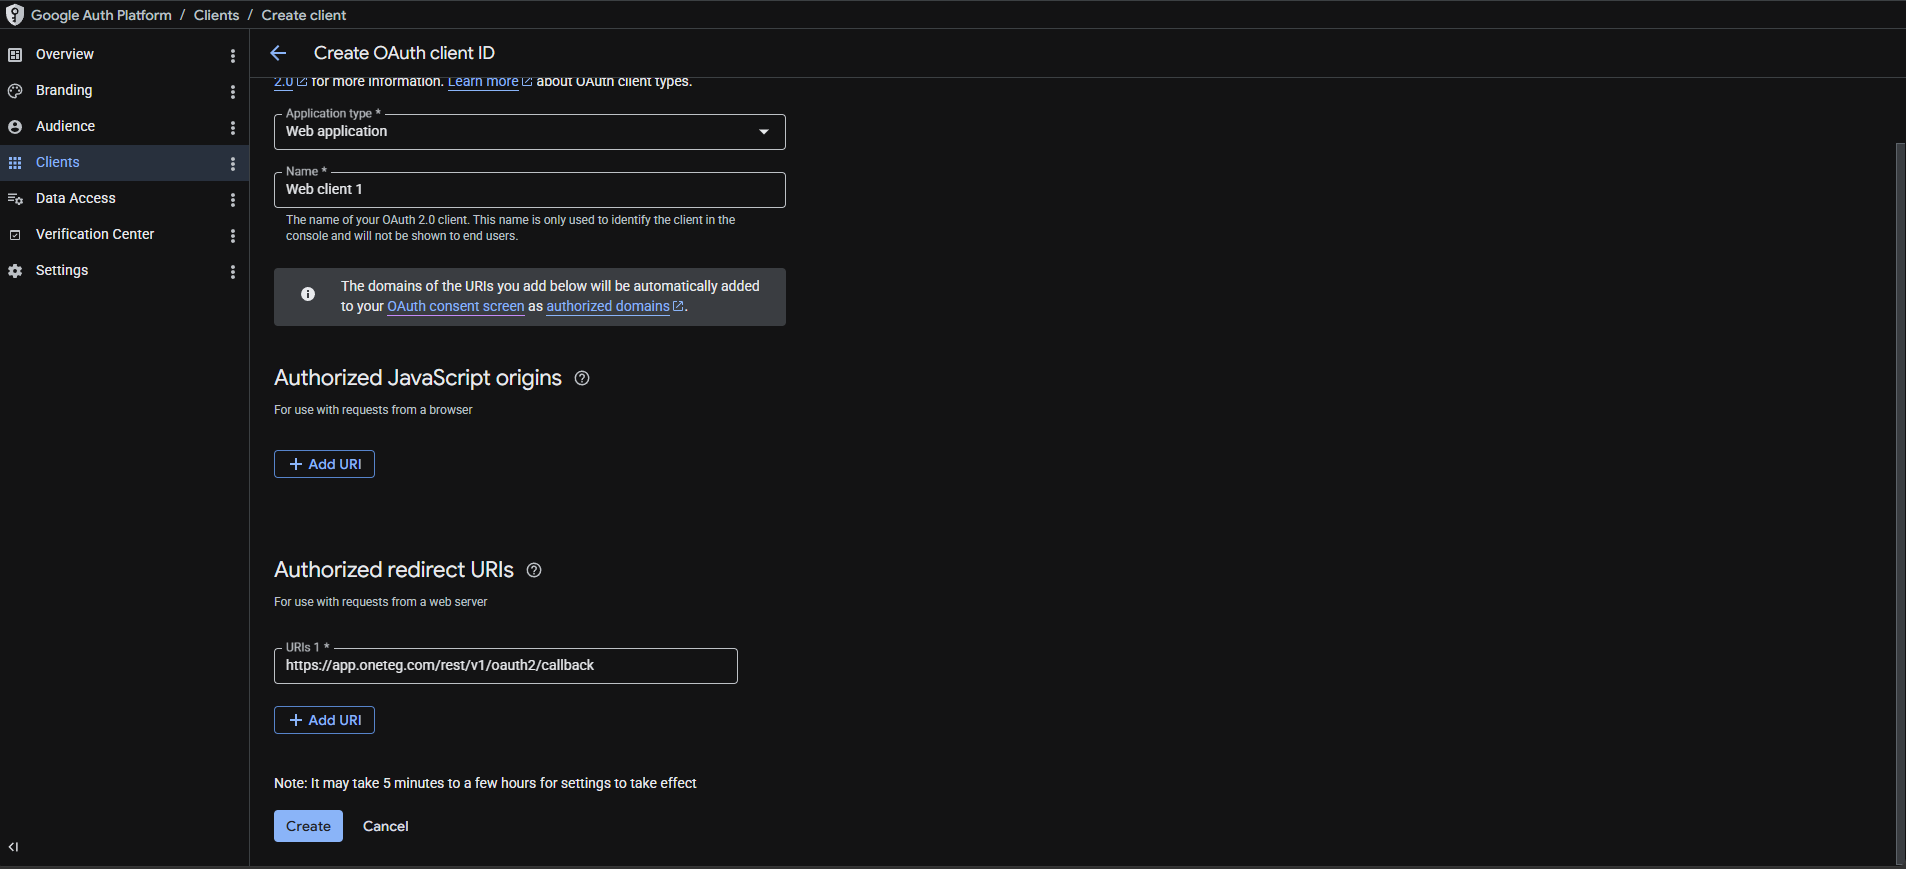
Go to APIs & Services → Credentials and click Create Credentials → OAuth client ID. Select Web application as the application type and give it a name. Under Authorized redirect URIs, add the OneTeg OAuth callback URL:
https://app.oneteg.com/rest/v1/oauth2/callback
Click Create to generate the credentials.
Step 6 - Copy the Client ID and Client Secret
After creation, a dialog displays your Client ID and Client Secret. Copy both values — you will enter them into OneTeg in the next step. You can also retrieve them later from APIs & Services → Credentials by clicking on your OAuth client.

Keep your Client Secret confidential. If it is ever exposed, regenerate it from APIs & Services → Credentials and update the value in your OneTeg connection.
Step 7 (Optional) - Obtain a Bearer Access Token
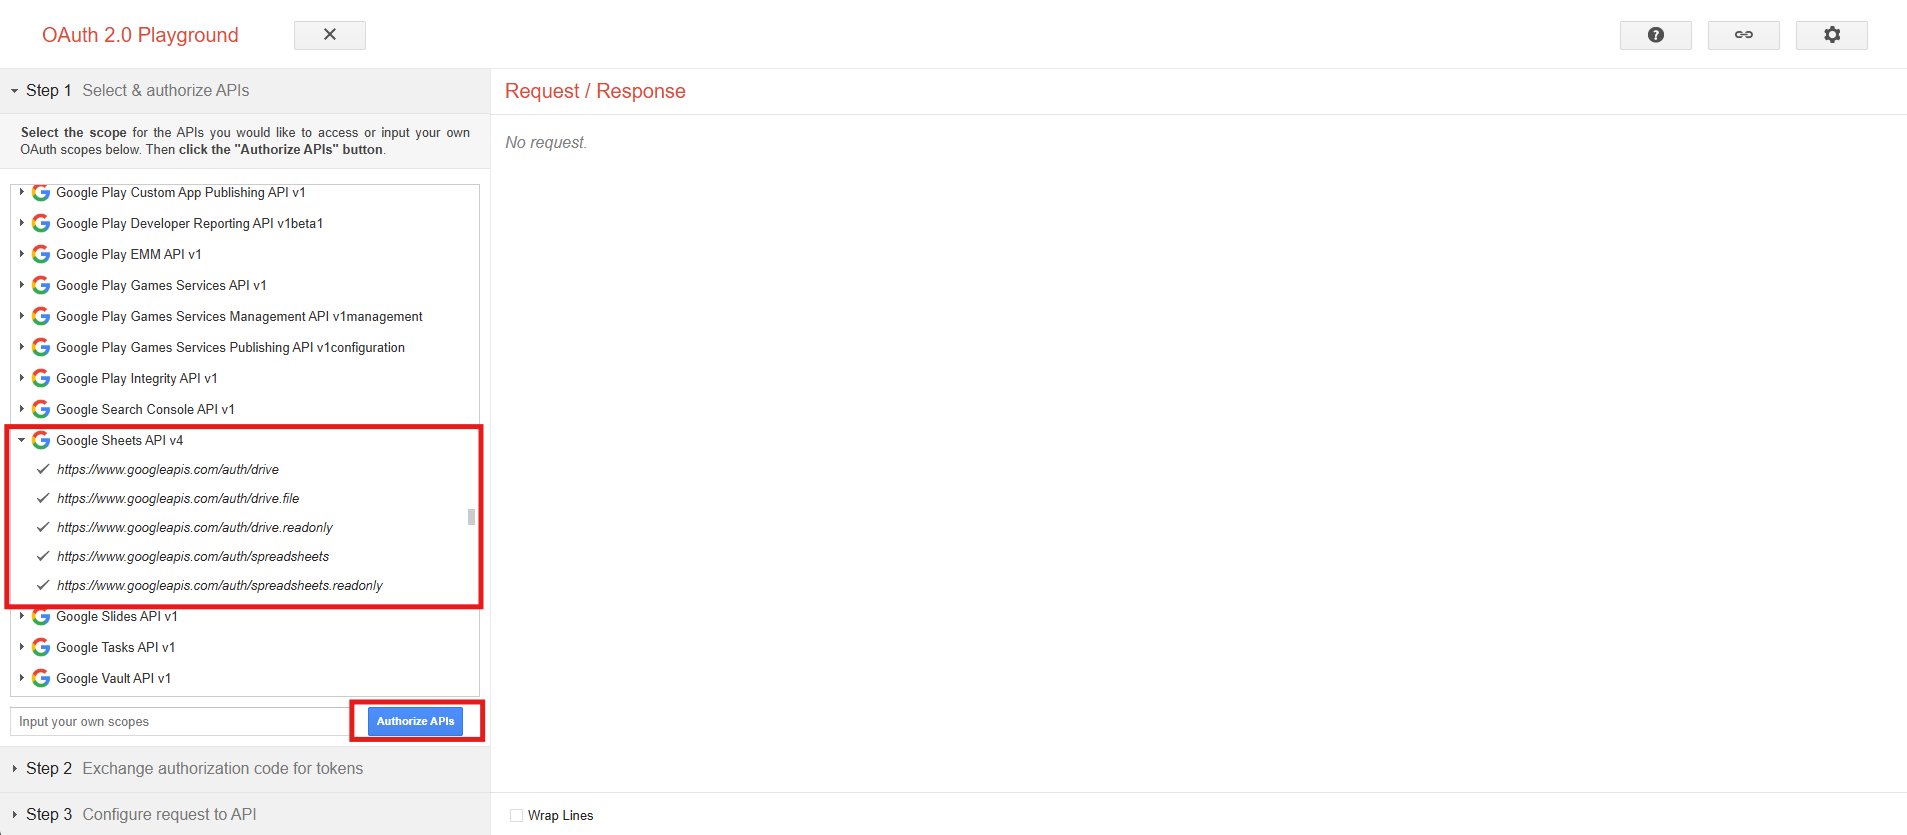
If you prefer to use the Bearer authentication method, you will need a valid Google OAuth 2.0 access token for the Google Sheets API. You can obtain one using the Google OAuth 2.0 Playground at https://developers.google.com/oauthplayground .
In the playground, select the Google Sheets API scope (https://www.googleapis.com/auth/spreadsheets), authorize your account, and exchange the authorization code for an access token. Copy the access token value.
Note that Bearer access tokens expire after approximately 1 hour. You will need to manually obtain a new token and update it in OneTeg when it expires, making this method less suitable for long-running automations.
3. Connection Settings and Configuration for OneTeg
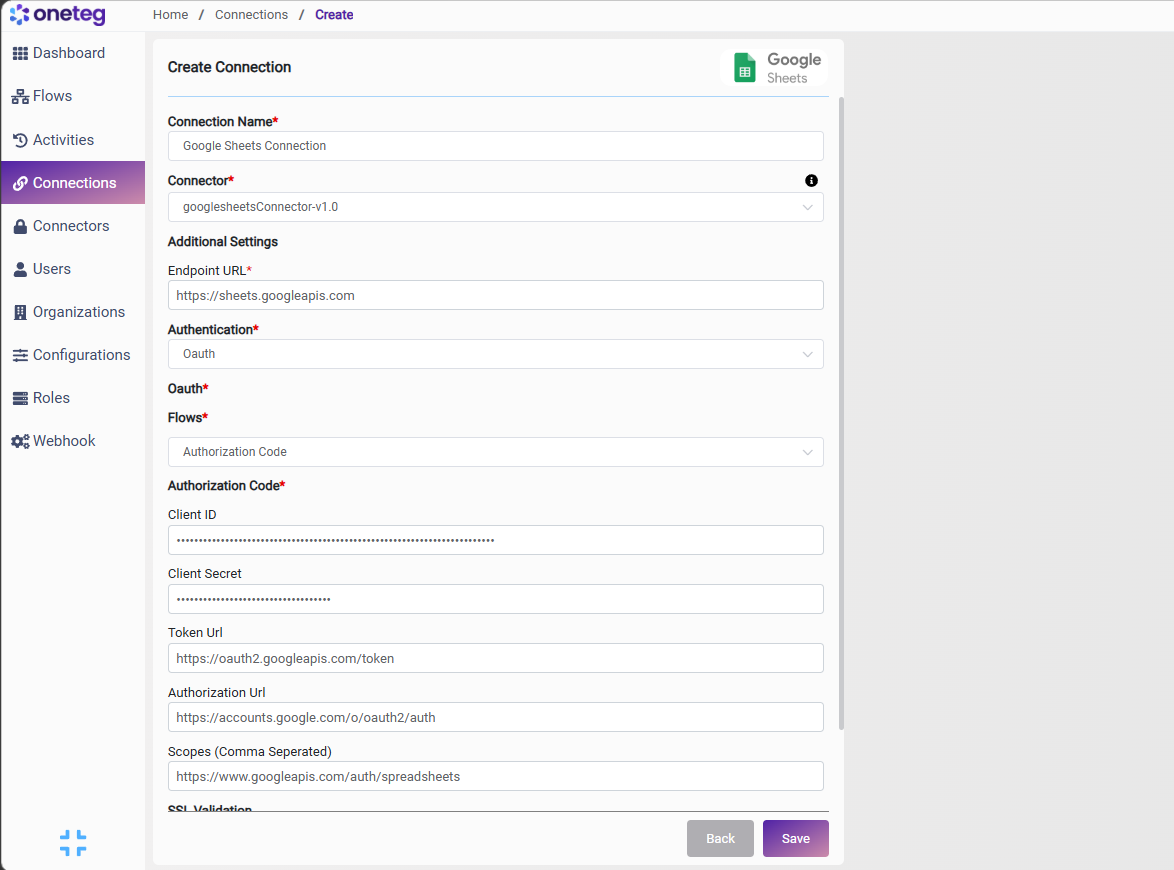
In OneTeg, navigate to Connections and create a new connection using the Google Sheets Connector. Choose your preferred authentication method below.
Option 1 — OAuth Authorization Code
Use this option for production integrations. Requires OAuth 2.0 credentials from Google Cloud Console (Steps 1–6).
|
Settings Parameters |
Value / Sample Value |
Description |
Required (Y/N) |
|
Connection Name |
Google Sheets Connection |
Choose a name for your Connection |
Y |
|
Connector |
googlesheetsConnector-v1.0 |
Auto-populated once the Google Sheets Connector is selected |
Y |
|
Endpoint URL |
The base URL of the Google Sheets REST API v4 |
Y |
|
|
Authentication |
Oauth |
Select Oauth as the authentication method |
Y |
|
Flows |
Authorization Code |
Select Authorization Code as the OAuth flow |
Y |
|
Client ID |
Your Google OAuth Client ID |
The Client ID from your OAuth 2.0 credentials in the Google Cloud Console |
Y |
|
Client Secret |
Your Google OAuth Client Secret |
The Client Secret from your OAuth 2.0 credentials in the Google Cloud Console |
Y |
|
Token URL |
The Google OAuth 2.0 token endpoint used to exchange authorization codes for access tokens |
Y |
|
|
Authorization URL |
The Google OAuth 2.0 authorization endpoint where users grant access |
Y |
|
|
Scopes |
The Google Sheets API scope granting read and write access to spreadsheets. Use the read-only scope if write access is not required: https://www.googleapis.com/auth/spreadsheets.readonly |
Y |
Option 2 — Bearer Token
Use this option for quick testing. Requires a short-lived Google OAuth 2.0 access token (Step 7).
|
Settings Parameters |
Value / Sample Value |
Description |
Required (Y/N) |
|
Connection Name |
Google Sheets Connection |
Choose a name for your Connection |
Y |
|
Connector |
googlesheetsConnector-v1.0 |
Auto-populated once the Google Sheets Connector is selected |
Y |
|
Endpoint URL |
The base URL of the Google Sheets REST API v4 |
Y |
|
|
Authentication |
Bearer |
Select Bearer as the authentication method |
Y |
|
Token |
Your Google OAuth 2.0 access token |
A valid Google OAuth 2.0 access token with the Google Sheets API scope. Obtain this via the Google OAuth 2.0 Playground (see Step 7). Note that tokens expire after approximately 1 hour — you will need to manually update the token when it expires, making this method less suitable for long-running automations. |
Y |
4. Supported Google Sheets Actions and Options
For the full list of supported endpoints, parameters, and options, see the page below: