1. General Information
Veeva Vault is a cloud-based enterprise content management platform purpose-built for life sciences. It serves as the system of record for regulated documents, digital assets, clinical data, quality processes, and commercial content across the product lifecycle. Organizations use Veeva Vault to manage submissions, SOPs, promotional materials, medical content, and more, all within a fully audited, 21 CFR Part 11-compliant environment.
The OneTeg Veeva Vault Connector integrates with the Veeva Vault REST API v23.1 and enables users to build automated workflows that interact with Vault objects, documents, and metadata, streamlining content operations between Veeva Vault and other enterprise systems connected through OneTeg.
2. Connect Veeva Vault to OneTeg
The Veeva Vault Connector uses a custom username/password authentication flow. Vault issues a session ID upon successful authentication, which is then used to authorize subsequent API calls. No OAuth app registration is required. You authenticate directly with your Vault user credentials.
The user account used for the connector should be a dedicated integration/service user in Veeva Vault with the minimum required permissions for the actions your flows will perform. Avoid using personal admin accounts.
Step 1 - Identify Your Vauld DNS
Your Vault DNS is the subdomain of your Veeva Vault environment. Log in to your Vault and look at the URL in your browser. It will follow the pattern: “https://your-vault.veevavault.com”. The your-vault portion is your Vault DNS and is required to construct the Endpoint URL, auth Endpoint, and Session Validity URL in OneTeg.
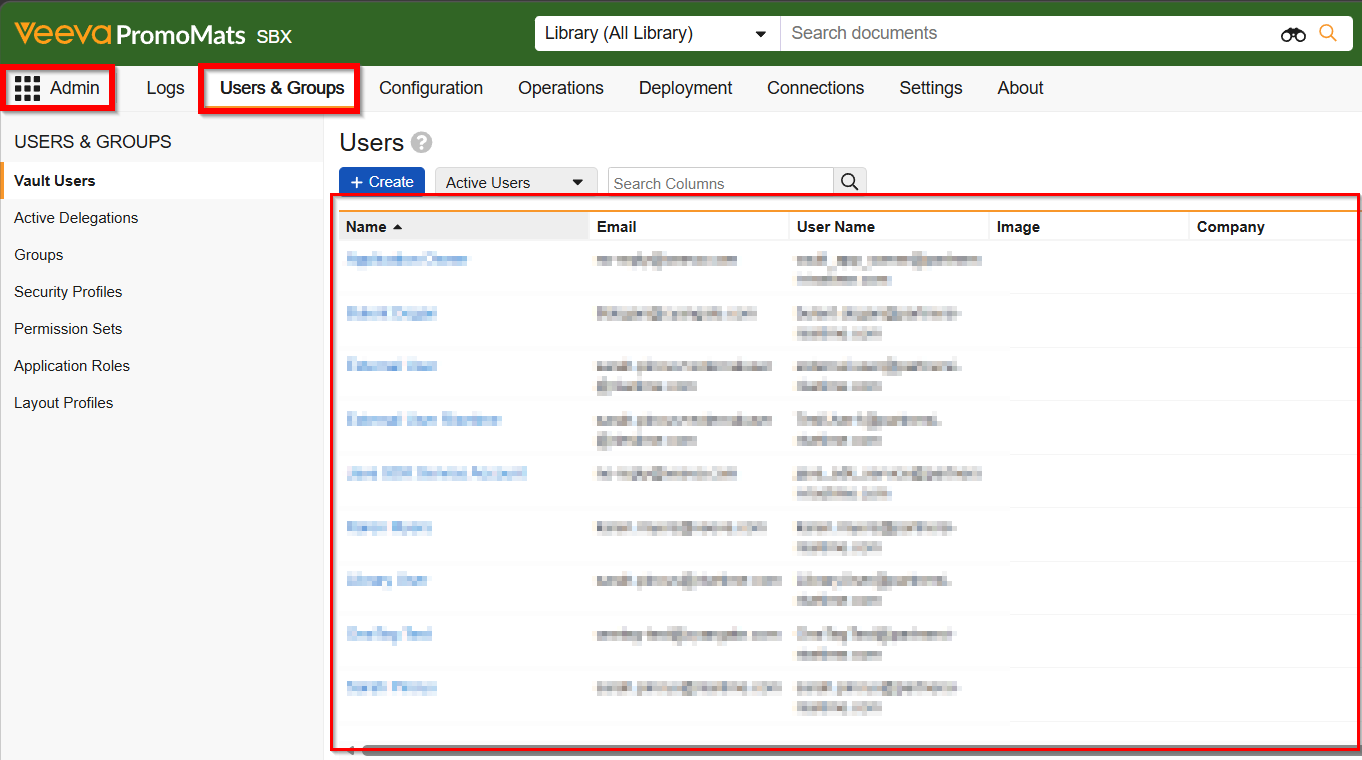
Step 2 - Create or Identify a Dedicated Integration User
In Veeva Vault, navigate to Admin → Users & Groups → Users and create a dedicated user account for the OneTeg integration (e.g., oneteg-integration@yourcompany.com). Assign the user a security profile and permission set that covers only the Vault objects and document types your flows require. Note the username and password — these will be entered in the OneTeg connection form.
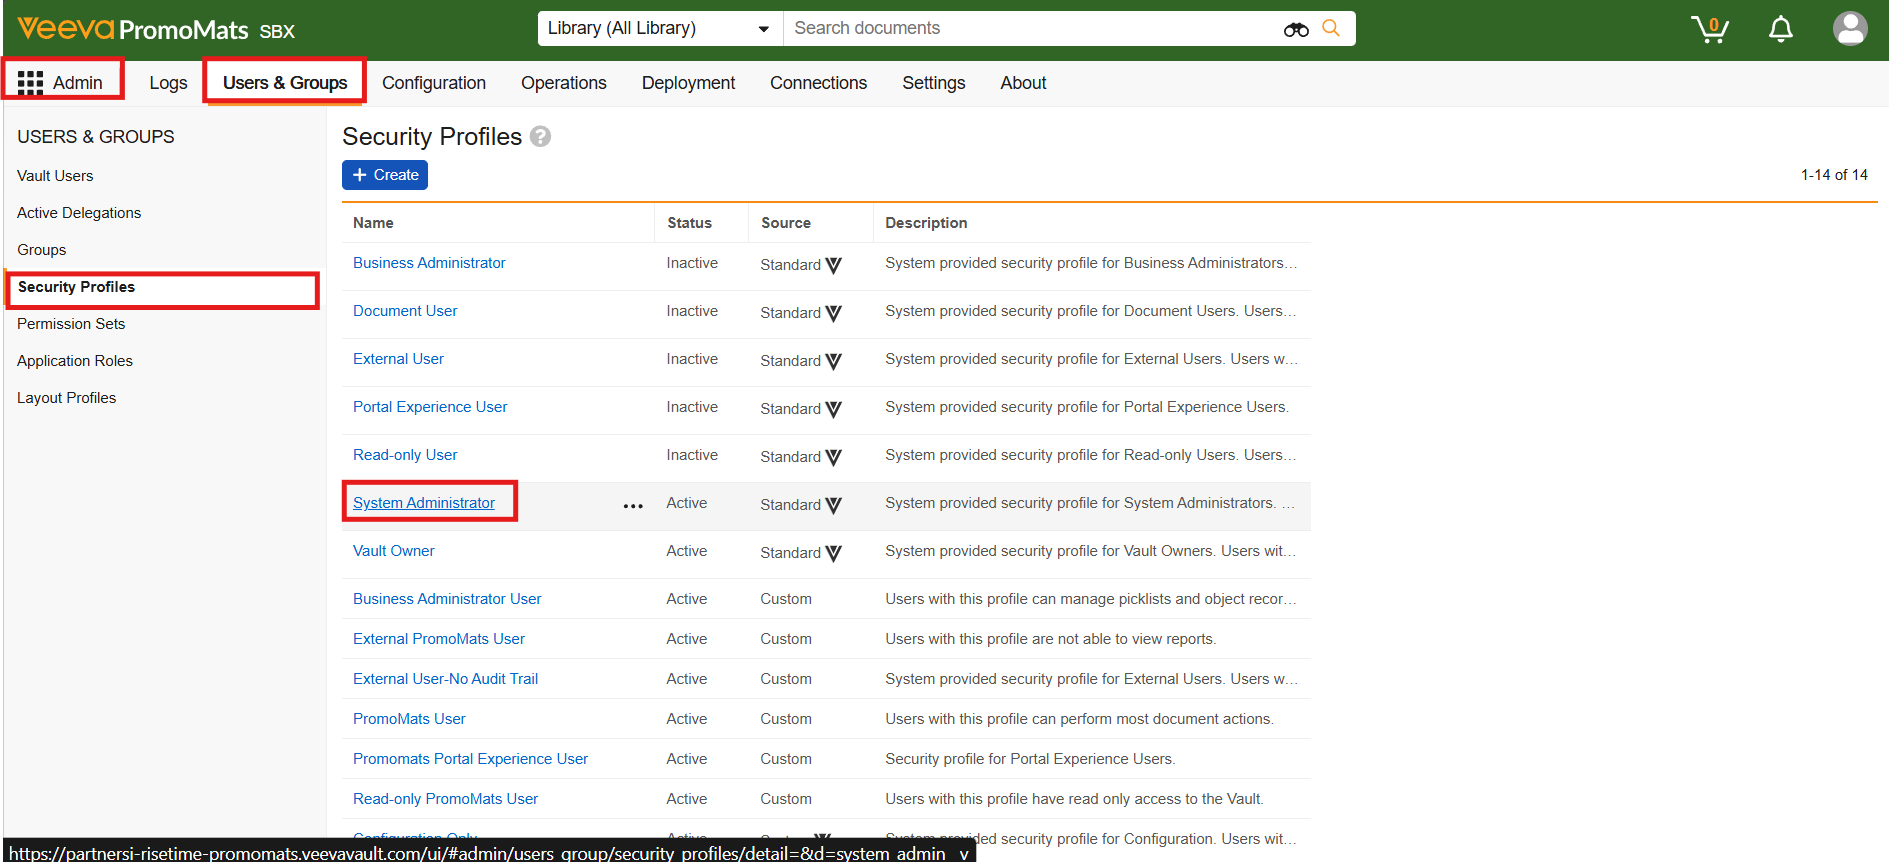
Step 3 - Verify API Access is Enabled
Ensure that API access is enabled for the integration user's security profile. In Veeva Vault, navigate to Admin → Users & Groups → Security Profiles, open the relevant profile, and confirm that the API Access permission is granted. Without this, the connector will not be able to authenticate.
3. Connection Settings and Configuration for OneTeg
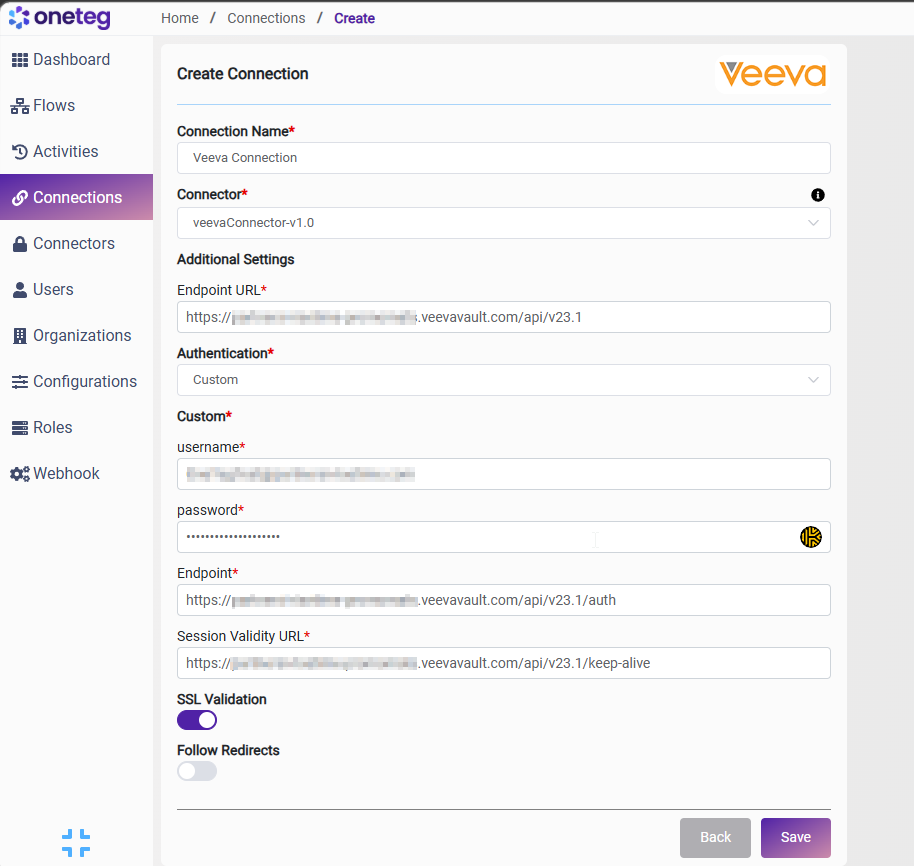
In OneTeg, navigate to Connections and create a new connection using the Veeva Vault Connector. The connector supports two authentication methods: Custom (username/password) and Bearer Token. Choose the one that best fits your setup.
Option 1 - Custom Authentication (Username/Password)
|
Settings Parameters |
Value / Sample Value |
Description |
Required (Y/N) |
|
Connection Name |
Veeva Connection |
Choose a name for your Connection |
Y |
|
Connector |
veevaConnector-v1.0 |
Auto-populated once the Veeva Vault Connector is selected |
Y |
|
Endpoint URL |
Base URL of your Veeva Vault REST API. Replace your-vault with your Vault DNS. The API version (v23.1) is appended to the Vault base URL |
Y |
|
|
Authentication |
Custom |
Authentication method — select Custom from the dropdown. Veeva Vault uses its own session-based auth rather than a standard OAuth flow |
Y |
|
Username |
The username (email address) of the dedicated Veeva Vault integration user created in Admin → Users & Groups → Users |
Y |
|
|
Password |
Vault user password |
The password of the Veeva Vault integration user. Veeva Vault may enforce password expiry — ensure the password is kept up to date to avoid connection failures |
Y |
|
Endpoint |
The Veeva Vault authentication endpoint. OneTeg POSTs the username and password to this URL to obtain a session ID. Replace your-vault with your Vault DNS |
Y |
|
|
Session Validity URL |
The Veeva Vault session keepalive endpoint. OneTeg calls this URL periodically to validate and extend the active session. Replace your-vault with your Vault DNS |
Y |
|
|
SSL Validation |
On (toggle) |
Enables SSL certificate validation on all requests to Veeva Vault. Recommended to keep enabled in production environments |
|
|
Follow Redirects |
On (toggle) |
Allows the connector to automatically follow HTTP redirects returned by the Veeva Vault API |
|
Option 2 - Bearer Token Authentication
|
Settings Parameters |
Value / Sample Value |
Description |
Required (Y/N) |
|
Connection Name |
Veeva Connection |
Choose a name for your Connection |
Y |
|
Connector |
veevaConnector-v1.0 |
Auto-populated once the Veeva Vault Connector is selected |
Y |
|
Endpoint URL |
Base URL of your Veeva Vault REST API. Replace your-vault with your Vault DNS. The API version (v23.1) is appended to the Vault base URL |
Y |
|
|
Authentication |
Bearer |
Select Bearer from the dropdown |
Y |
|
token |
Veeva Vault Session ID |
A valid Veeva Vault session ID obtained by calling the /auth endpoint manually or via an external process. This value will need to be updated each time the session expires |
Y |
|
SSL Validation |
On (toggle) |
Enables SSL certificate validation on all requests to Veeva Vault. Recommended to keep enabled in production environments |
|
|
Follow Redirects |
On (toggle) |
Allows the connector to automatically follow HTTP redirects returned by the Veeva Vault API |
|
4. Supported Veeva Vault Actions and Options
For the full list of supported endpoints, parameters, and options, see the page below: