
1. General Information
Airtable is a cloud-based low-code platform that combines the simplicity of a spreadsheet with the structure of a database. Data is organized into bases, each containing tables, records, and fields, and used for project tracking, content planning, inventory, and many other workflows. The Airtable Web API provides programmatic access to this data.
The OneTeg Airtable Connector integrates with the Airtable Web API, enabling users to manage bases and records directly from OneTeg automation workflows. This connector authenticates using a Bearer token — an Airtable personal access token.
Airtable authenticates with a personal access token (PAT) sent as a Bearer token in the Authorization header. Legacy Airtable API keys were retired on February 1, 2024, so PATs are the current method. A PAT is scoped in two dimensions — scopes (what it can do) and base/workspace access (which data it can reach) — so grant both when creating it, or requests may return 401/403 errors.
2. Connect Airtable to OneTeg
The connector authenticates with an Airtable personal access token. Follow the steps below to create the token you will enter into OneTeg.
Step 1 - Open the Developer Hub
In Airtable, click your profile icon in the top-right corner and select Developer Hub, then click Personal access tokens in the sidebar. You can also go there directly at airtable.com/create/tokens.
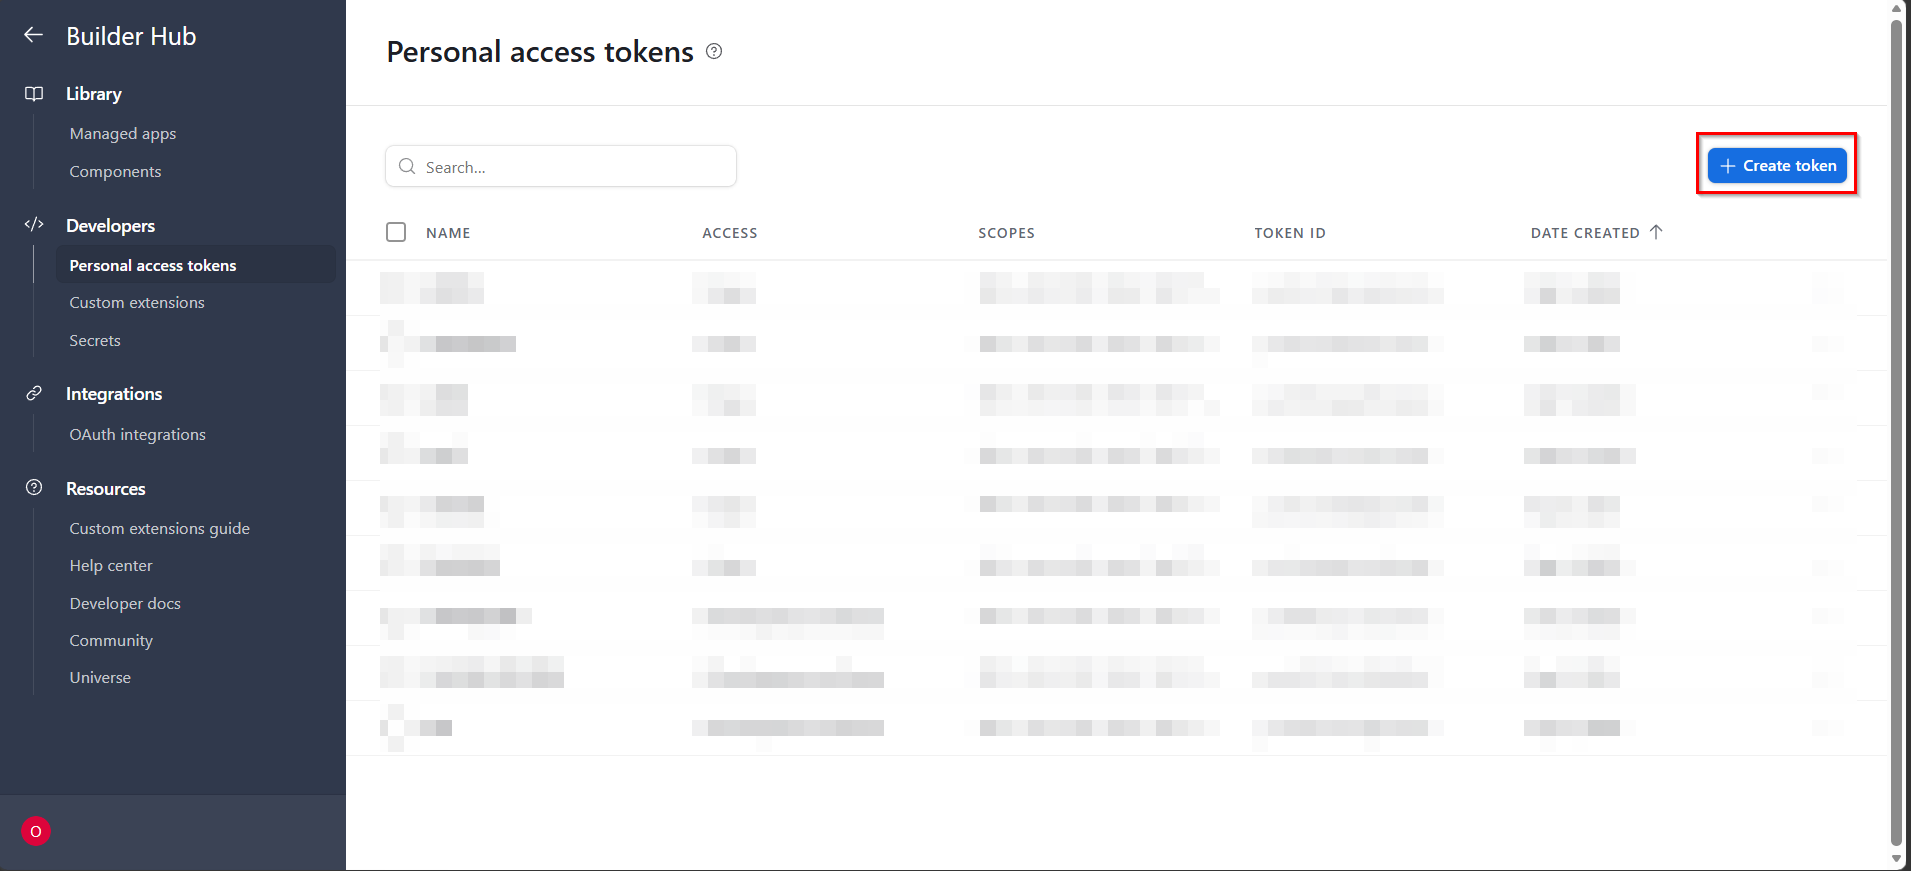
Step 2 - Create a Personal Access Token
Click Create new token and give it a descriptive name. Add the scopes your integration needs (for example data.records:read, data.records:write, and schema.bases:read), and under Access, add the bases or workspaces the token should be able to reach.
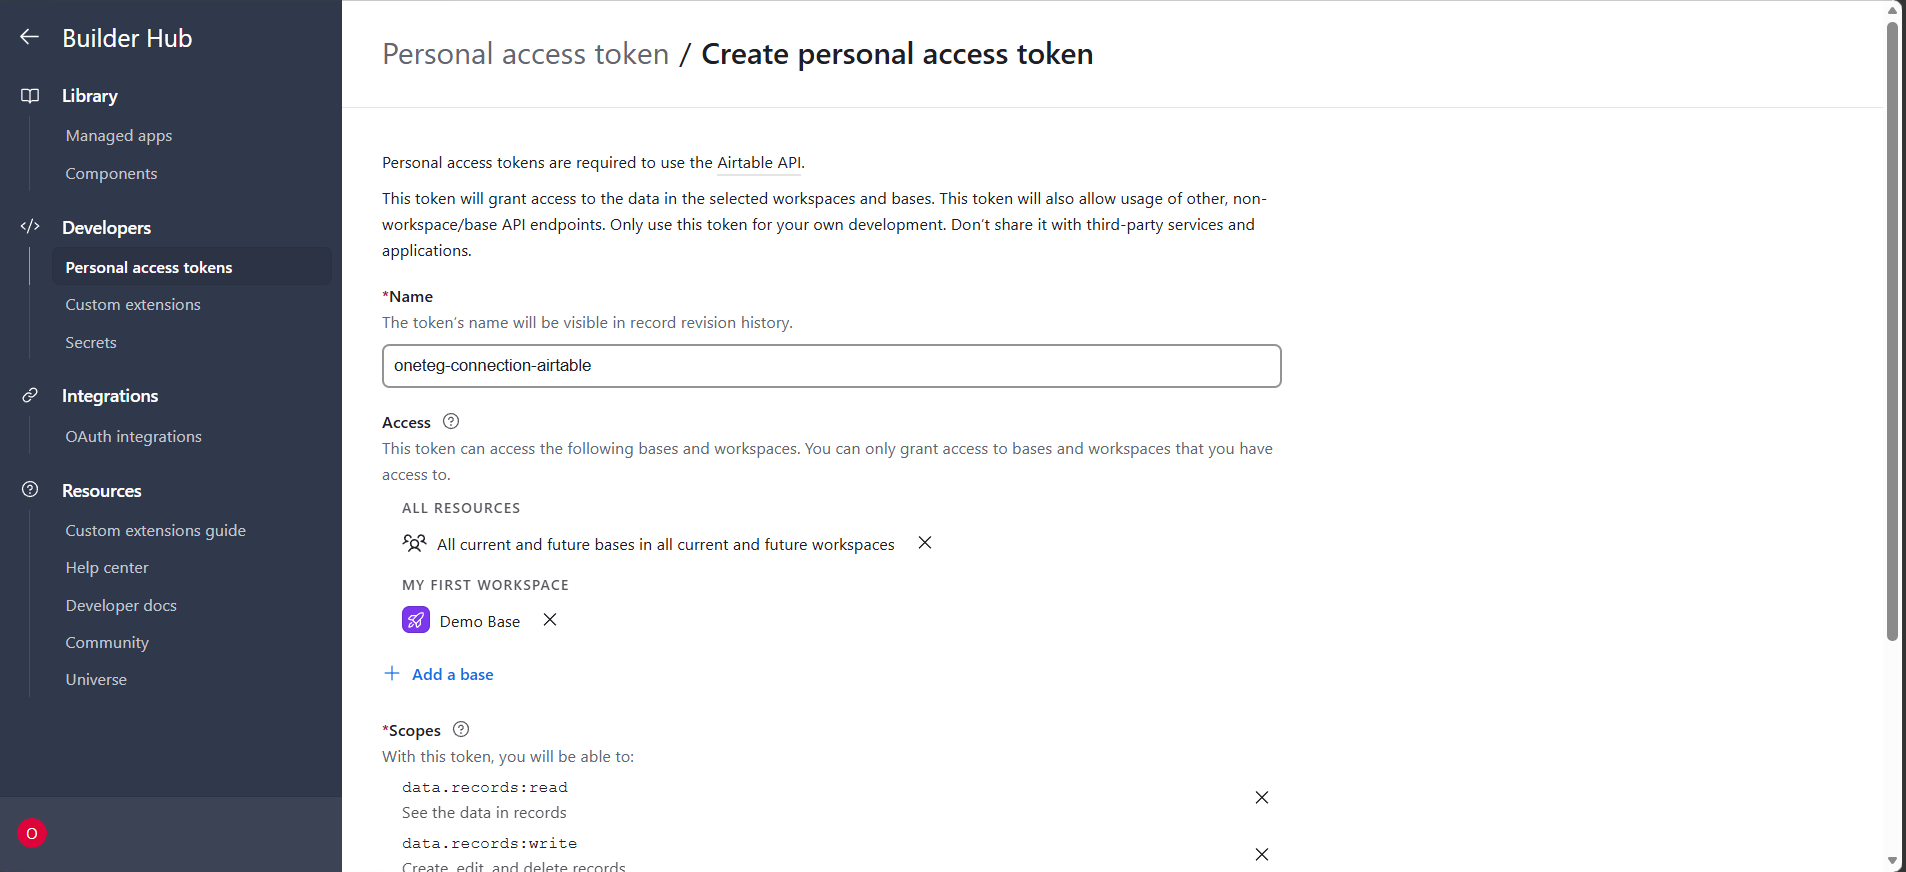
Step 3 - Copy the Token
Click Create token and copy the token — it begins with pat. You will paste it into OneTeg in the next step.
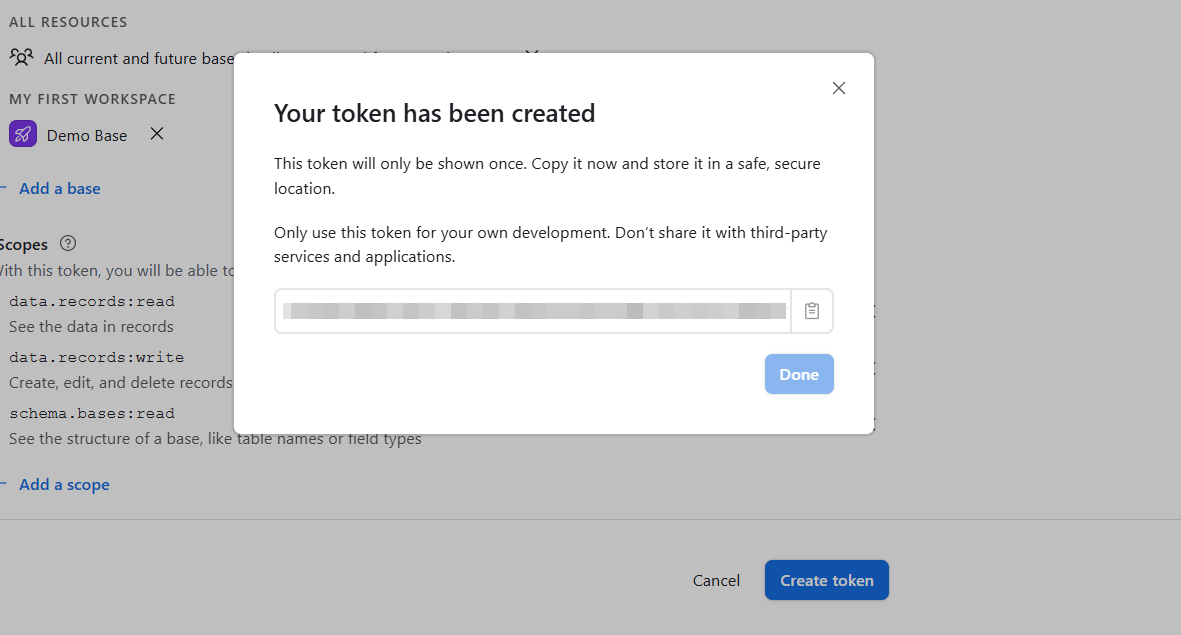
The personal access token is shown only once, at creation. Copy it immediately and store it securely; if it is lost, revoke it and create a new one.
3. Connection Settings and Configuration for OneTeg
In OneTeg, navigate to Connections and create a new connection using the Airtable Connector. Enter the settings below.
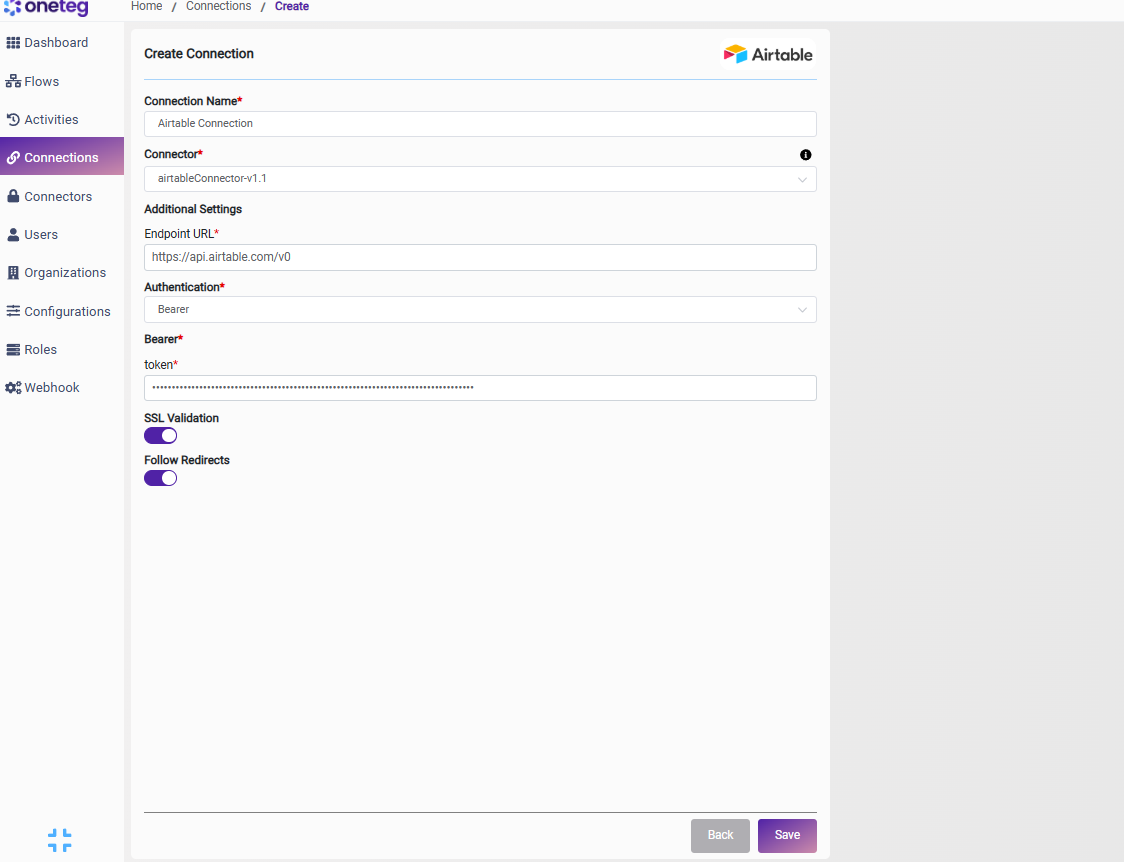
|
Settings Parameters |
Value / Sample Value |
Description |
Required (Y/N) |
|
Connection Name |
Airtable Connection |
Choose a name for your Connection |
Y |
|
Connector |
airtableConnector-v1.1 |
Auto-populated once the Airtable Connector is selected |
Y |
|
Endpoint URL |
The base URL of the Airtable Web API |
Y |
|
|
Authentication |
Bearer |
Select Bearer as the authentication method |
Y |
|
token |
Your Airtable personal access token (pat…) |
Your Airtable personal access token, sent as a Bearer token in the Authorization header. Created in the Airtable Developer Hub |
Y |
4. Supported Airtable Actions and Options
For the full list of supported endpoints, parameters, and options, see the page below: