1. General Information
HubSpot is an all-in-one customer platform offering integrated tools for marketing, sales, customer service, and content management. Built around a central CRM, HubSpot enables organizations to manage customer relationships, run marketing campaigns, and build and manage digital content — all from a single platform with a unified REST API.
This document covers three OneTeg HubSpot Connectors, each targeting a different area of the HubSpot platform:
HubSpot CMS Connector (hubspotcmsConnector-v1.0)
Integrates with HubSpot's Content Management System to manage website pages, blog posts, landing pages, domains, and other CMS objects.
HubSpot CRM Connector (hubspotcrmConnector-v1.0)
Integrates with HubSpot CRM to read and manage contacts, companies, deals, and other CRM objects and associations.
HubSpot Marketing Connector (hubspotmarketingConnector-v1.0)
Integrates with HubSpot Marketing Hub to manage campaigns, track campaign revenue, and automate marketing workflows.
All three connectors share the same OAuth Authorization Code authentication flow and HubSpot app setup process. The only differences are the connector selected and the OAuth scopes required.
2. Connect HubSpot to OneTeg
All three HubSpot Connectors authenticate using OAuth Authorization Code. You will need to create a HubSpot app in the HubSpot Developer Portal to obtain a Client ID and Client Secret, and configure the required OAuth scopes for your connector. Follow the steps below.
Step 1 - Log in to the HubSpot Developer Portal
Navigate to https://developers.hubspot.com and log in with your HubSpot account. If you do not have a developer account, create one for free.
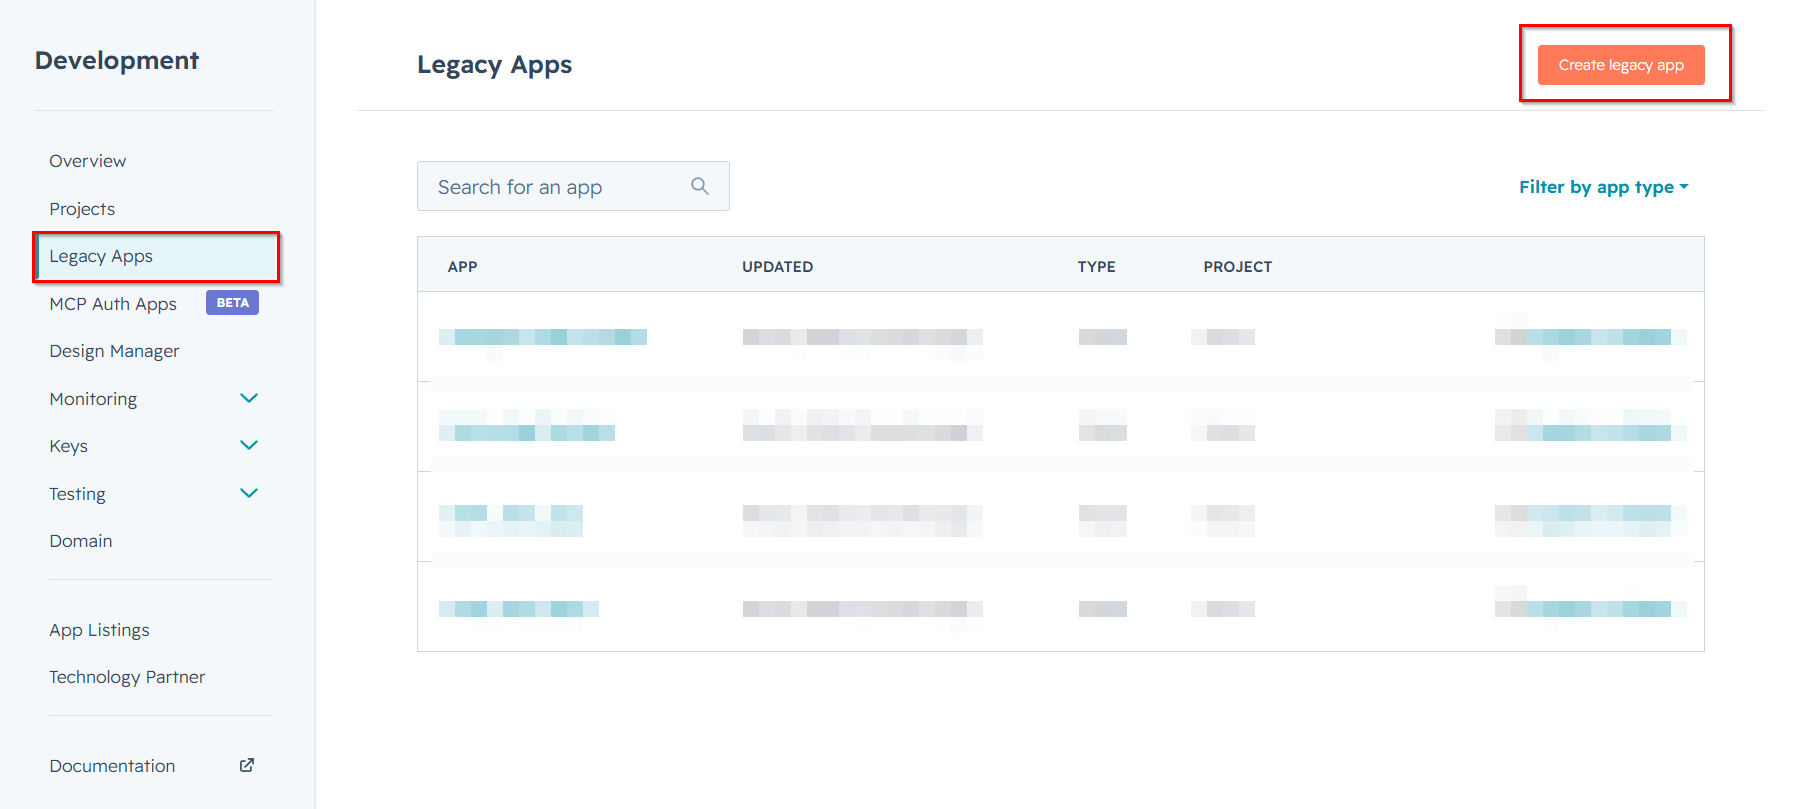
Step 2 - Create a New App
In the Developer Portal, click Apps in the top navigation, then click Create app. Give your app a name and click Create app to confirm.
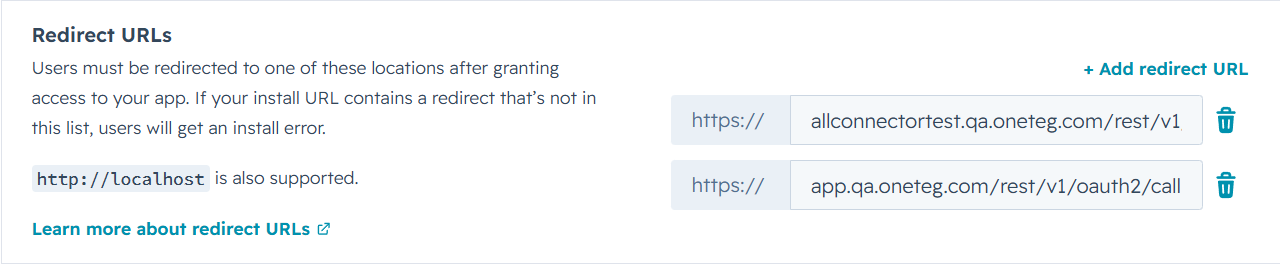
Step 3 - Configure the OAuth Redirect URL
Inside your app, navigate to the Auth tab. Under Redirect URLs, add the OneTeg OAuth callback URL:
https://app.oneteg.com/rest/v1/oauth2/callback
Click Save to apply the redirect URL.
Step 4 - Add the Required Scopes
Still on the Auth tab, scroll to the Scopes section. Add the scopes appropriate for the connector you are configuring:
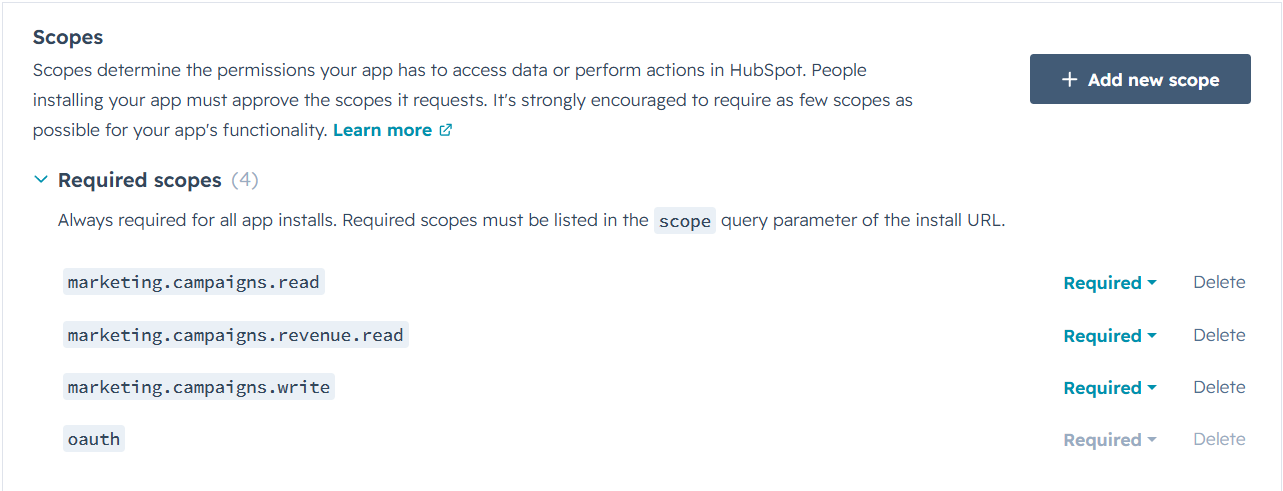
CMS Connector: oauth cms.domains.read
CRM Connector: oauth crm.objects.contacts.read
Marketing Connector: oauth marketing.campaigns.read marketing.campaigns.revenue.read marketing.campaigns.write
Step 5 - Copy the Client ID and Client Secret
After saving, your app's Client ID and Client Secret are displayed at the top of the Auth tab. Copy both values — you will enter them into OneTeg in the next step.
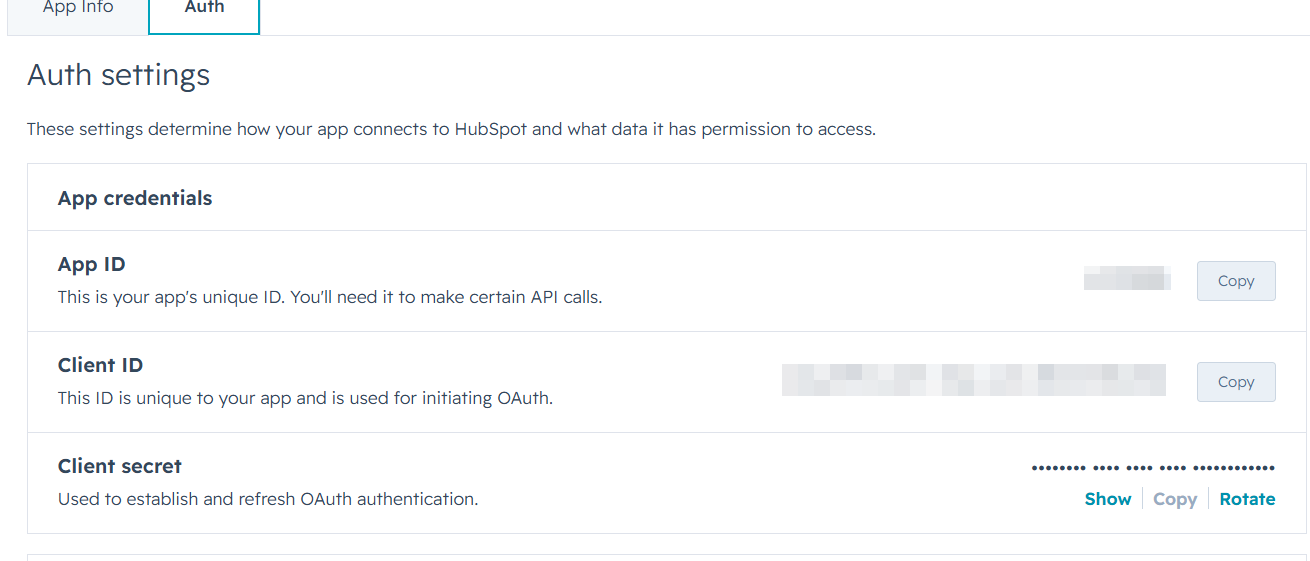
Keep your Client Secret confidential. If it is ever exposed, regenerate it immediately from the HubSpot app Auth tab. You will need to update the Client Secret in OneTeg after regeneration.
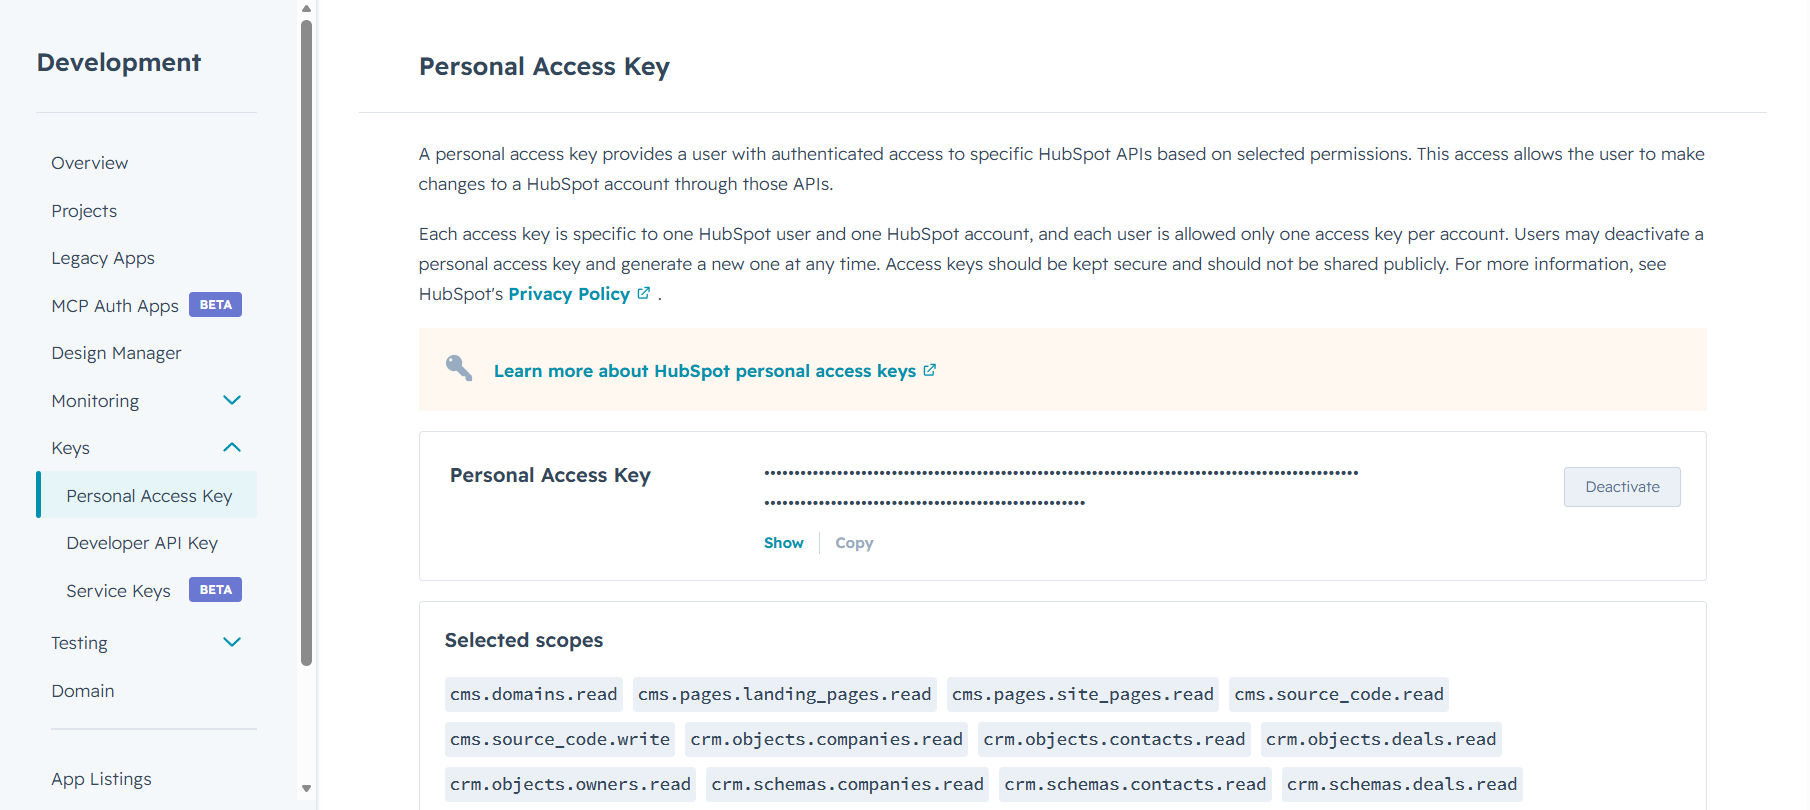
Step 6 (Optional) - Generate a Personal Access Key for Api Key Authentication
If you prefer to use the Api Key authentication method instead of OAuth, you can generate a Personal Access Key directly from the HubSpot Developer Portal — no app setup required.
Navigate to https://developers.hubspot.com , log in, and go to Keys → Personal Access Key.
Select the permissions (scopes) required for your connector, then click Generate personal access key. Copy the key immediately — it will be masked after you navigate away. This is the value you will enter in the Api Key field in OneTeg.
3. Connection Settings and Configuration for OneTeg
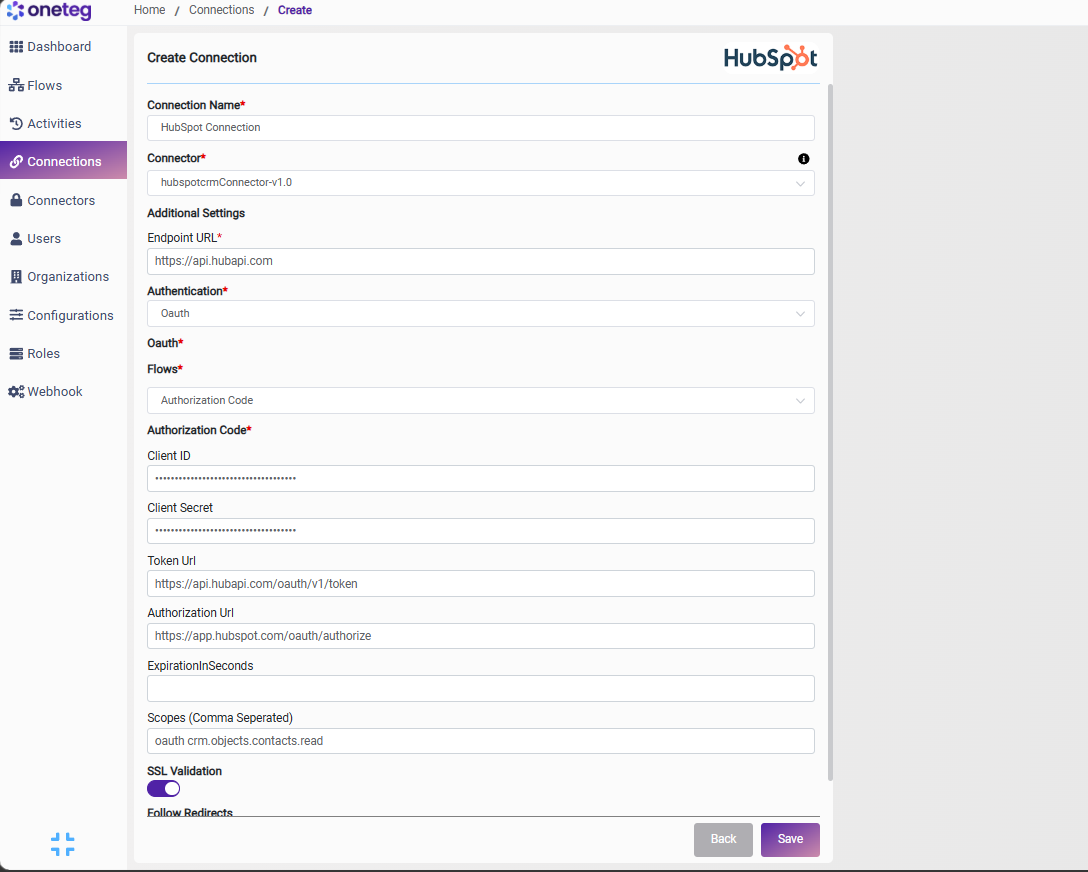
In OneTeg, navigate to Connections and create a new connection using the HubSpot Connector. Select the specific connector that matches your use case (CMS, CRM, or Marketing) and fill in the fields below using the credentials obtained in Section 2.
Option 1 - OAuth Authorization Code (Recommended)
Use this option for production integrations. Requires a HubSpot app (Steps 1–5).
|
Settings Parameters |
Value / Sample Value |
Description |
Required (Y/N) |
|
Connection Name |
HubSpot Connection |
Choose a name for your Connection |
Y |
|
Connector |
hubspotcmsConnector-v1.0 hubspotcrmConnector-v1.0 hubspotmarketingConnector-v1.0 |
Choose the connector based on your HubSpot use case: select the CMS connector for website content management, the CRM connector for contact and deal management, or the Marketing connector for campaign management |
Y |
|
Endpoint URL |
The base URL for the HubSpot REST API. Shared across all three connectors |
Y |
|
|
Authentication |
Oauth |
Select Oauth as the authentication method |
Y |
|
Flows |
Authorization Code |
Select Authorization Code as the OAuth flow |
Y |
|
Client ID |
Your HubSpot App Client ID |
The Client ID from the Auth tab of your HubSpot app in the Developer Portal |
Y |
|
Client Secret |
Your HubSpot App Client Secret |
The Client Secret from the Auth tab of your HubSpot app in the Developer Portal |
Y |
|
Token URL |
The HubSpot OAuth token endpoint used to exchange authorization codes for access tokens |
Y |
|
|
Authorization URL |
The HubSpot OAuth authorization endpoint where users grant access |
Y |
|
|
ExpirationInSeconds |
|
Token expiration time in seconds. |
|
|
Scopes |
CMS: oauth cms.domains.read CRM: oauth crm.objects.contacts.read Marketing: oauth marketing.campaigns.read marketing.campaigns.revenue.read marketing.campaigns.write |
Enter the scopes required for your chosen connector. Scopes differ per connector — refer to the values above that match your selected connector |
Y |
Option 2 - Api Key (Personal Access Key)
Use this option for quick setup or testing. Requires a Personal Access Key from the HubSpot Developer Portal (Step 6).
|
Settings Parameters |
Value / Sample Value |
Description |
Required (Y/N) |
|
Connection Name |
HubSpot Connection |
Choose a name for your Connection |
Y |
|
Connector |
hubspotcmsConnector-v1.0 hubspotcrmConnector-v1.0 hubspotmarketingConnector-v1.0 |
Choose the connector based on your HubSpot use case: select the CMS connector for website content management, the CRM connector for contact and deal management, or the Marketing connector for campaign management |
Y |
|
Endpoint URL |
The base URL for the HubSpot REST API. Shared across all three connectors |
Y |
|
|
Authentication |
Apikey |
Select Apikey as the authentication method |
Y |
|
Api Key |
Your HubSpot Personal Access Key |
The Personal Access Key generated from the HubSpot Developer Portal under Keys → Personal Access Key (see Step 6). The key inherits the permissions selected during generation |
Y |
4. Supported HubSpot Actions and Options
For the full list of supported endpoints, parameters, and options, see the pages below: