
1. General Information
Agility CMS is a cloud-based headless content management system. Content is organized into content items, lists, pages, and sitemaps within an instance, and delivered through a fast, CDN-backed API. The Content Fetch API provides read access to an instance’s published (live) and preview content.
The OneTeg Agility Connector integrates with the Agility CMS Content Fetch API, enabling users to retrieve content directly from OneTeg automation workflows. This connector authenticates using the Apikeyauthorization method — an Agility API key.
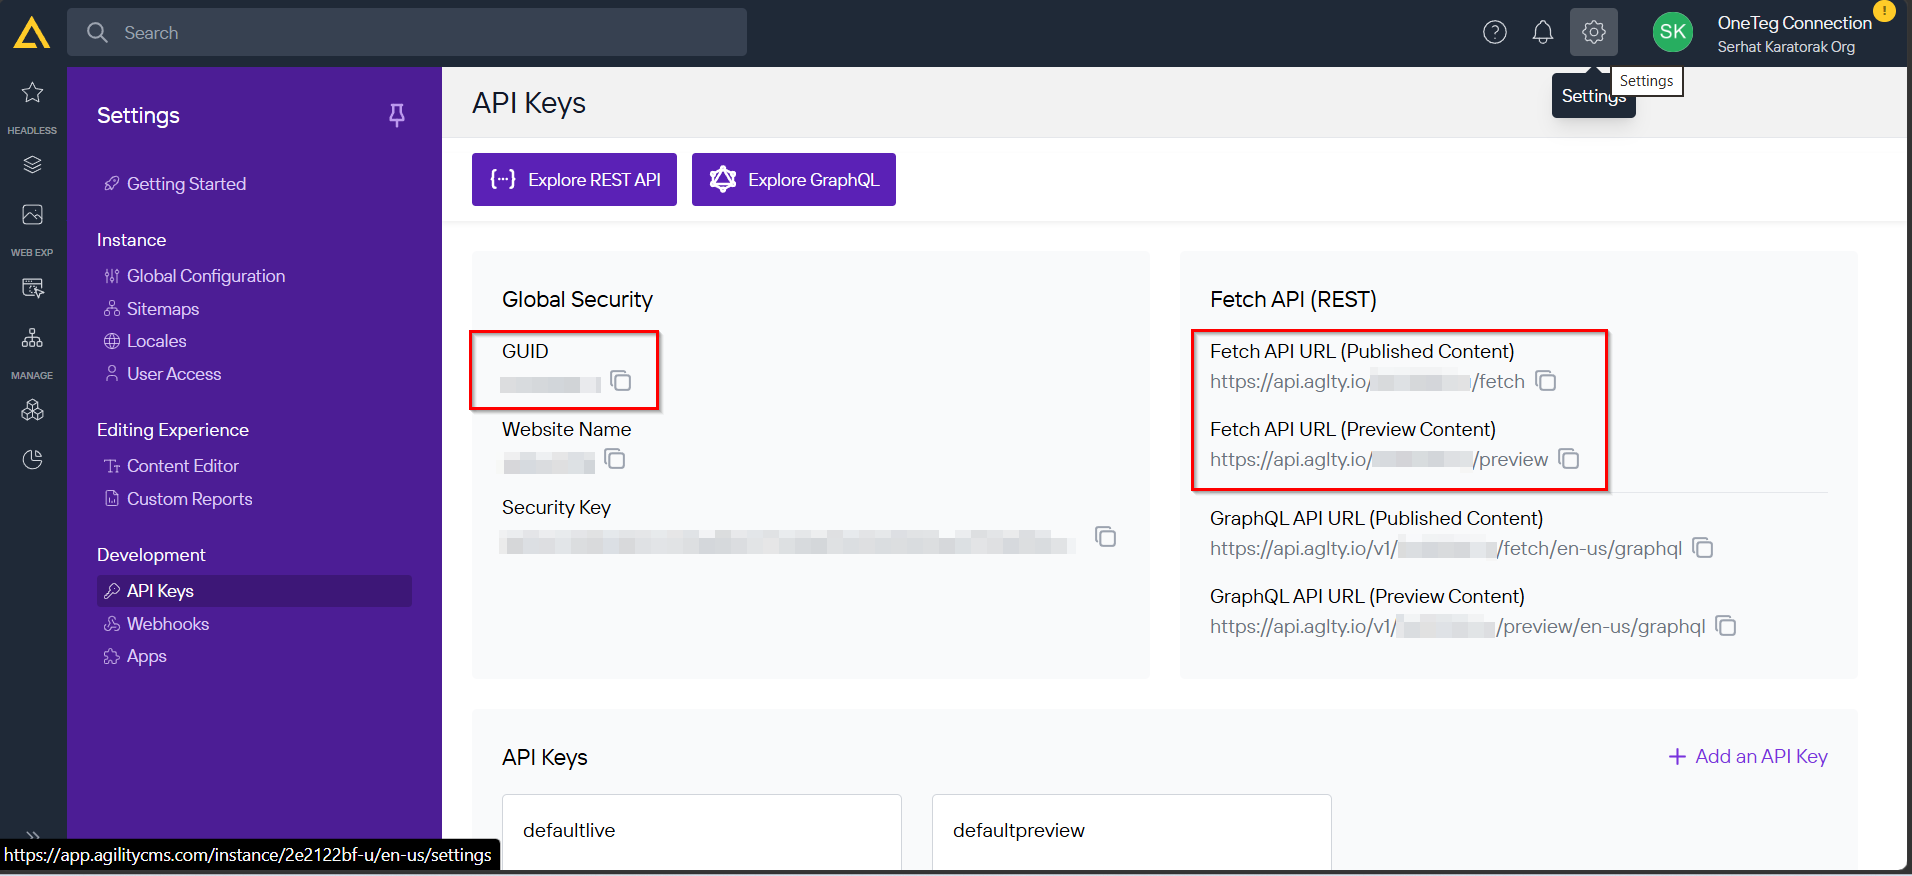
Agility’s Content Fetch API is instance-specific: the Endpoint URL includes your instance GUID and the content mode (fetch for live/published content, or preview for unpublished content). The API key is sent to authenticate requests (Agility expects it in the APIKey header). The GUID and API key are found together in the Agility dashboard under Settings → API Keys.
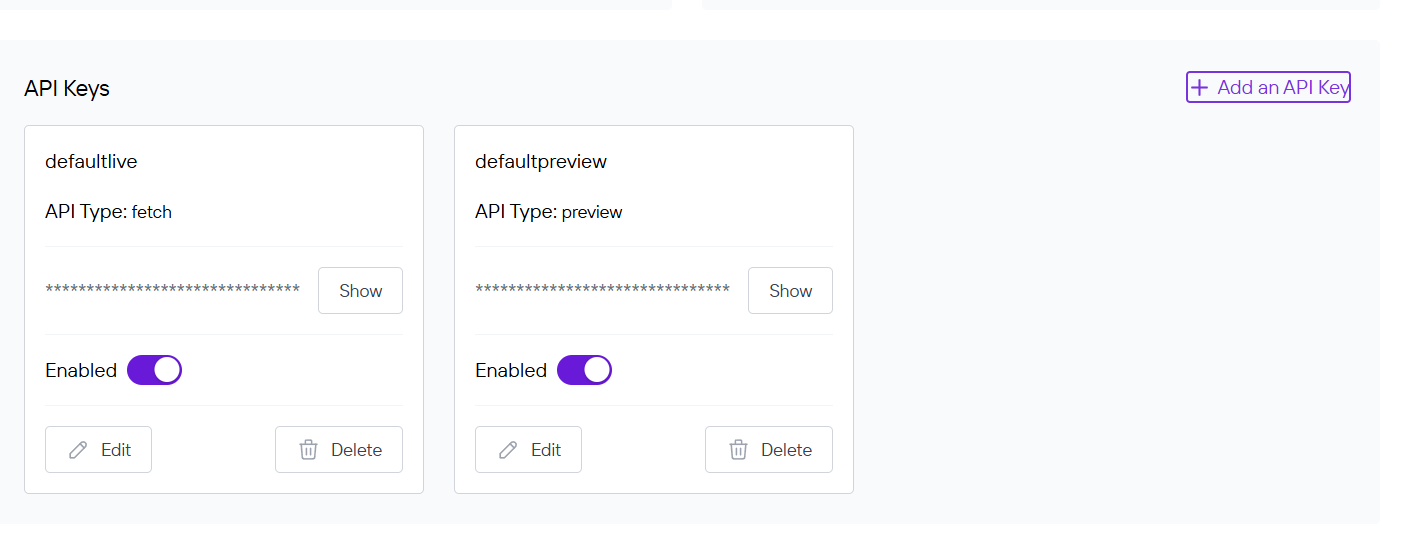
Agility offers different API key types: a Fetch key for live content and a Preview key for preview content. Use the key type that matches the content mode in your Endpoint URL. Keys can optionally be given an expiry in Agility — if you set one, the key will need to be renewed before it expires.
2. Connect Agility to OneTeg
The connector authenticates with an Agility API key, and the Endpoint URL includes your instance GUID. Follow the steps below to gather what you will enter into OneTeg.
Step 1 - Open API Keys in Agility
Sign in to Agility and go to Settings → API Keys. From this page you can view, add, edit, name, set an expiry for, or disable API keys.
Step 2 - Get Your GUID and API Key
Note your instance GUID and copy the appropriate API key — the Fetch key for live content or the Preview key for preview content.
Step 3 - Build Your Endpoint URL
Your Endpoint URL is https://api.aglty.io/{your-guid}/fetch for live content (or https://api.aglty.io/{your-guid}/preview for preview content), replacing {your-guid} with your instance GUID.
3. Connection Settings and Configuration for OneTeg
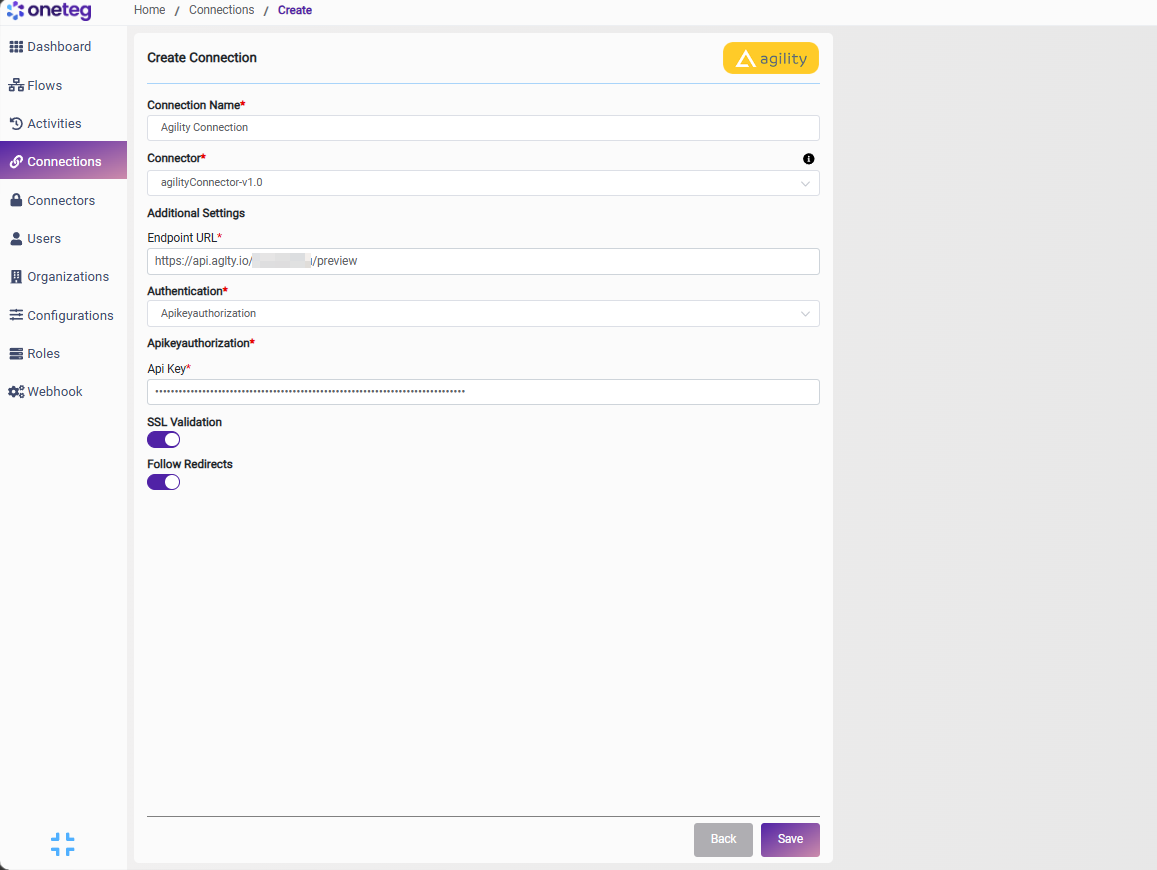
In OneTeg, navigate to Connections and create a new connection using the Agility Connector. Enter the settings below.
|
Settings Parameters |
Value / Sample Value |
Description |
Required (Y/N) |
|
Connection Name |
Agility Connection |
Choose a name for your Connection |
Y |
|
Connector |
agilityConnector-v1.0 |
Auto-populated once the Agility Connector is selected |
Y |
|
Endpoint URL |
The base URL of the Agility Content Fetch API, where {your-guid} is your instance GUID. Use fetch for live content or preview for preview content |
Y |
|
|
Authentication |
Apikeyauthorization |
Select Apikeyauthorization as the authentication method |
Y |
|
Api Key |
Your Agility API key |
Your Agility CMS API key (the Fetch key for live content, or the Preview key for preview), from Settings → API Keys |
Y |
4. Supported Agility Actions and Options
For the full list of supported endpoints, parameters, and options, see the page below: