1. General Information
Iconik is a cloud-native media asset management (MAM) platform by Backlight, designed for modern media workflows. It provides a centralized, browser-based environment for storing, organizing, searching, and collaborating on video, audio, image, and document assets at scale. iconik supports multi-cloud storage architectures and offers granular access control, metadata management, version tracking, and a powerful REST API — making it a popular choice for media companies, broadcasters, agencies, and enterprises managing large-scale content libraries.
The OneTeg Iconik Connector integrates with the iconik REST API and enables users to build automated workflows for managing assets, metadata, collections, and related objects directly from the OneTeg flow builder.
The Iconik API Key inherits the permissions of the user it is generated for. For production integrations, it is recommended to generate the API Key from a dedicated integration user account with the minimum permissions required for your OneTeg workflows.
2. Connect Iconik to OneTeg
Before configuring the connector in OneTeg, you need to generate an API Key from your iconik account. Follow the steps below:
Step 1 - Log in to iconik
Navigate to your Iconik instance at https://app.iconik.io and log in with your administrator credentials.
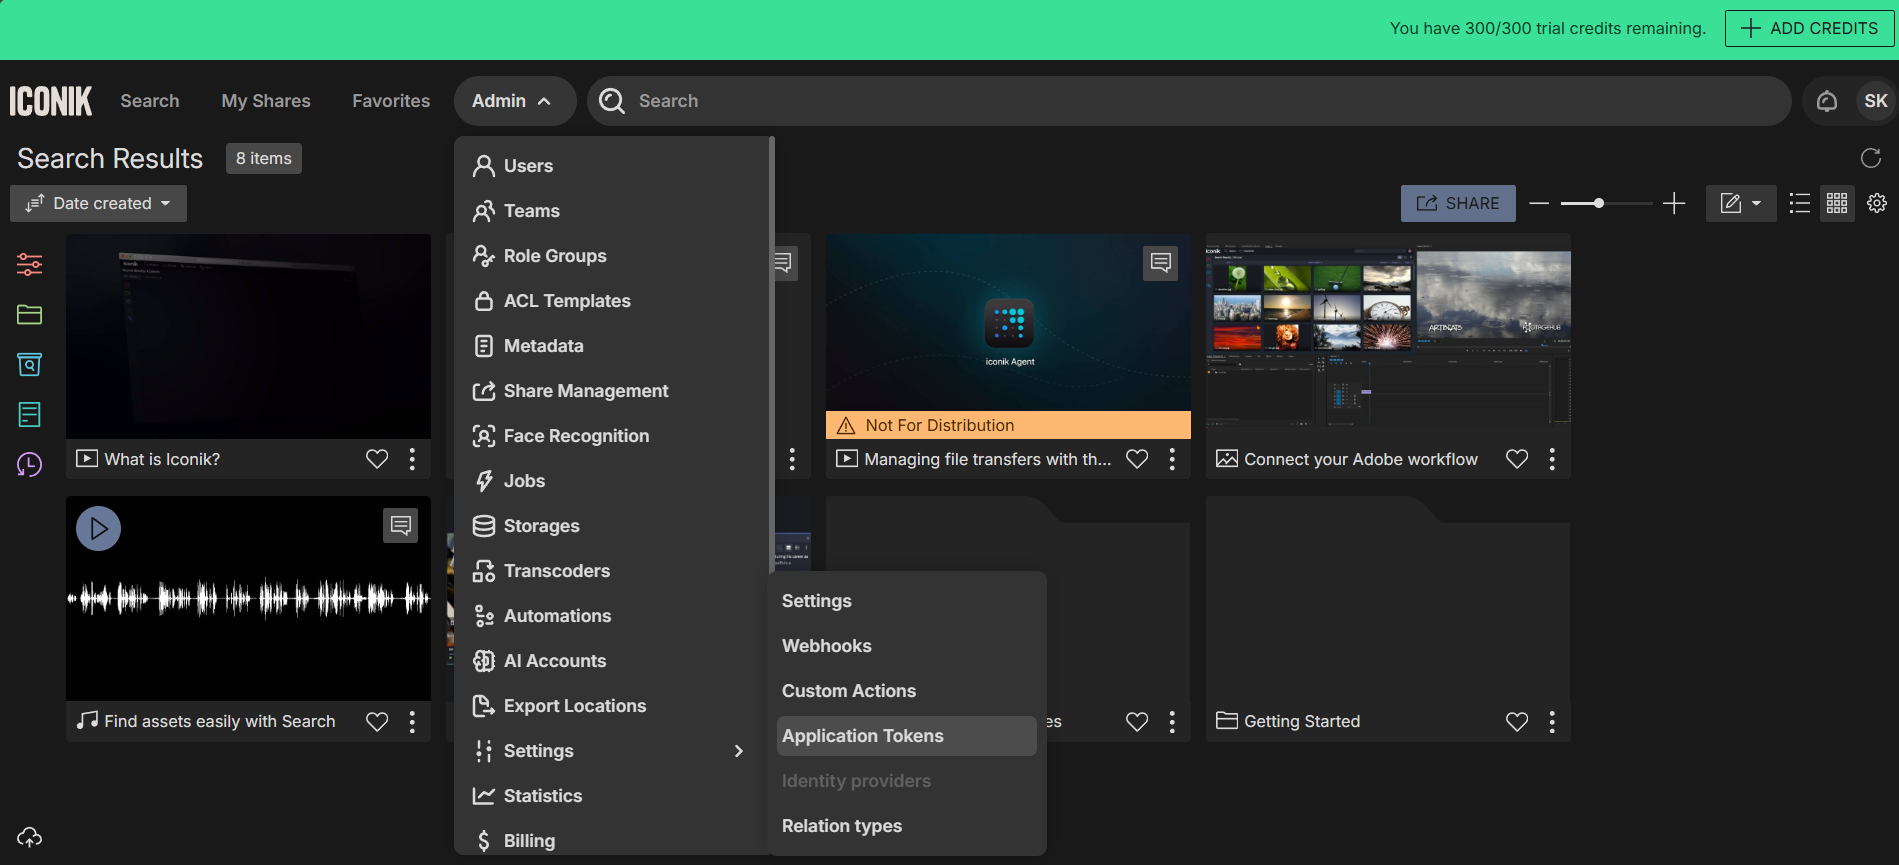
Step 2 - Navigate to Admin → Settings →Application Tokens
Once logged in, click your user avatar or the main menu in the upper-right corner and select Admin. In the Admin panel, navigate to the API Keys section.
Step 3 - Create a New API Key
Click Create New. Provide a descriptive name, for example, "Iconik Connector" Select the user and click Save or Create.

Step 4 - Copy the API Key
After the key is created, Iconik will display the API Key value. Copy this value. Store it securely; you will enter it into OneTeg in the next step.
Iconik API Keys do not expire by default, but they can be revoked at any time from the Admin → API Keys panel. Treat the key as a secret credential and avoid sharing it unnecessarily.
3. Connection Settings and Configuration for OneTeg
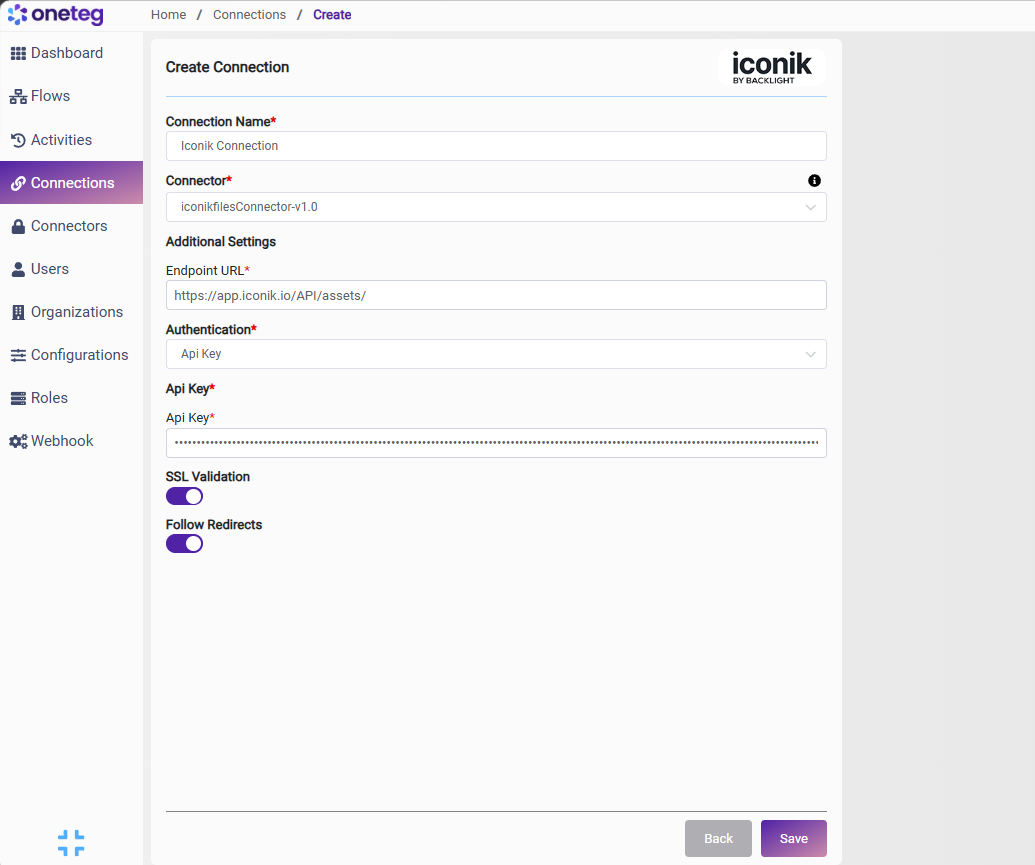
In OneTeg, navigate to Connections and create a new connection using the Iconik Connector. Fill in the settings below using the API Key generated from the iconik Admin panel.
|
Settings Parameters |
Value / Sample Value |
Description |
Required (Y/N) |
|
Connection Name |
Iconik Connection |
Choose a name for your Connection |
Y |
|
Connector |
iconikfilesConnector-v1.0 |
Auto-populated once the iconik Connector is selected |
Y |
|
Endpoint URL |
The base URL of the iconik REST API |
Y |
|
|
Authentication |
Api Key |
Select Api Key from the dropdown |
Y |
|
Api Key |
Iconik API Key |
Generated from the iconik Admin panel: Admin → API Keys → Create API Key. The key inherits the permissions of the selected user |
Y |
4. Supported Iconik Actions and Options
For the full list of supported endpoints, parameters, and options, see the page below: