1. General Information
NetX is a cloud-based Digital Asset Management (DAM) platform designed for creative teams and organizations managing large volumes of digital media. It provides a centralized repository for storing, organizing, searching, and distributing digital assets — including images, videos, documents, and creative files — with advanced metadata management, versioning, and workflow capabilities.
The OneTeg NetX Connector integrates with the NetX API and enables users to build automated workflows for managing assets, collections, folders, and metadata directly from the OneTeg flow builder.
2. Connect NetX to OneTeg
The NetX Connector supports two authentication methods — API Key and OAuth 2.0 Authorization Code. The API Key method is the simpler option and suitable for most integrations. The OAuth method provides user-delegated access and is recommended when your flows need to act on behalf of a specific NetX user.
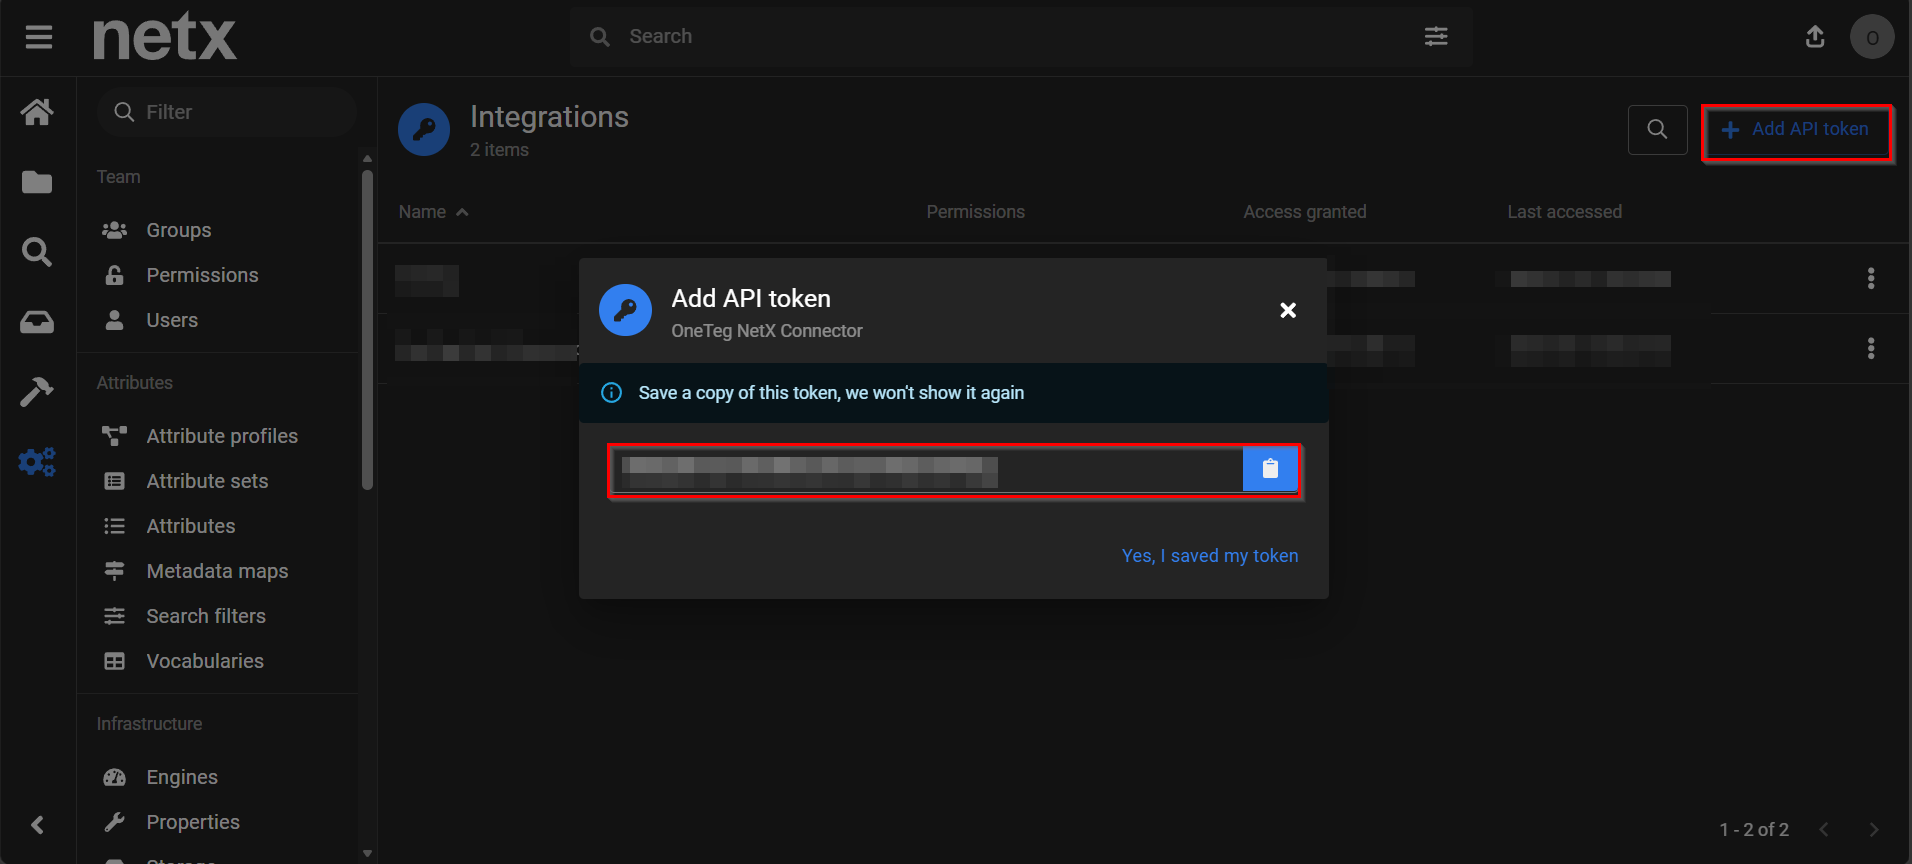
Step 1 - Obtain Your NetX API Key
Log in to your NetX instance. Click your profile avatar in the top right corner and select Integrations from the menu. Click + Add API token. Enter a name for the token (e.g., "OneTeg") and confirm. The generated token will be displayed — copy it immediately and store it securely. This is the value you will enter in the API Key field in OneTeg.
Step 2 - Register an OAuth Application (for OAuth auth only)
OAuth 2.0 app registration (Client ID and Client Secret) in NetX is not self-service and requires contacting NetX support or your NetX administrator. Provide them with the OneTeg OAuth callback URL: https://app.oneteg.com/rest/v1/oauth2/callback. Once the OAuth application is registered, your NetX administrator will provide you with a Client ID and Client Secret to use in the OneTeg connection form.
Skip Step 2 if you are using API Key authentication — it is only required for the OAuth / Authorization Code flow. For most integrations, the API Key method from Step 1 is sufficient and simpler to set up.
3. Connection Settings and Configuration for OneTeg
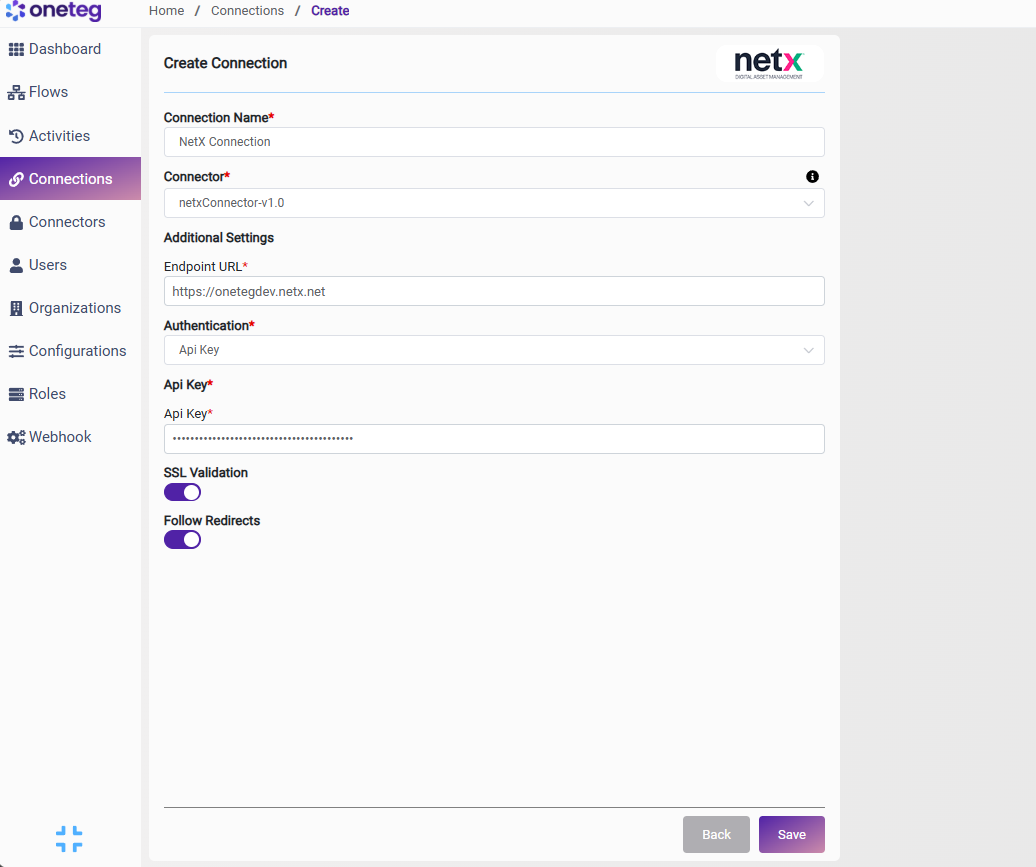
In OneTeg, navigate to Connections and create a new connection using the NetX Connector. The connector supports two authentication methods: API Key and OAuth (Authorization Code). Choose the one that best fits your setup.
Option 1 - API Key Authentication
It authenticates using a static API Key tied to a specific NetX user account. Simple to set up and suitable for automated server-to-server workflows.
|
Settings Parameters |
Value / Sample Value |
Description |
Required (Y/N) |
|
Connection Name |
NetX Connection |
Choose a name for your Connection |
Y |
|
Connector |
netxConnector-v1.0 |
Auto-populated once the NetX Connector is selected |
Y |
|
Endpoint URL |
Base URL of your NetX instance |
Y |
|
|
Authentication |
Api Key |
Select Api Key from the dropdown |
Y |
|
Api Key |
NetX API Key |
Generated from NetX: Admin → Users → your user → API Keys → Generate API Key |
Y |
Option 2 - OAuth Authentication (Authorization Code)
Use this method when your flows need to authenticate on behalf of a specific NetX user via an interactive consent flow. Requires an OAuth application to be registered in NetX Admin first (see Step 2 in Section 2).
|
Settings Parameters |
Value / Sample Value |
Description |
Required (Y/N) |
|
Connection Name |
NetX Connection |
Choose a name for your Connection |
Y |
|
Connector |
netxConnector-v1.0 |
Auto-populated once the NetX Connector is selected |
Y |
|
Endpoint URL |
Base URL of your NetX instance |
Y |
|
|
Authentication |
OAuth |
Select OAuth from the dropdown |
Y |
|
Flows |
Authorization Code |
Select Authorization Code as the OAuth grant type |
Y |
|
Client ID |
NetX OAuth Client ID |
Obtained from NetX: Admin → OAuth Applications → your app → Client ID |
Y |
|
Client Secret |
NetX OAuth Client Secret |
Obtained from NetX: Admin → OAuth Applications → your app → Client Secret. Store securely |
Y |
|
Token URL |
NetX OAuth token endpoint. Constructed by appending /oauth/token to your NetX instance base URL |
Y |
|
|
Authorization URL |
NetX OAuth authorization endpoint. Constructed by appending /oauth/authorize to your NetX instance base URL |
Y |
|
|
Scopes |
|
Leave blank unless your NetX administrator has specified required scopes for your integration |
|
4. Supported NetX Actions and Options
For the full list of supported endpoints, parameters, and options, see the page below: